Creating and managing sites
Create a website on an adopted web server, then manage its domains, certificates, access protection, maintenance mode and PHP version.
The site list
Infrastructure > Sites lists every website on every web server: its domain and name, customer, server, runtime, status, HTTPS check result, days left on its Certificate and Backups schedule. Filter by Runtime, HTTPS check, Maintenance and Managed.
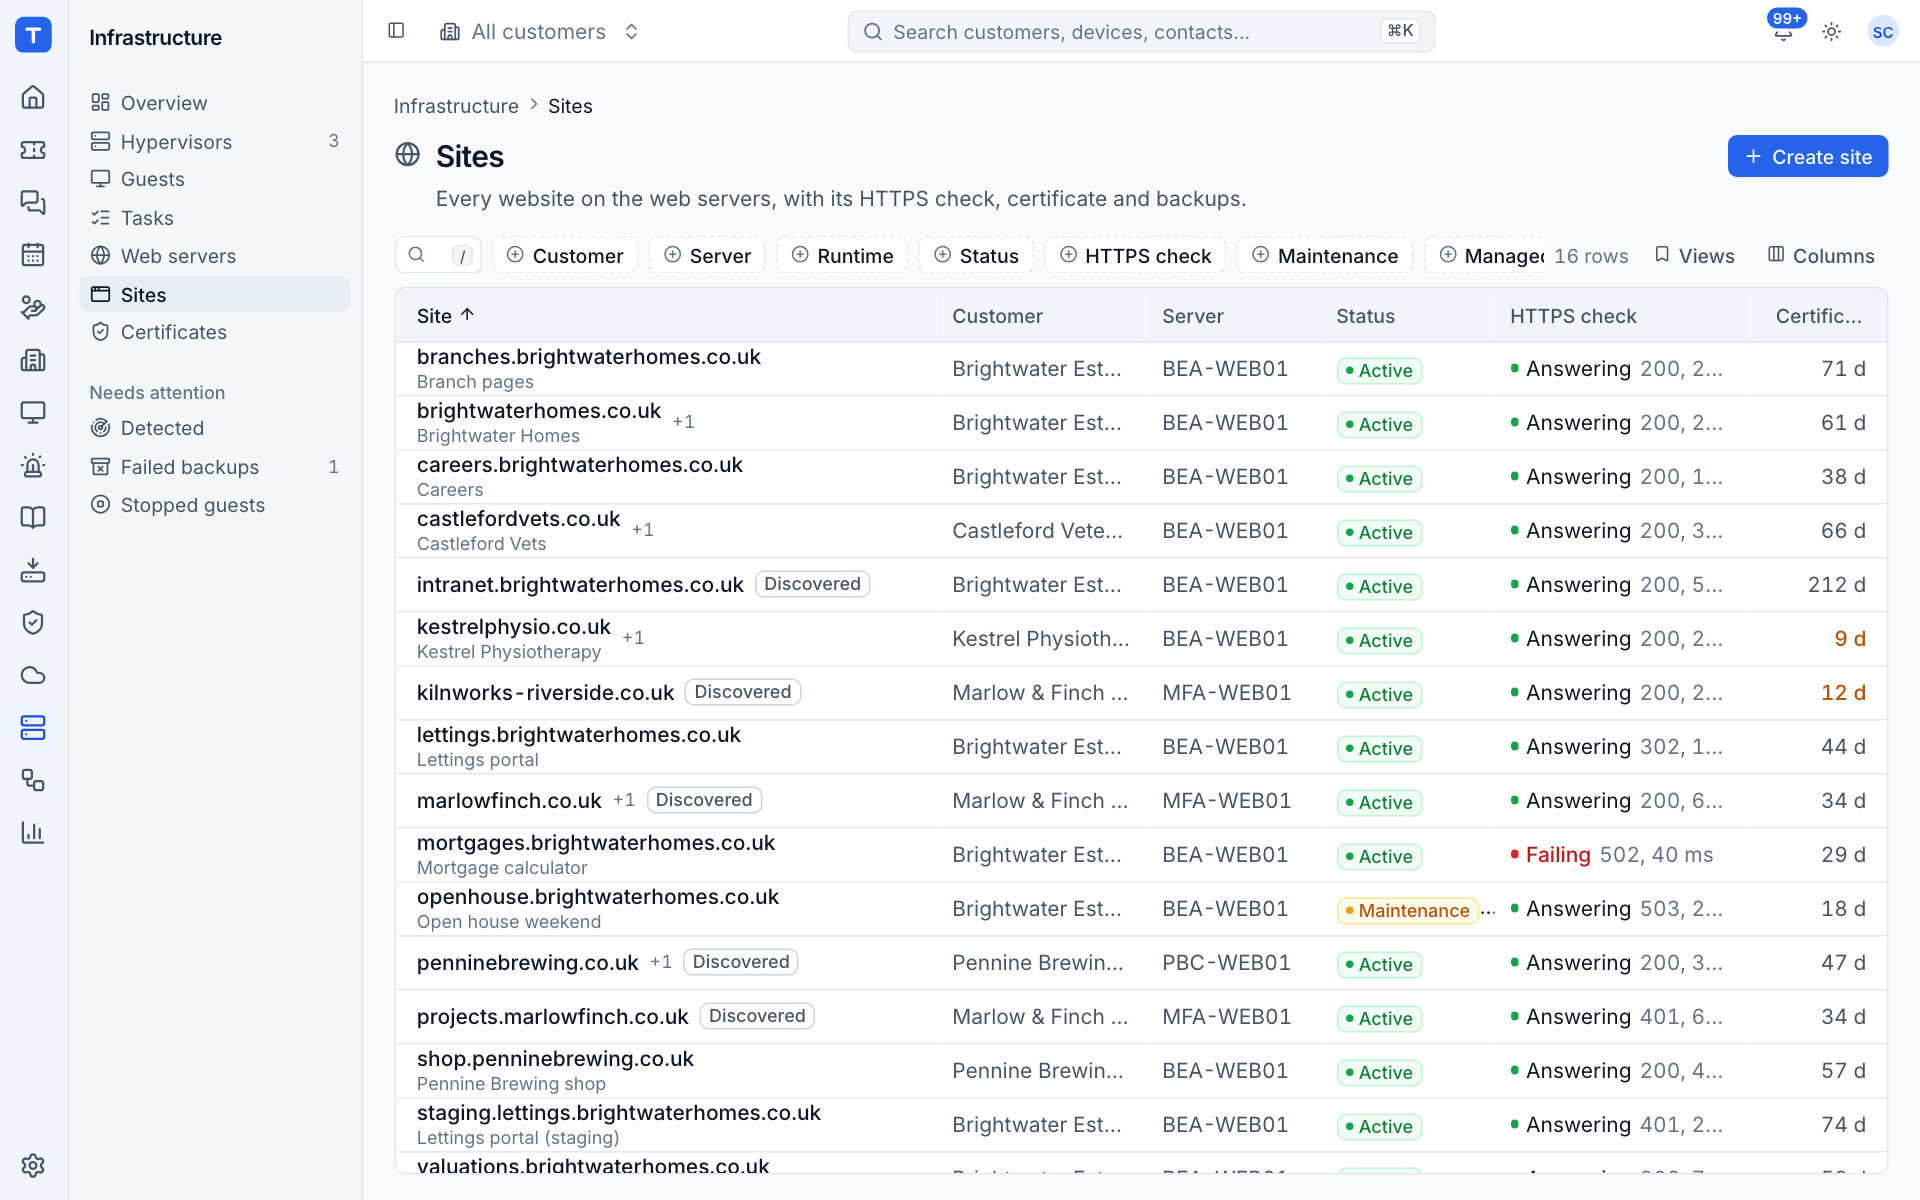
Sites created by Tenvara are managed. Sites that were already in the server's configuration are Discovered: they are checked and shown, but operations are for managed sites only.
A site's status is Active, Maintenance, Failing (its HTTPS check fails), Provisioning while it is being made, or Failed if creating it went wrong.
Creating a site
You need Infrastructure Manage and an adopted nginx server (or an IIS server for static and .NET sites).
-
Press Create site on the site list or on the server's page.
-
Choose the Server.
-
Choose the Customer: whose site it is. A shared server can host several customers' sites.
-
Enter a Name, for example "Kestrel Physio".
-
Enter a Short name in lower case, used for the folder and the Linux user (for example
kestrel-physio). It must start with a letter and be 2 to 30 characters. -
Choose the Runtime:
Runtime What you get Static Files served by nginx PHP A PHP-FPM pool of its own Laravel PHP, serving the publicfolder, with.envandstoragekept across deploysWordPress PHP, with WordPress installed and its own database Node.js A Node.js service behind nginx -
For PHP runtimes choose the PHP version; the server's installed versions are offered. For Node.js give a Node.js version (a major version such as
22or an exact one such as22.9.0; the server installs it if needed) and how it starts. -
Enter the Domains, separated by spaces. The first is the primary. Point their DNS at the server before issuing a certificate.
-
Optionally set a Web root: a folder inside the release to serve, such as
publicordist. -
For WordPress, also give the Site title, Admin user (not admin, administrator or root) and Admin email. The admin password is generated on the server and shown on the site page once.
-
Press Create site.
The server creates a Linux user for the site, its folders, its PHP-FPM pool or Node.js service and an nginx vhost, and tests nginx before reloading it. Anything that fails is rolled back before the reload, so a bad site never takes the others down.
The site page
Each site has a header with its status, Open site, Check (run the HTTPS check now), the server, customer, runtime and last report, and these tabs:
- Overview
- Domains and TLS
- Database
- SFTP
- Deploy
- Backups
- Cron
- Logs
- WordPress (WordPress sites only)
- Operations: everything run on this site
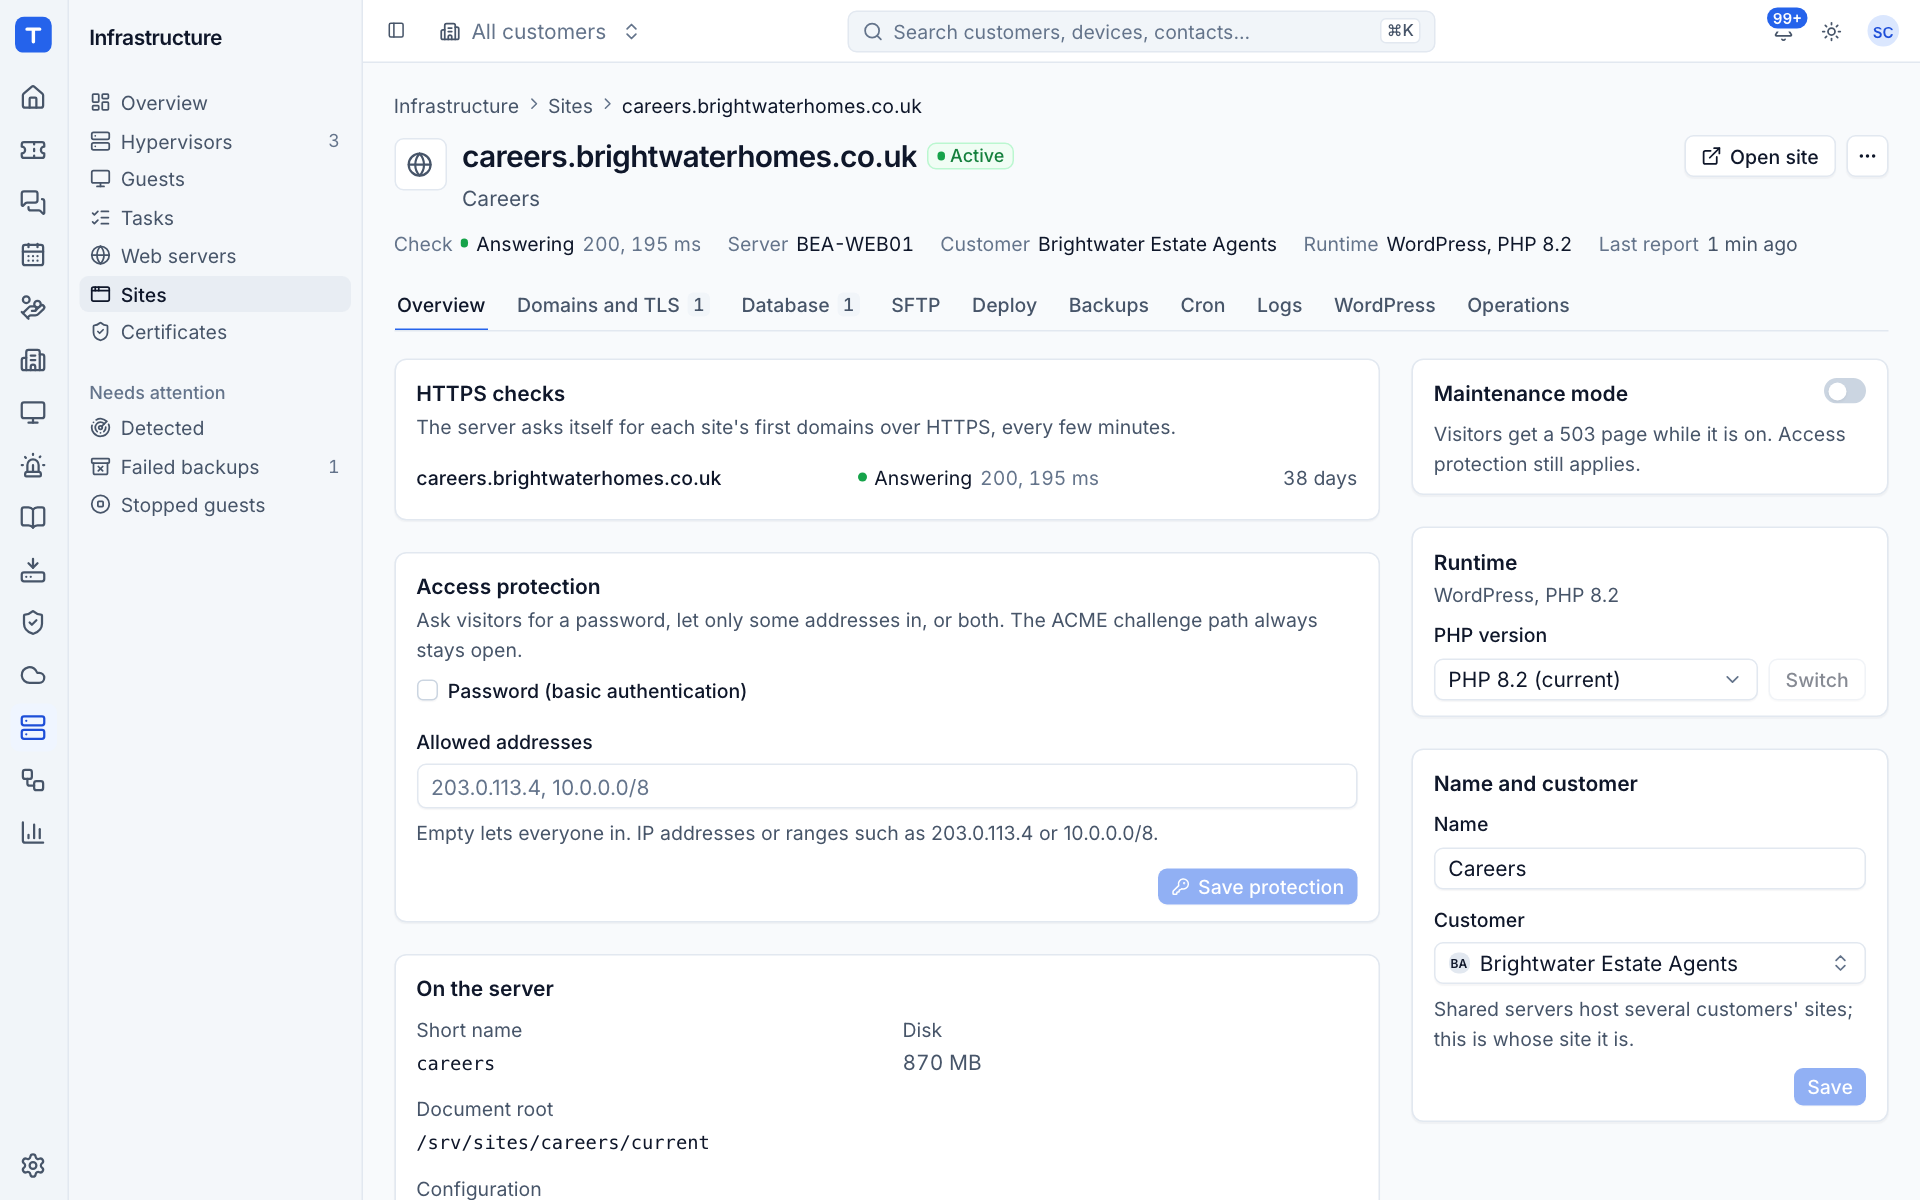
The Overview tab shows the HTTPS checks for each domain, Access protection, On the server (short name, disk used, document root, configuration file, current release and when it was created), Maintenance mode, the PHP version and Name and customer.
Domains and certificates
Open Domains and TLS.
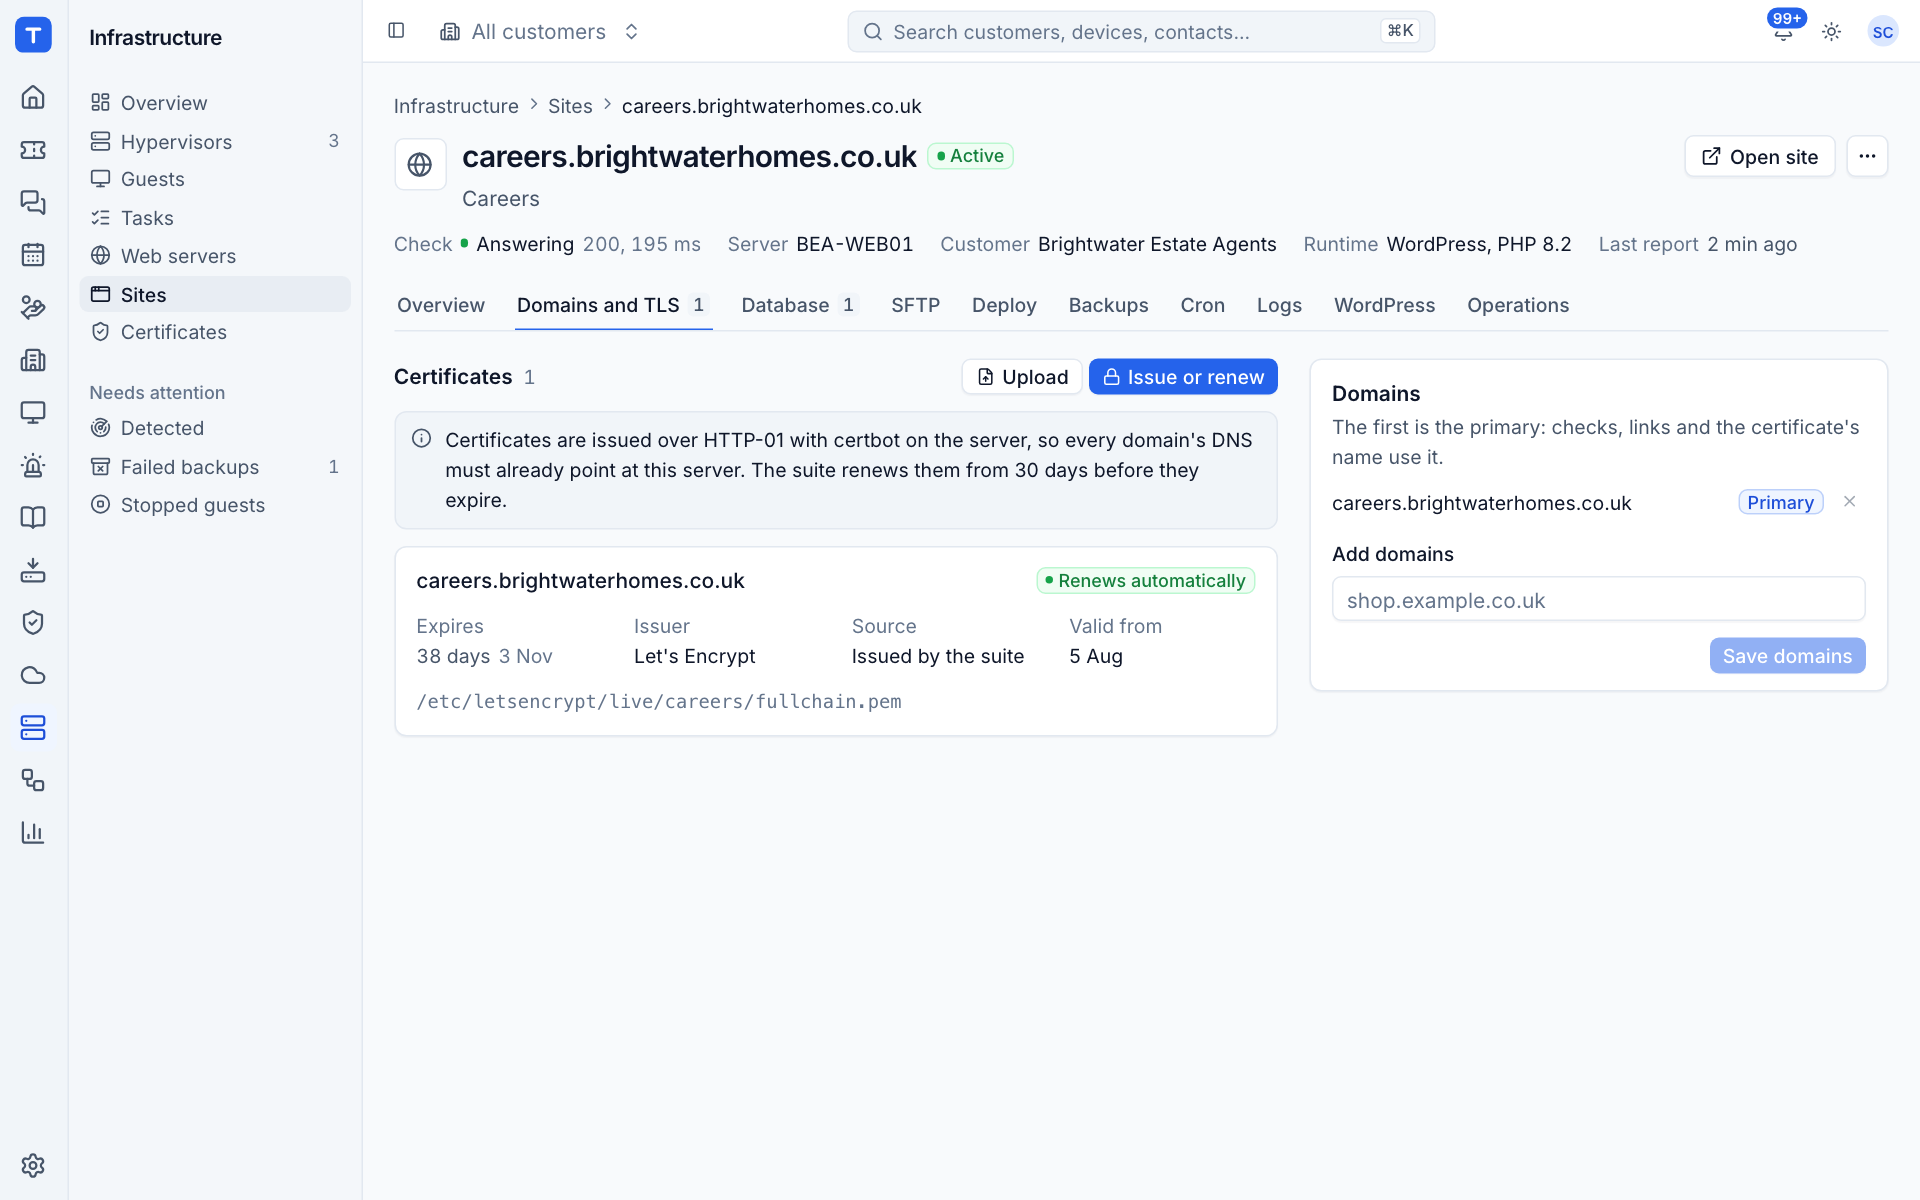
Change domains
- Under Domains, type into Add domains and add them.
- Use the primary button beside a domain to make it the Primary: checks, links and the certificate's name use it.
- Remove domains you no longer need.
- Press Save domains.
Up to 50 domains per site. Wildcards are not accepted. New domains need a certificate that covers them, so issue one once they are saved.
Issue or renew a certificate
Certificates are issued over HTTP-01 with certbot on the server, so every domain's DNS must already point at the server, and the server needs an ACME contact email (set when adopting it).
- Press Issue or renew.
- Tick Renew even if it is not due only when you need it: certificate authorities limit how often the same names can be issued.
- Confirm.
Tenvara renews its own certificates from 30 days before they expire, once a day, and alerts you if a renewal fails. The private key never leaves the server.
Upload a certificate
For a certificate bought elsewhere or issued by your own CA:
- Press Upload.
- Paste the Certificate chain in PEM form (
BEGIN CERTIFICATE), the site's certificate first. - Paste the Private key in PEM form, without a passphrase.
- Upload. The key goes to the server and is removed from Tenvara once installed.
Uploaded certificates are not renewed automatically; you are alerted before they expire.
Access protection
Ask visitors for a password, let only some addresses in, or both. Useful for staging sites and previews. The ACME challenge path always stays open so certificates still renew.
- On Overview, under Access protection, turn on Password (basic authentication) and enter a User name. The password is generated on the server when you save; reveal it once the change has finished.
- Under Allowed addresses, list IP addresses or ranges such as
203.0.113.4or10.0.0.0/8. Empty lets everyone in. - Press Save protection.
Maintenance mode
Turn Maintenance mode on and visitors get a 503 page while it is on. Access protection still applies. Turn it off again from the same place. A site in maintenance still counts as answering its HTTPS check.
Changing the PHP version
- On Overview, under PHP version, choose a version and press Switch.
- Confirm Switch to PHP x.y.
The site gets a new PHP-FPM pool and the vhost points at it; nginx and PHP-FPM are tested before they reload, and the old pool is removed once the new one answers. Check the site afterwards: extensions differ between versions.
Name and customer
Under Name and customer you can rename the site and change whose site it is. Shared servers host several customers' sites, and the customer decides where the site shows on customer pages and reports.
Deleting a site
Administrators can delete a site from More actions on the site page:
- Choose to delete the site.
- Decide on Delete its files too. Otherwise they are kept in a deleted-sites folder on the server. Backups are not touched either way.
- Decide on Drop its databases too.
- Type the domain to confirm, then press Delete site (or Delete site and data).
For a managed site, the vhost, PHP pool or Node.js service, SFTP access, cron entries and its Linux user are removed from the server and the site stops answering. For a discovered site only the record in Tenvara is removed; nothing changes on the server, and the site comes back with the next report if it is still configured there.
Revealed passwords
Passwords for databases, SFTP, basic authentication and WordPress are generated on the server and kept encrypted in Tenvara. Revealing one needs Infrastructure Manage and is written to the activity log.
Was this page helpful?
Thanks for the feedback.