Ticket setup and SLAs
Set up queues, statuses, priorities with their SLA targets, types and business hours, and write the canned responses your team uses.
Settings > Ticket setup holds the lists tickets are sorted with and the rules for SLA clocks. It has five tabs: Queues, Statuses, Priorities and SLAs, Types and Business hours. Each list shows how many tickets use each entry. Drag an entry by its handle, or use the arrows, to change the order: the order here is the order in the pickers on a ticket. The ... menu on each entry edits or removes it.
Queues
A queue is where tickets wait to be picked up, such as Service desk, Projects or Alerts. Each queue gets its own view in the inbox sidebar.
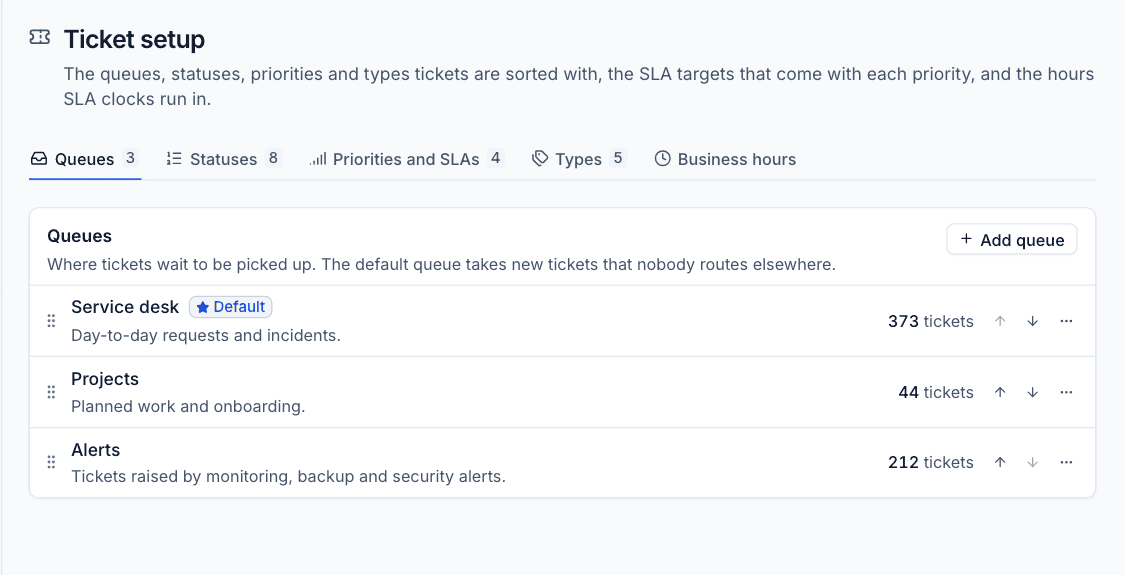
To add one:
- Press Add queue.
- Enter a Name and a Description. The description shows beside the queue when choosing one.
- Turn on Default queue if new tickets should land here unless someone chooses another.
- Press Add queue.
A support mailbox and an alert rule can each send their tickets to a particular queue.
Statuses
Statuses are the steps a ticket goes through. Each has a category, which decides how it counts:
| Category | Means | In the default set |
|---|---|---|
| New | Not looked at yet | New |
| Open | Being worked on | Open, In progress |
| Pending | Waiting on the customer or a third party | Waiting on customer, Waiting on third party, On hold |
| Resolved | Done, the customer can still reply | Resolved |
| Closed | Finished | Closed |
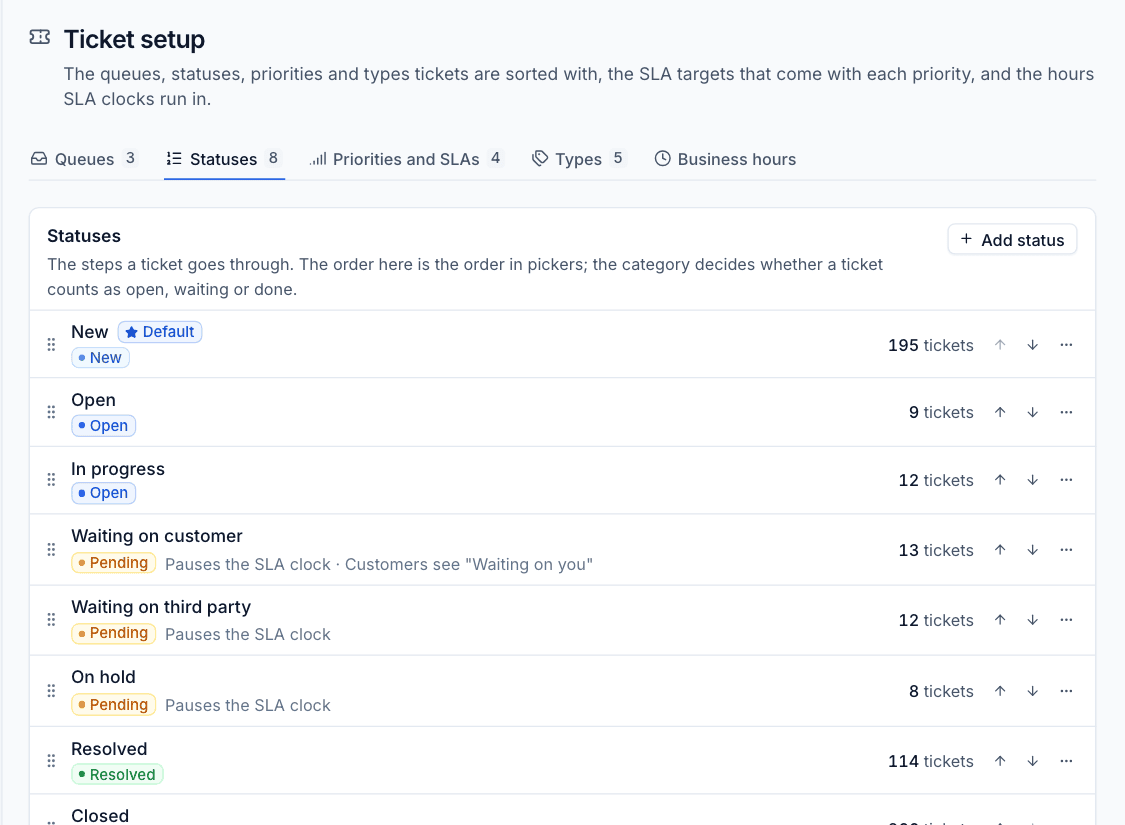
To add a status:
- On the Statuses tab, press Add status.
- Enter a Name and choose the Category.
- Turn on Pause the SLA clock if time in this status should not count towards SLA targets. It is useful for waiting on the customer.
- For a Pending status, turn on Waiting on the customer if that is what it means. The portal then shows it as "Waiting on you" once you have replied, and the Send button offers it as "send and wait". Leave it off for on hold or waiting on a supplier: those read as "Open" to the customer.
- Turn on Default status if new tickets should get it.
- Press Add status.
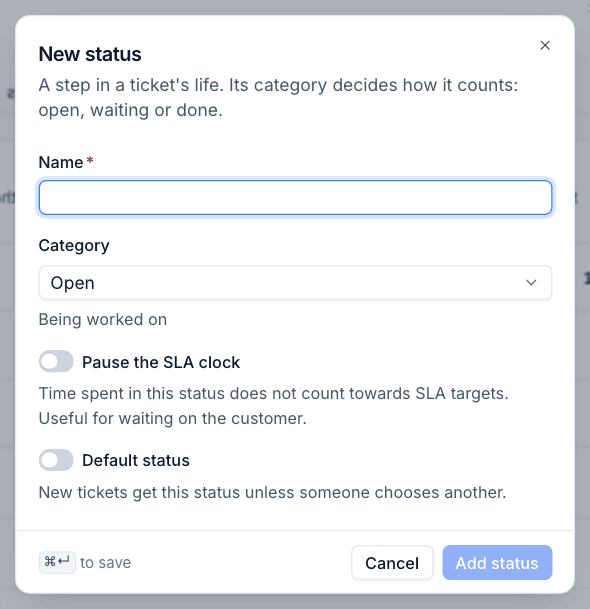
Note: A customer reply reopens any ticket in a pending, resolved or closed status.
Priorities and SLA targets
A priority says how urgent a ticket is and carries its SLA targets: how soon someone should first reply, and how soon it should be fixed. The default set is:
| Priority | Level | Respond within | Resolve within |
|---|---|---|---|
| Critical | 1 | 30 min | 4 h |
| High | 2 | 1 h | 8 h |
| Medium (default) | 3 | 2 h | 16 h |
| Low | 4 | 4 h | 32 h |
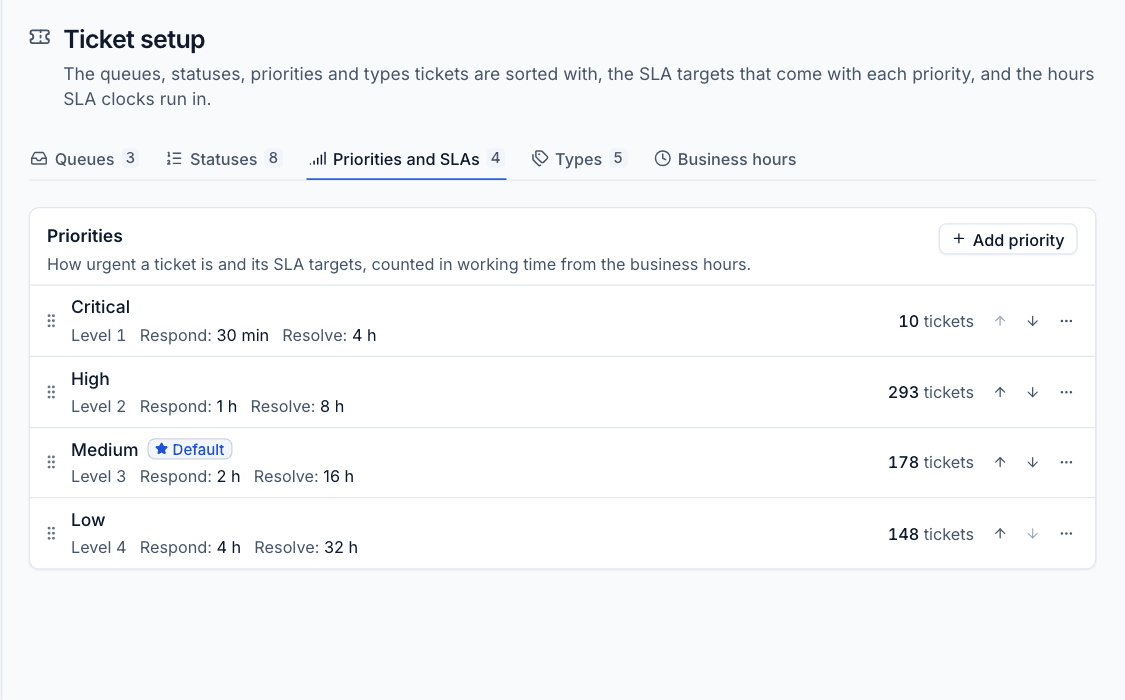
To add or change one:
- On the Priorities and SLAs tab, press Add priority (or Edit in an entry's ... menu).
- Enter a Name.
- Choose the Level, from 1 (most urgent) to 9 (least urgent). The inbox sorts by it.
- Set First response within and Resolve within, each in Minutes, Hours or Working days. Leave either blank for no target.
- Turn on Default priority if new tickets should get it.
- Press Add priority.
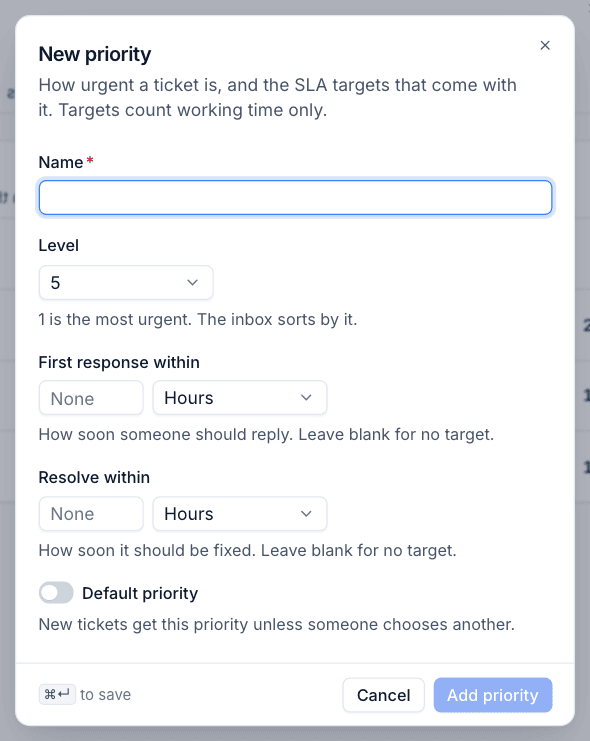
How the SLA clock works
- Targets count working time only, in the business hours below. A 4 hour target on a ticket opened at 16:00 on a Friday, with hours of 09:00 to 17:30, is due at 11:30 on Monday.
- Time spent in a status that pauses the SLA clock does not count.
- The response target is met by the first public reply from your team. Internal notes do not count.
- The resolution target is met when the ticket reaches a resolved or closed status.
- When a target is missed, the assignee is told once, in the notification bell.
On each ticket the SLA section of the details panel shows both targets: when they are due, met or missed and by how much. The inbox has SLA breached and SLA at risk views, and the SLA filter picks tickets that are Breached, At risk, On track, Paused, Met or have No SLA.
Types
Types say what kind of work a ticket is, for reporting and routing. The default set is Incident (the default), Service request, Problem, Change and Alert. Add more with Add type on the Types tab.
Business hours
- Open the Business hours tab.
- Choose the Time zone. The hours are in this time zone, wherever the team is.
- Turn each day on or off, and set its start and end time. Copy to weekdays copies a day's hours to Monday to Friday.
- Check the summary underneath, for example "Mon to Fri 09:00 to 17:30. 42 h 30 min a week. A working day in SLA targets is 8 h 30 min."
- Press Save hours.
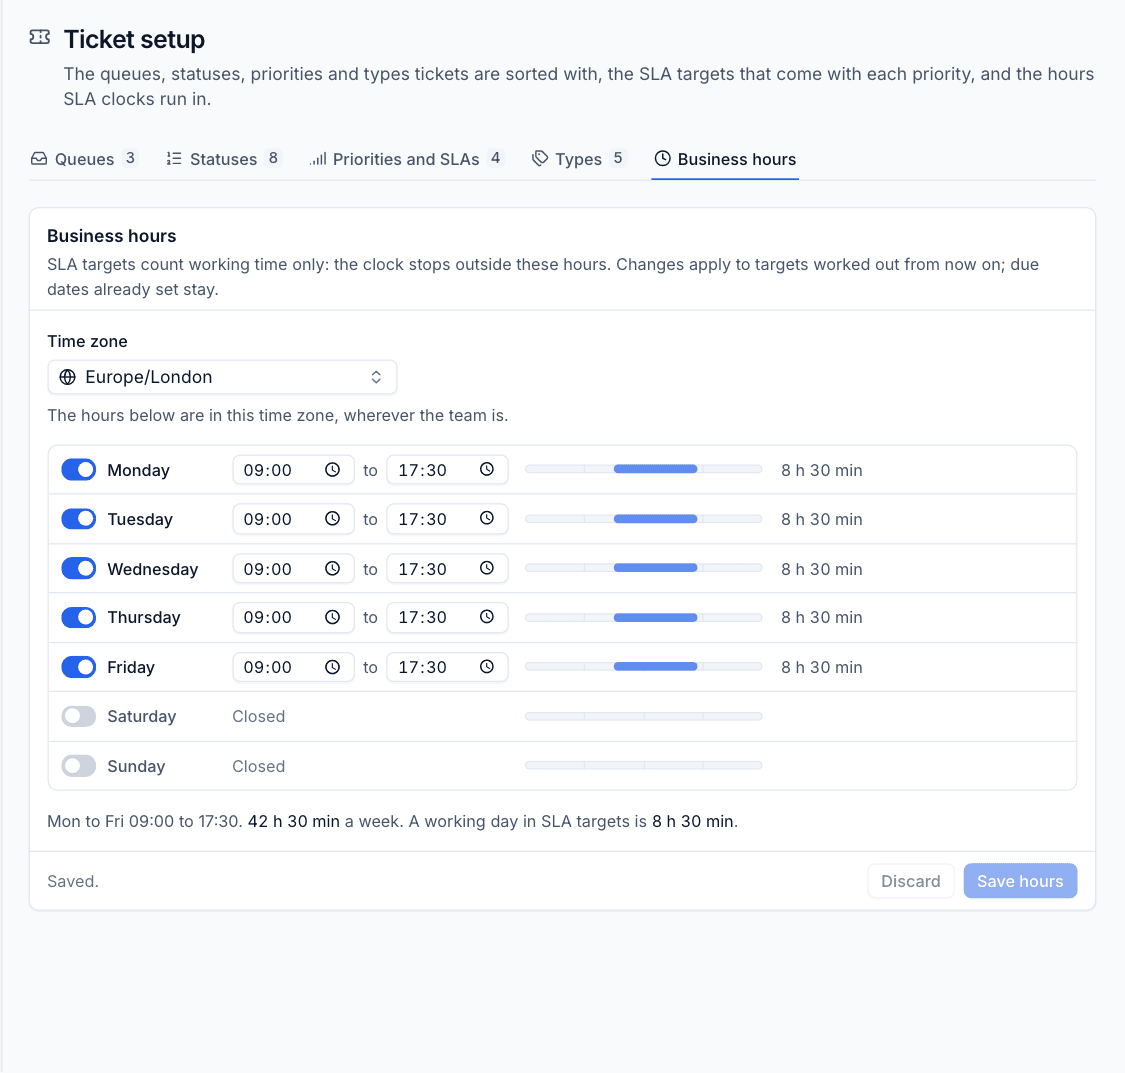
Changes apply to targets worked out from now on. Due dates already set stay as they are.
Tip: The length of a working day matters when a target is set in Working days. With the hours above, 2 working days means 17 hours of working time.
Canned responses
Settings > Canned responses holds replies your team sends often, ready to insert into a ticket with the customer's details filled in. The list shows each response, whether it is Shared or Personal, how often it has been used and when it last changed.
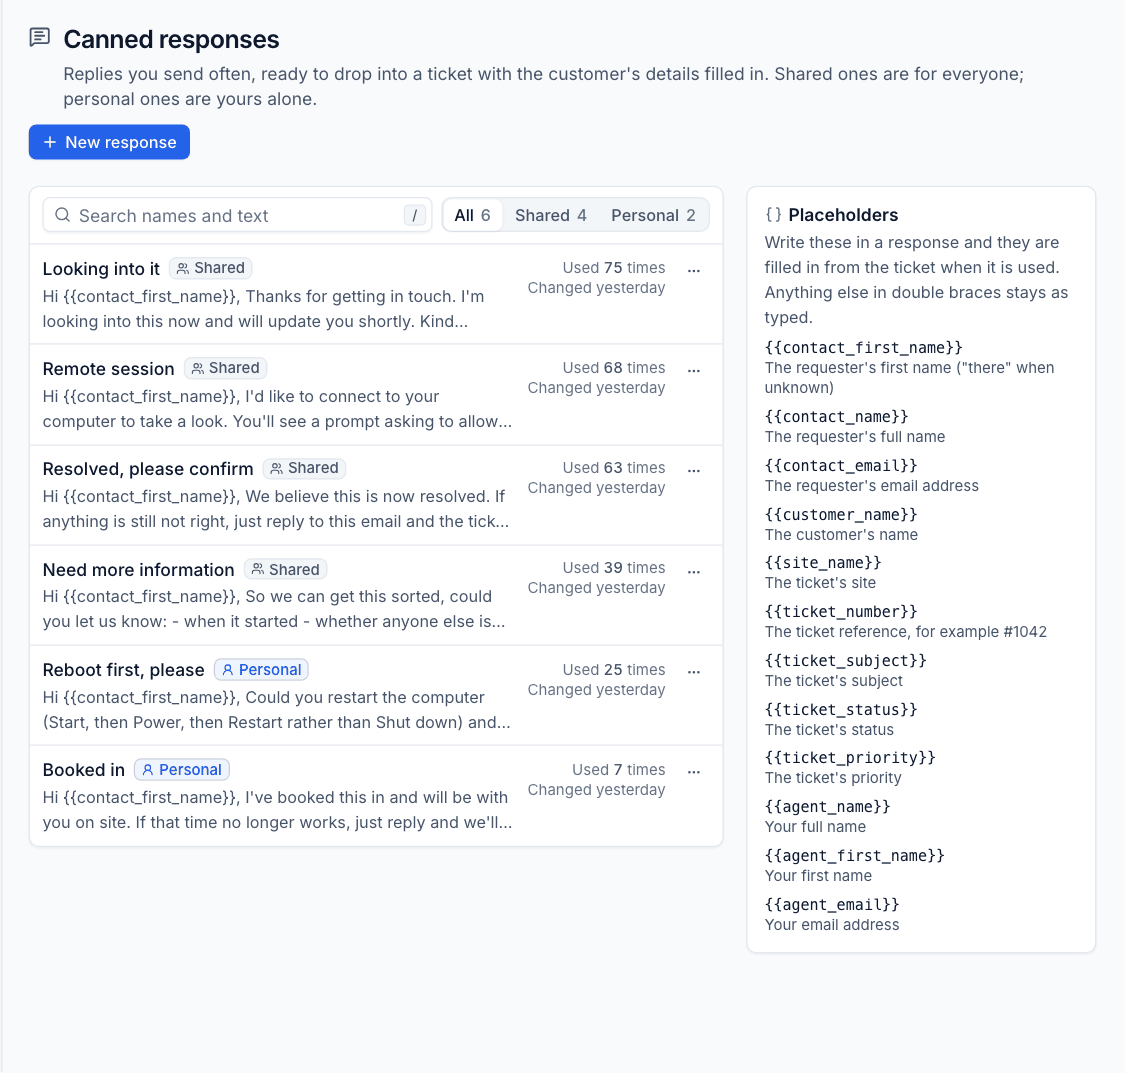
To add one:
- Press New response.
- Enter a Name. It is what you search for when replying, for example "Password reset done".
- Write the Text. Click a placeholder to insert it at the cursor; the Preview shows it with example values.
- Turn on Shared with everyone for the whole team, or leave it off to keep it personal (only you can see and use it).
- Press Save response.
The placeholders are:
| Placeholder | Filled with |
|---|---|
{{contact_first_name}} |
The requester's first name ("there" when unknown) |
{{contact_name}}, {{contact_email}} |
The requester's full name and email address |
{{customer_name}}, {{site_name}} |
The customer and the ticket's site |
{{ticket_number}}, {{ticket_subject}} |
The ticket reference (for example #1042) and subject |
{{ticket_status}}, {{ticket_priority}} |
The ticket's status and priority |
{{agent_name}}, {{agent_first_name}}, {{agent_email}} |
Your name, first name and email address |
Anything else in double braces stays as typed.
Was this page helpful?
Thanks for the feedback.