Working a ticket
Reply to the customer, add internal notes, use canned responses, change status, priority and assignment, link devices, merge duplicates and use the details panel.
Open a ticket from the inbox and it fills the right of the screen. Along the top are its number, how it arrived, and the buttons Timer, Link a device, Merge into another ticket, More actions and Close the ticket. Below the subject sit the pickers for status, priority, assignee, queue and type, and the SLA badge.
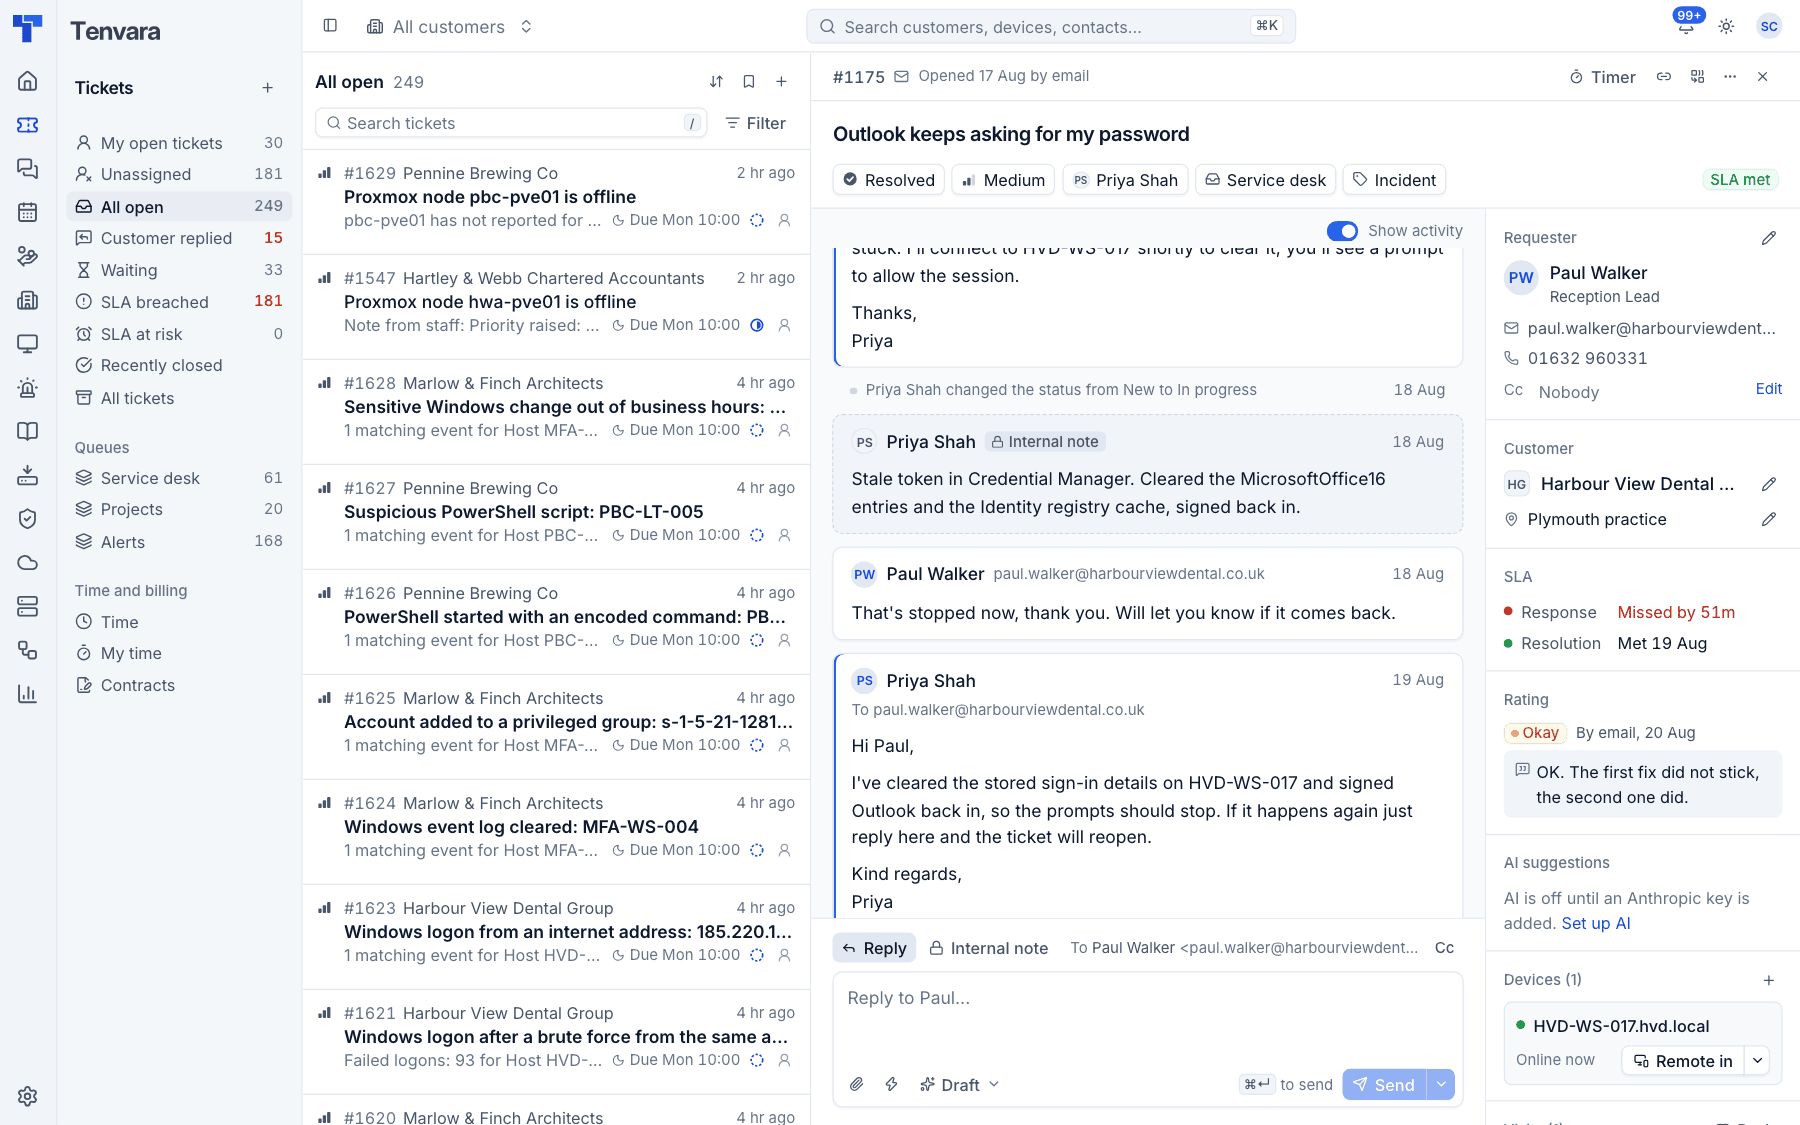
The conversation
The middle column is the conversation, oldest first:
- Replies from your team show who they went To, with a coloured edge.
- Messages from the customer show their name and email address.
- Internal notes have a dashed border and an Internal note badge. Customers never see them.
- Activity (status changes, assignments and so on) shows as small lines between messages. Turn Show activity off to hide it and read only the messages.
Reply to the customer
- Press Reply below the conversation (or press
r). The To line shows who will get it; press Cc to copy others in. - Write your reply. Press the paperclip to attach files, or drop them in.
- Press Send (or
Cmd+Enter).
The reply is emailed to the requester from your support mailbox, with the ticket number in the subject so their answer threads back onto the ticket. Each reply shows whether it was emailed, and a failed one can be sent again.
Send and change the status in one go
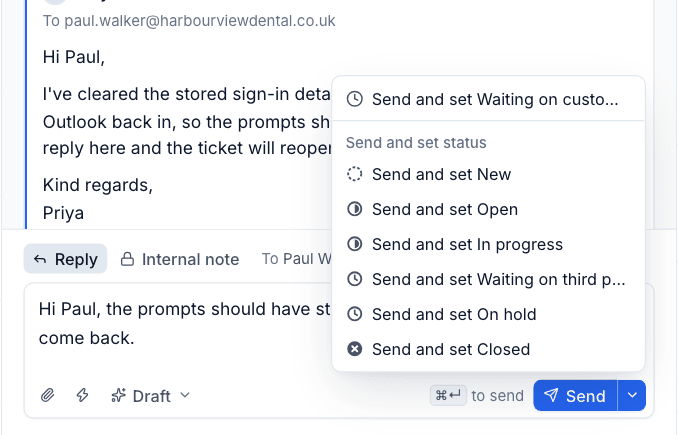
Press the arrow next to Send to send and set the status at the same time:
- Send and set Waiting on customer puts the ticket in the waiting status (the SLA clock pauses, and the portal shows "Waiting on you").
- Under Send and set status, pick any other status, such as Send and set In progress, Send and set On hold or Send and set Closed.
Cmd+Shift+Enter sends and resolves.
Note: Your first public reply is what meets the response SLA. An internal note does not count.
Add an internal note
- Press Internal note (or press
n). The box turns dashed and says "Only your team sees notes. They are never emailed". - Write the note. You can attach files here too.
- Press Add note (or
Cmd+Enter). The arrow next to it can also change the status as you add the note, for example to resolve the ticket.
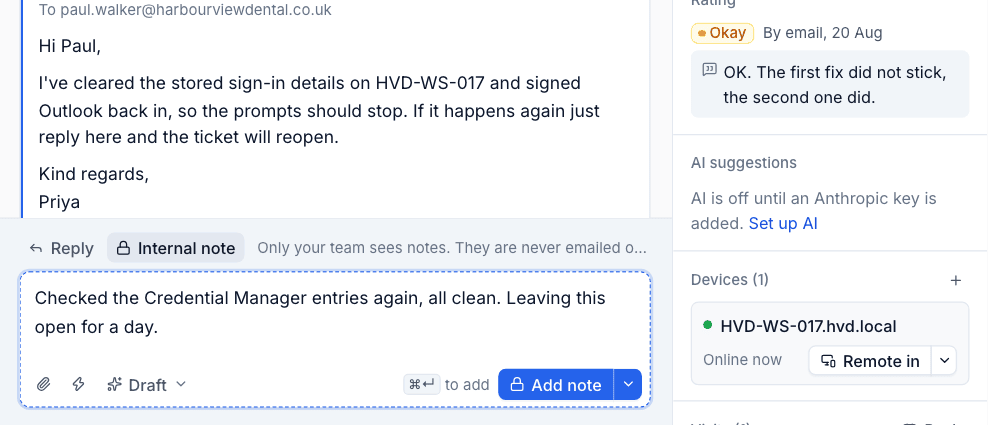
Use notes for what you found and what you tried, so whoever picks the ticket up next does not start from scratch.
Canned responses
Press the lightning button in the reply box (or Cmd+/) to insert a canned response. Start typing to search, then pick one. Shared responses are listed first, then your own under Mine.
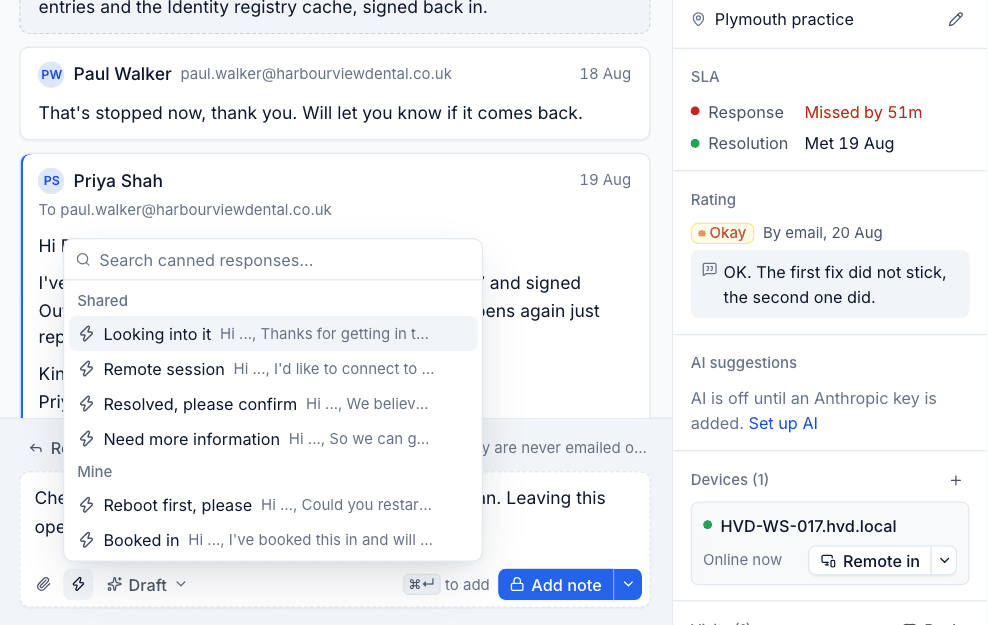
Placeholders such as {{contact_first_name}} and {{agent_first_name}} are filled in from the ticket when the response is inserted. Manage them in Settings > Canned responses (see Ticket setup and SLAs).
Draft in the reply box drafts a reply with AI when AI is set up.
Drafts
Anything you type is kept as a draft for that ticket in your browser. Press Esc or open another ticket and it is still there when you come back.
Status, priority, assignee, queue and type
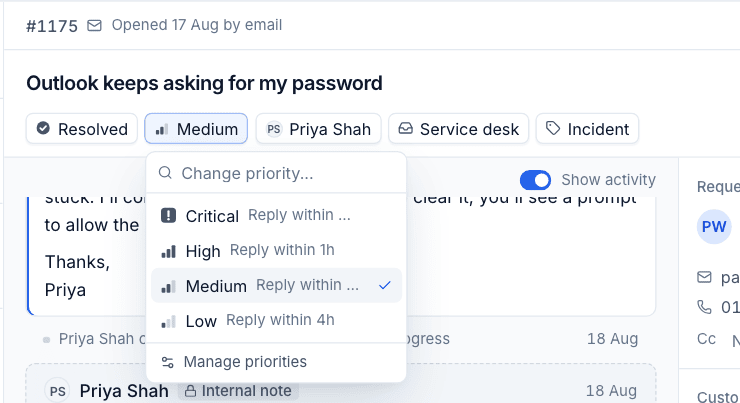
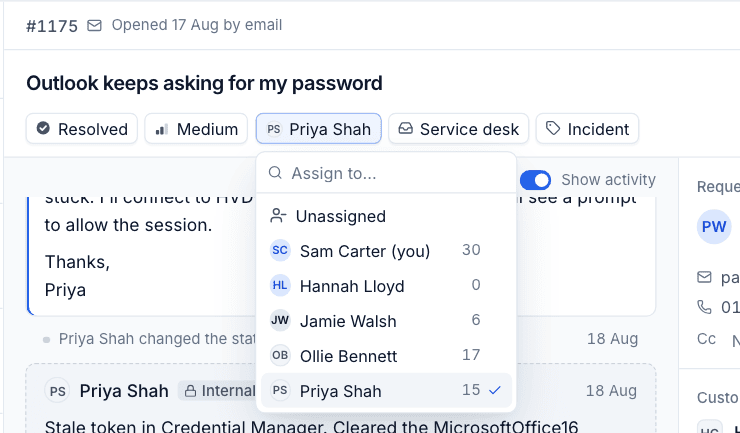
Click the picker under the subject, or use the keyboard: s status, p priority, a assign, i assign to me, q queue and y type. Each picker has a search box, and a link at the bottom to manage the list in settings.
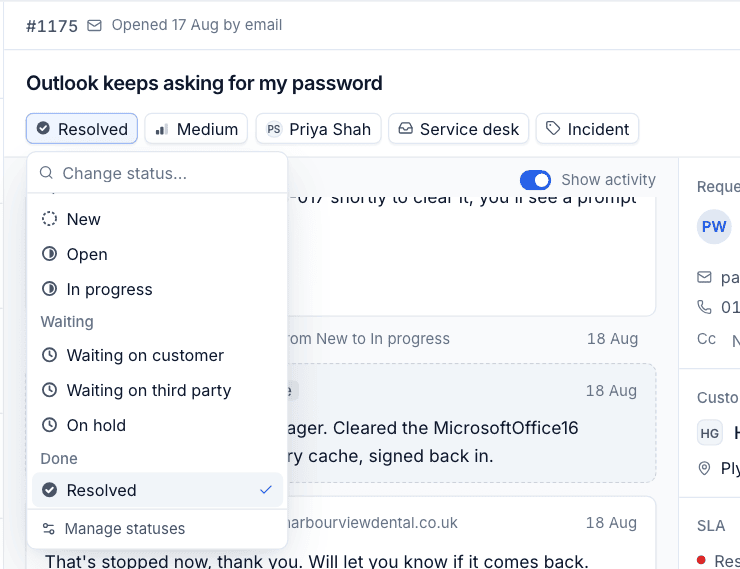
- Status is grouped into open, waiting and done. In the default set, the waiting statuses pause the SLA clock.
- Priority shows the response target next to each one. The priority sets the ticket's SLA targets.
- Assignee shows how many open tickets each person has, so you can spread the load.
When the customer replies to a ticket that is waiting, resolved or closed, it reopens by itself and shows in Customer replied.
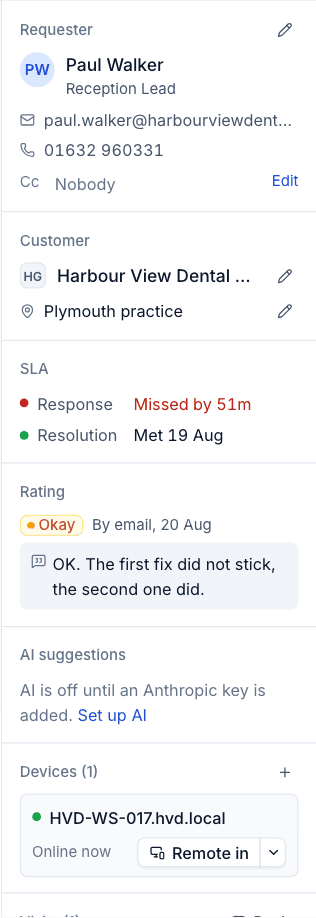
The details panel
The right-hand panel holds everything else about the ticket:
| Section | What you can do |
|---|---|
| Requester | See their name, job title, email and phone. The pencil changes the requester; Edit next to Cc changes who is copied in |
| Customer | The customer and site, each with a pencil to change them |
| SLA | The Response and Resolution targets: when they are due, or whether they were met or missed |
| Rating | The customer's rating and comment once the ticket is resolved, if feedback is on |
| AI suggestions | Suggestions for the ticket when AI is set up |
| Devices | Linked devices with their status and Remote in. Press + (or l) to link another |
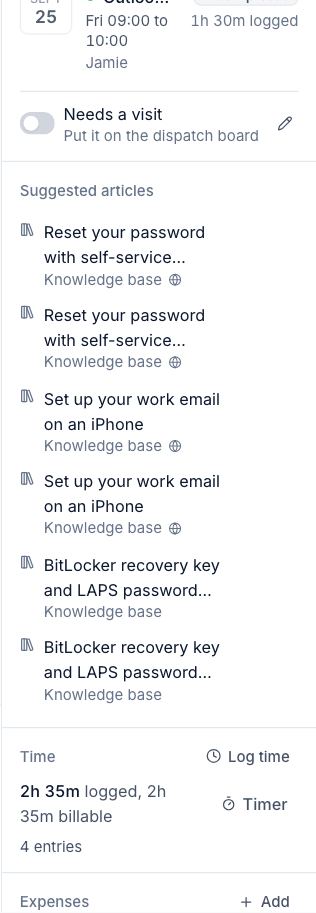
| Visits | Site visits booked for the ticket. Book schedules one; Needs a visit puts it on the dispatch board |
| Suggested articles | Knowledge base articles that match the ticket, each with buttons to insert it into the reply or link it to the ticket |
| Time | Time logged so far and how much is billable, with Log time and Timer |
| Expenses | Parking, parts or mileage to charge for this ticket. Press Add |
| About | When it was opened and how many messages it has |
More actions
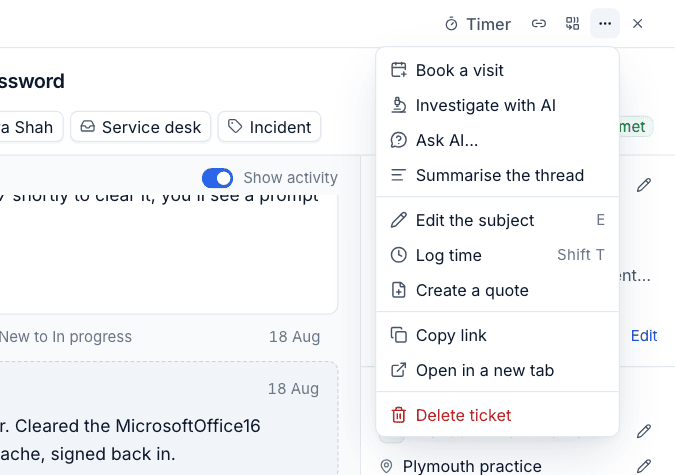
The More actions menu (the three dots at the top) has:
- Book a visit,
- Investigate with AI, Ask AI... and Summarise the thread (when AI is set up),
- Edit the subject (
e), - Log time (
Shift+t), - Create a quote for the customer,
- Copy link and Open in a new tab,
- Delete ticket.
Merge a duplicate
When the same problem has been raised twice, merge one into the other:
- Open the ticket you want to get rid of.
- Press Merge into another ticket at the top (or
m). - Search the customer's tickets by number or subject and pick the one to keep.
- Press Merge.
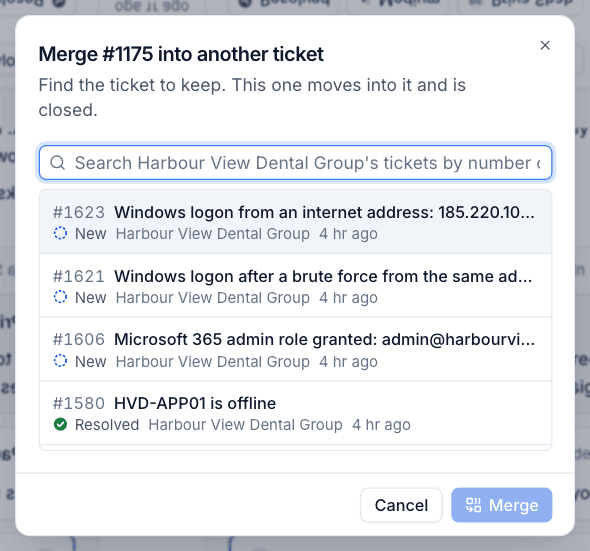
The messages, attachments, time, devices and alert links move into the ticket you kept, and the merged ticket is closed with a pointer to it. Tickets of different customers cannot be merged.
Resolving
Set the status to Resolved when the work is done, or use Send and resolve. The resolution SLA is met when the ticket reaches a resolved or closed status. If feedback is on, the customer is asked to rate the ticket (see The customer portal and feedback).
Was this page helpful?
Thanks for the feedback.