First steps
Your first hour in Tenvara: secure your account, choose your modules, add a customer, invite your team, install the agent and open the portal.
You can sign in and you are looking at an empty Home. This page takes you from there to a working setup: one customer, your team, devices reporting in and contacts able to raise tickets. Each step links to the full guide.
1. Secure your own account
You are the first administrator, so your account can change everything. Protect it first.
- Open the account menu (your initials, top right) and choose Password and two-factor.
- Under Two-factor authentication, press Set up two-factor and follow the steps with an authenticator app.
- Keep the recovery codes you are shown somewhere safe. They are shown once.
Then decide whether everyone must use two-factor: see Passwords and two-factor.
2. Choose your modules
Go to Settings > Modules and switch off anything your team will not use yet. A module that is off disappears from the rail, from customer and device pages, and from search, for everyone. You can switch it back on at any time. See Modules.
3. Add your first customer
A customer is a company you look after. Sites, contacts and devices hang off it.
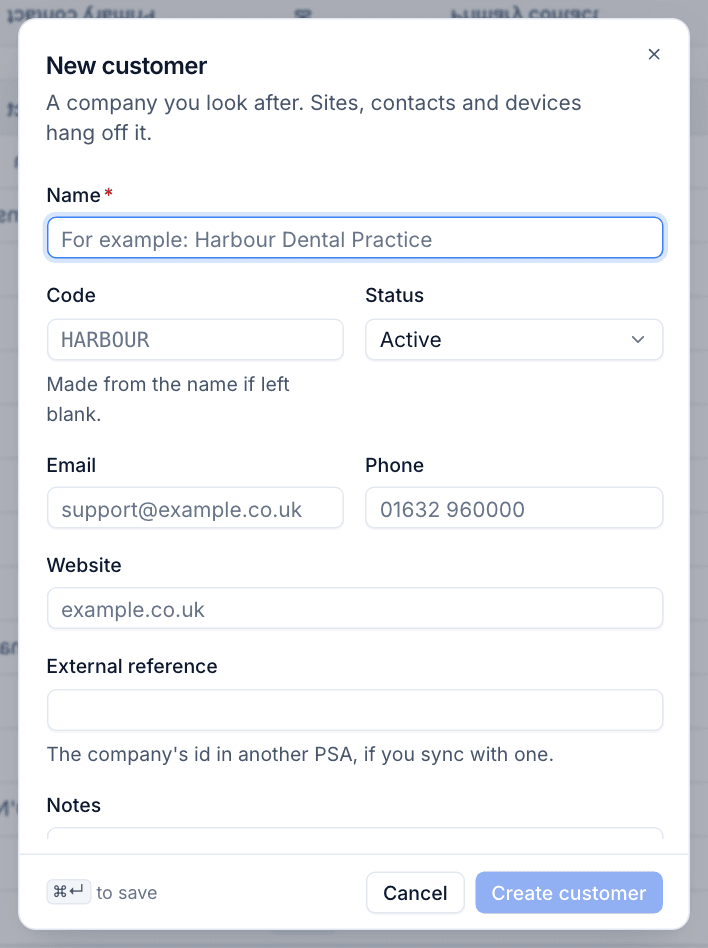
- Go to Customers and press New customer.
- Enter the Name. The Code is made from the name if you leave it blank.
- Set the Status: Active, Onboarding or Inactive.
- Add the Email, Phone and Website if you have them. External reference is the company's id in another PSA, if you sync with one. Notes are for anything else.
- Press Create customer (or
Cmd+Enter).
Open the customer to add its sites and contacts. Contacts are the people who raise tickets and can use the customer portal.
Tip: Add your own company as a customer too. It gives your internal machines and internal tickets a home.
4. Invite your team
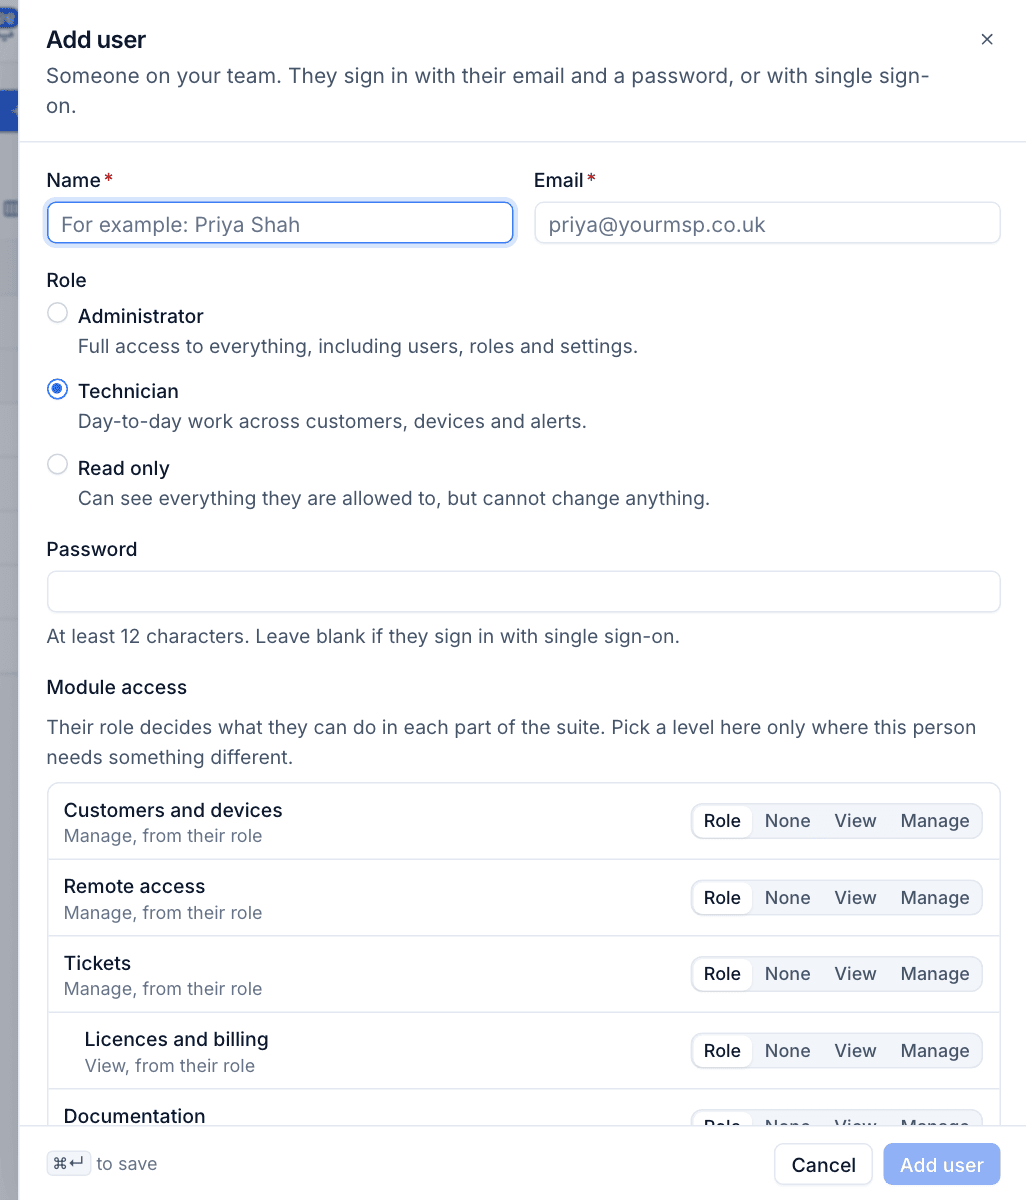
- Go to Settings > Users and press Add user.
- Enter their Name and Email.
- Choose a Role: Administrator, Technician or Read only.
- Either give them a Password (at least 12 characters), or leave it blank if they will use single sign-on or you want them to choose their own.
- Press Add user.
If you left the password blank and they will not use single sign-on, open the row's menu and choose Send password reset. Someone with no password gets a "set your password" email instead.
To let your team sign in with Microsoft 365 or Google instead, set up Single sign-on first, with Create accounts on first sign-in turned on. Then there is nothing to invite: people sign in and get an account with the role your rules give them. See Users for everything else.
5. Install the agent
Devices appear in Tenvara once the agent is installed on them and enrolled with a customer.
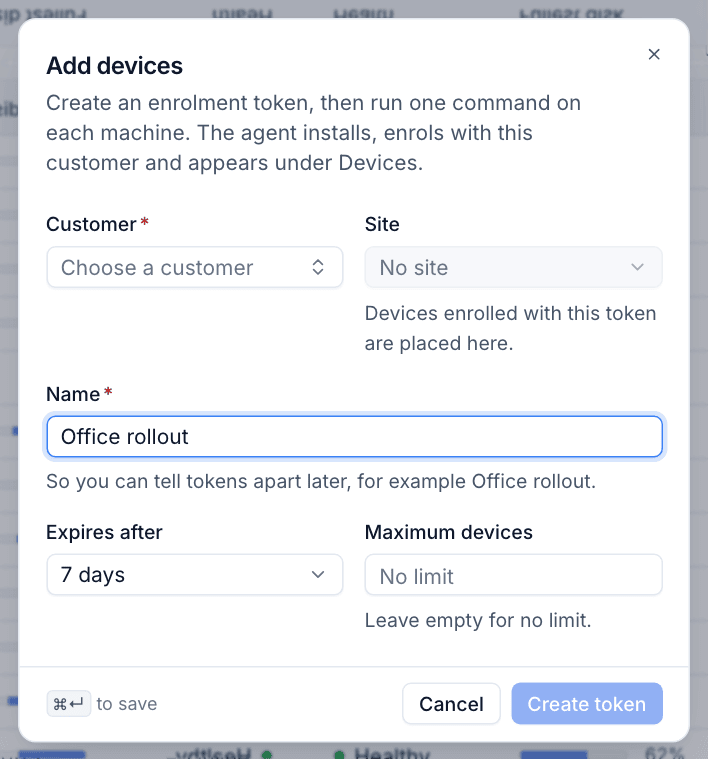
- Go to Devices and press Add devices.
- Choose the Customer and, if you like, a Site. Devices enrolled with this token are placed there.
- Give the token a Name so you can tell tokens apart later, for example "Office rollout".
- Choose when it Expires after (1 day to 1 year, or never) and, optionally, the Maximum devices it can enrol.
- Press Create token.
Tenvara then shows the command to run on each machine for Windows, macOS and Linux. The agent installs, enrols with this customer and appears under Devices, usually within a minute. Full details, including silent installs through Intune or another MDM, are in Installing the agent.
What the agent does once it is installed (inventory, monitoring, patching, remote control and so on) is set in Devices and agent. Have a look at Remote session consent there before anyone remotes in, so it matches what you have agreed with your customers.
6. Open the customer portal
Contacts sign in to the portal with a link emailed to them. There are no passwords.
- Go to Settings > Customer portal and check Portal is On.
- Set the Portal name to your company name, so contacts see who they are talking to.
- Copy the Address and put it in your email signature or on your website.
- On each contact who should use the portal, turn portal access on and press Send sign-in invitation.
See Customer portal settings and The customer portal.
7. Set up email to tickets and the rest
With the basics in place, work through the settings for the areas you use. The Settings sidebar groups them: Tickets (ticket setup, email, alert rules, canned responses), Microsoft 365, Backup, Monitoring, Integrations and so on. Settings overview lists them all and where each is explained.
Checklist
| Done? | Step |
|---|---|
| Two-factor on your own account | |
| Two-factor policy chosen, and a break-glass administrator marked | |
| Modules you do not use switched off | |
| First customer with a site and contacts | |
| Team added, or single sign-on set up | |
| Agent on at least one device | |
| Portal named and invitations sent |
Was this page helpful?
Thanks for the feedback.