Adding printers and finding them on a network
Add a printer by hand, or scan a site's network from a device there and add the printers it finds.
Before a printer can go on any device, Tenvara needs a record of it: which customer and site it belongs to, where it is on the network and how to talk to it. You can type the details in yourself, or have an agent at the site scan its network and fill most of them in for you.
Adding a printer by hand
- Go to Devices > Printers and click Add printer. (You can also click Add printer on a customer's Printers tab, which picks the customer for you.)
- Fill in the form:
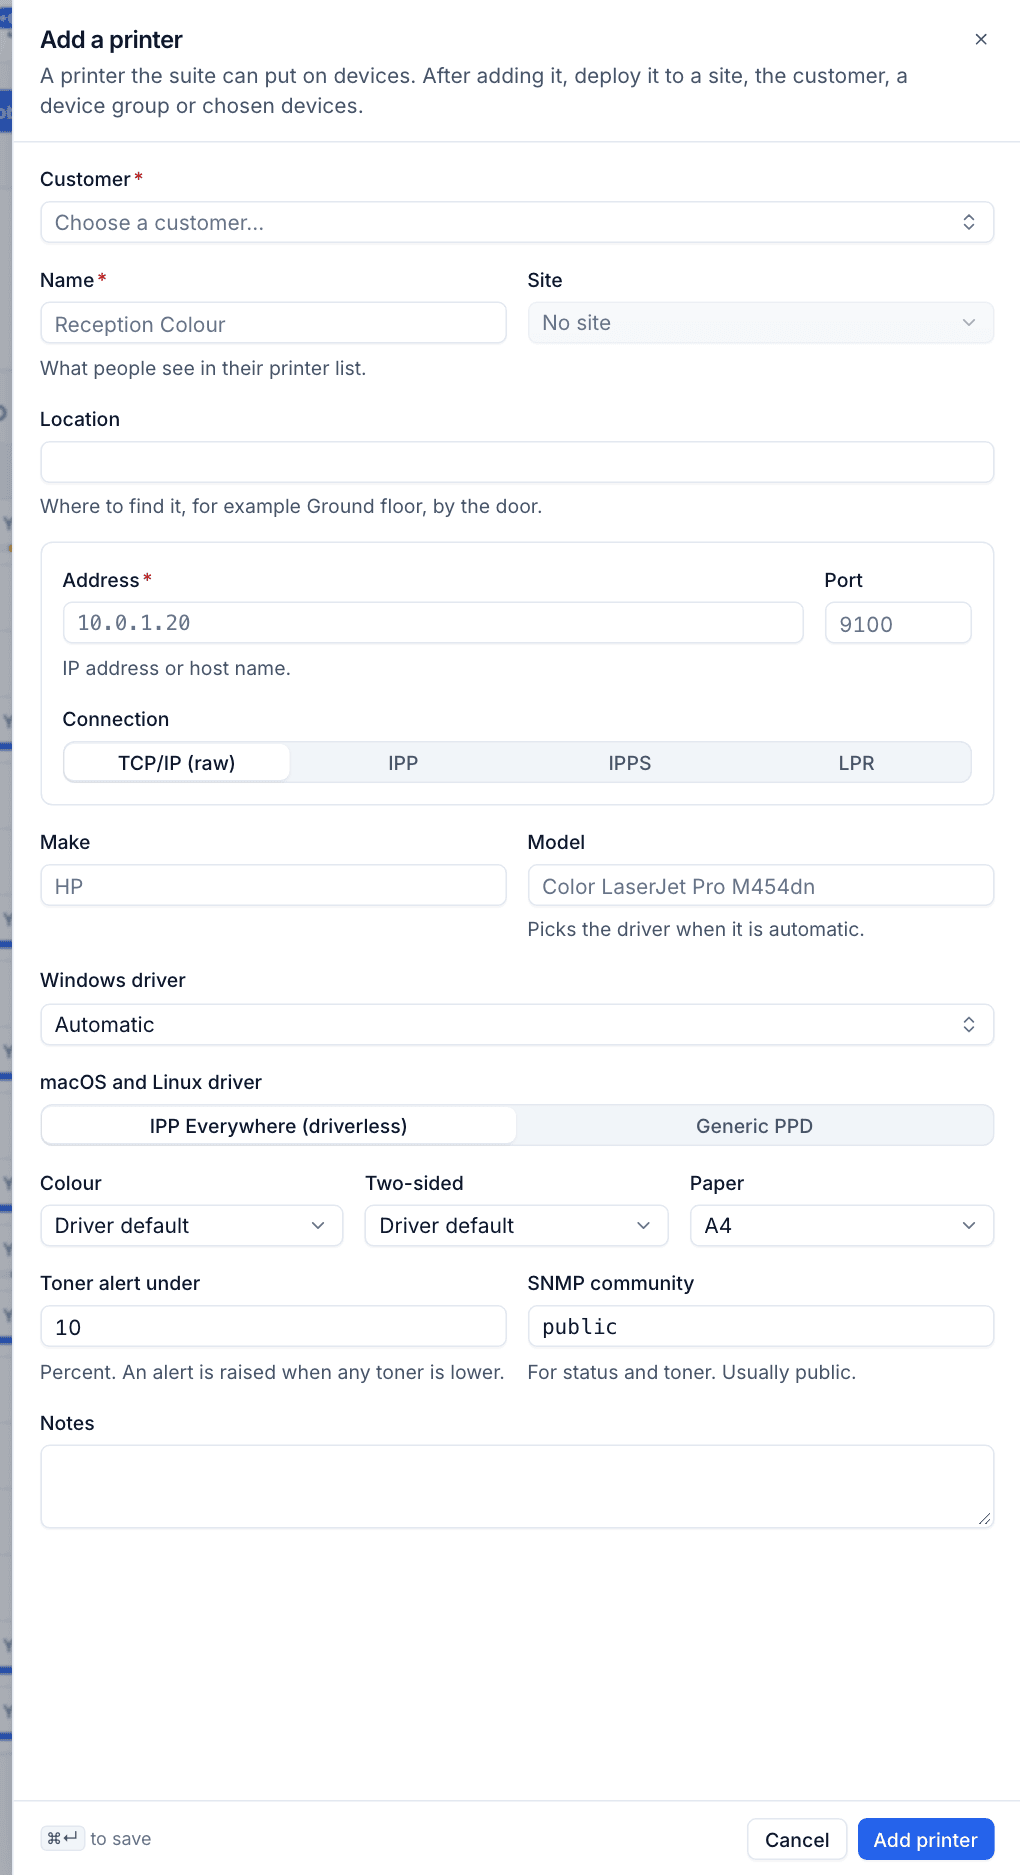
| Field | What to enter |
|---|---|
| Customer | Who the printer belongs to. Required |
| Name | What people see in their printer list, for example "Reception Colour". Must be unique for the customer. Required |
| Site | The site the printer is at. The site decides which agent checks its status, and lets you deploy it to the whole site |
| Location | Where to find it, for example "Ground floor, by the door". Shown in users' printer lists |
| Address and Port | The printer's IP address or host name. Leave Port empty for the connection's usual port (9100 for raw, 631 for IPP, 443 for IPPS, 515 for LPR). For IPP and IPPS there is also the queue path, ipp/print unless the printer uses another |
| Connection | TCP/IP (raw), IPP, IPPS or LPR |
| Make and Model | Used to pick the driver when the Windows driver is automatic. Match what the printer reports if you can |
| Windows driver | Automatic, or a specific driver from the driver list |
| macOS and Linux driver | IPP Everywhere (driverless) or Generic PPD |
| Colour, Two-sided, Paper | The printer's defaults on every device. Driver default leaves the driver's own setting |
| Toner alert under | A percentage. An alert is raised when any toner falls below it. Default 10 |
| SNMP community | The read-only community used for status and toner. Usually public |
| Notes | Anything the next technician should know |
- Click Add printer (or press Cmd+Enter).
Adding a printer does not put it on any device yet. Deploy it next: see Deploying printers to devices.
Tip: Leave Windows driver on Automatic and fill in the make and model. Tenvara then chooses the driver through your model mapping, so when you upload a newer driver package later, every matching printer follows it. See Drivers and model mapping.
Choosing a connection
- TCP/IP (raw) on port 9100 works with almost every network printer and is the usual choice on Windows.
- IPP and IPPS suit macOS and Linux, where IPP Everywhere needs no driver at all. On Windows, a printer on IPP uses the Microsoft IPP Class Driver unless you choose another.
- LPR is there for older printers and print servers that only speak it.
On macOS and Linux, IPP Everywhere always talks IPP, so a raw or LPR printer set to IPP Everywhere is created on the printer's IPP address. If the printer does not answer IPP, the agent falls back to the generic PPD and says so in the device's note.
Finding printers with Discovery
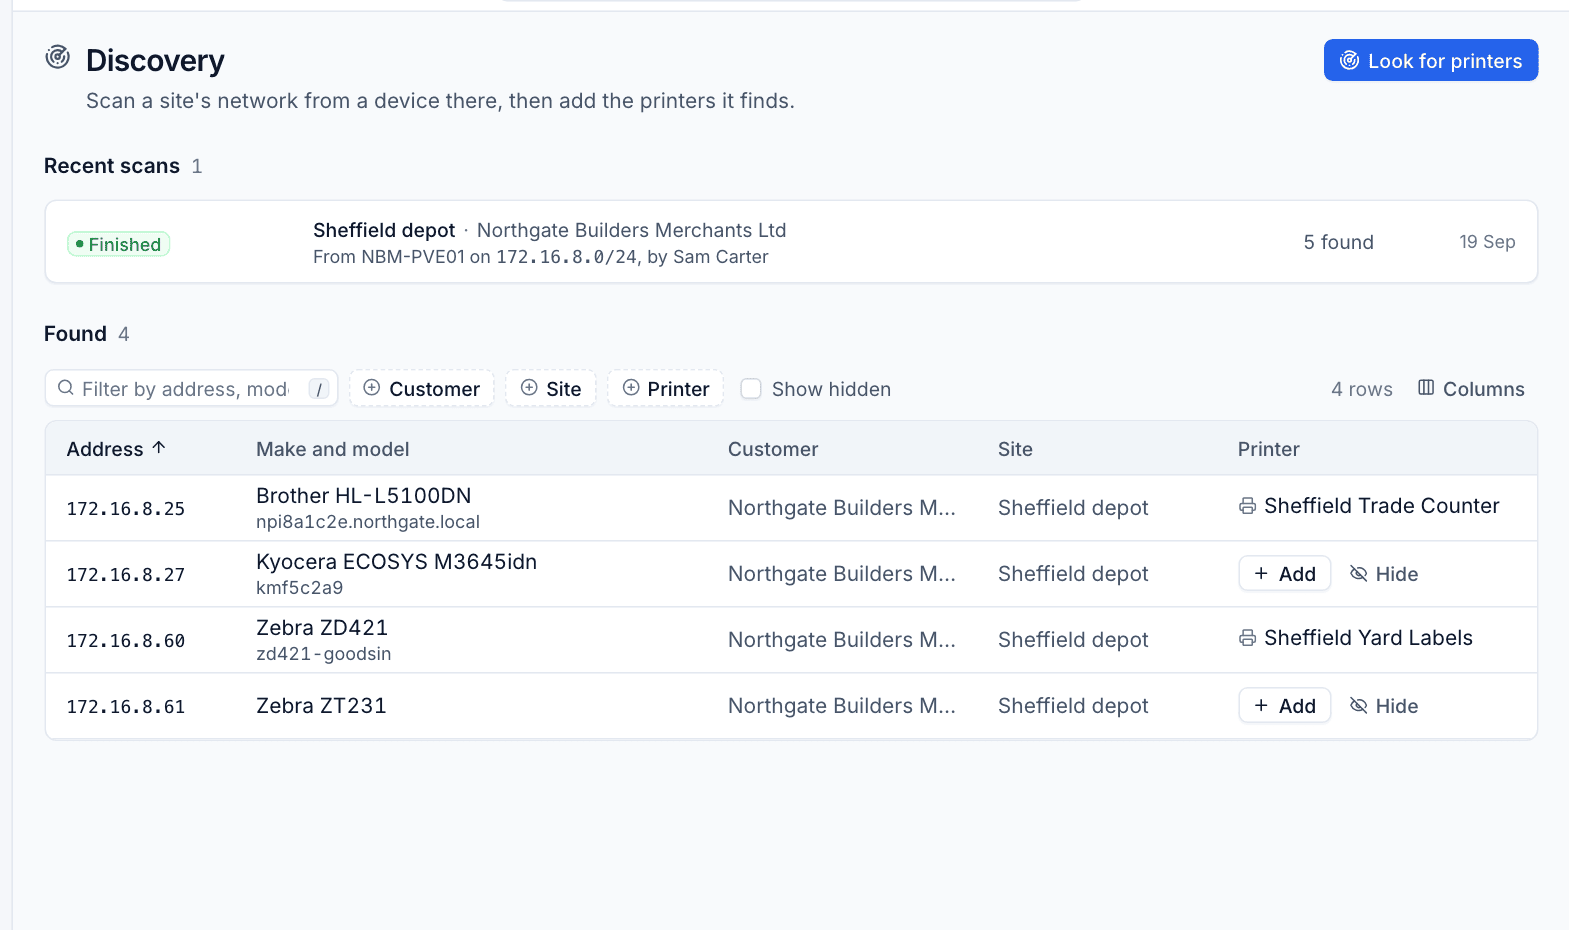
Discovery asks one device at a site to scan its network for printers. It is the quickest way to add the printers at a new customer.
Starting a scan
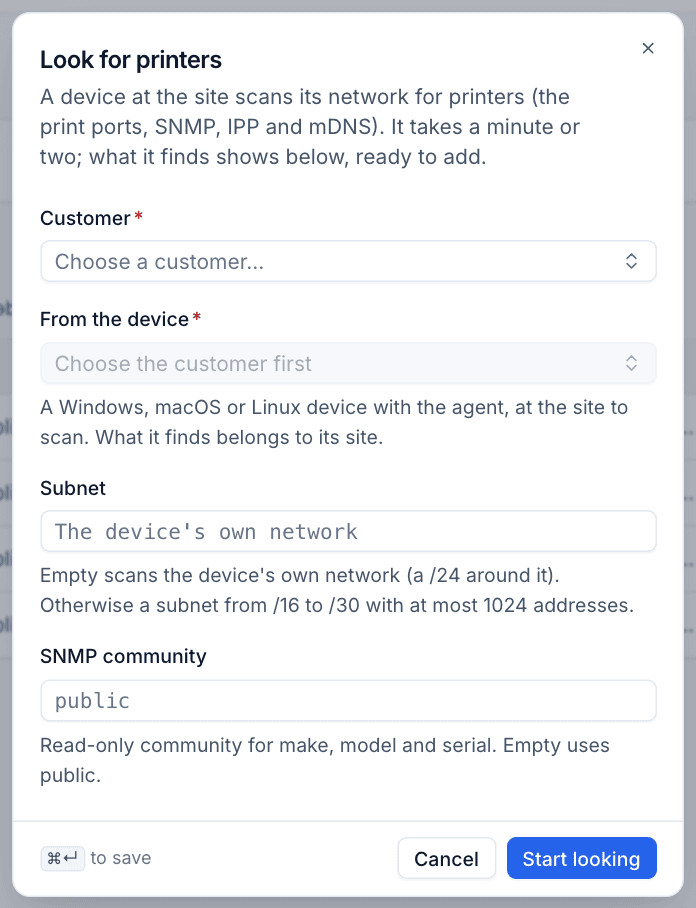
- Go to Devices > Printers > Discovery and click Look for printers (the same button is on the Printers list).
- Choose the Customer.
- Choose From the device: a Windows, macOS or Linux device with the agent, at the site you want to scan. Whatever it finds belongs to that device's site.
- Leave Subnet empty to scan the device's own network (a /24 around its address), or enter a subnet from /16 to /30 with at most 1024 addresses, for example
172.16.8.0/24. - Change SNMP community only if the printers do not use
public. - Click Start looking.
The scan takes a minute or two. The device tries every address on the print ports (9100, 631 and 515) and SNMP, and listens for printers announcing themselves on the local network (mDNS). Only hosts that look like printers are listed. For each one it reads the make, model, serial number and MAC address where the printer offers them.
What you see
Recent scans lists each scan with its status, site, customer, the device and subnet it used, who started it and how many printers it found. If the device could not do part of the job (for example macOS did not let it use mDNS), the scan still finishes and says what it could not do.
Found lists every printer found, with its Address, Make and model (and host name), Customer, Site and which protocols it Answers on (Raw 9100, IPP, IPPS, LPR). The Printer column shows either the printer it already belongs to, or two buttons:
- Add opens a short form for that address, with the make and model it found. Enter the Name (it starts as the model), check the Site, add a Location and pick the Connection from the ways the printer answered the scan. Click Add printer. You can fill in the rest (driver, defaults, toner alert) afterwards with Edit.
- Hide takes the entry out of the list, for things you never want to manage, such as a label printer used by another system. Tick Show hidden to see hidden entries again and restore them.
Note: Any device with the agent can run a discovery, including a protected device. There is no special bridge or probe to install at the site.
Editing and deleting a printer
Open the printer and click Edit (or press E) to change any field. Changes reach the devices it is on at their next reconcile: a new address, for example, gets a new port and the old one is removed.
To delete a printer, open it, click the ... menu and choose Delete printer.
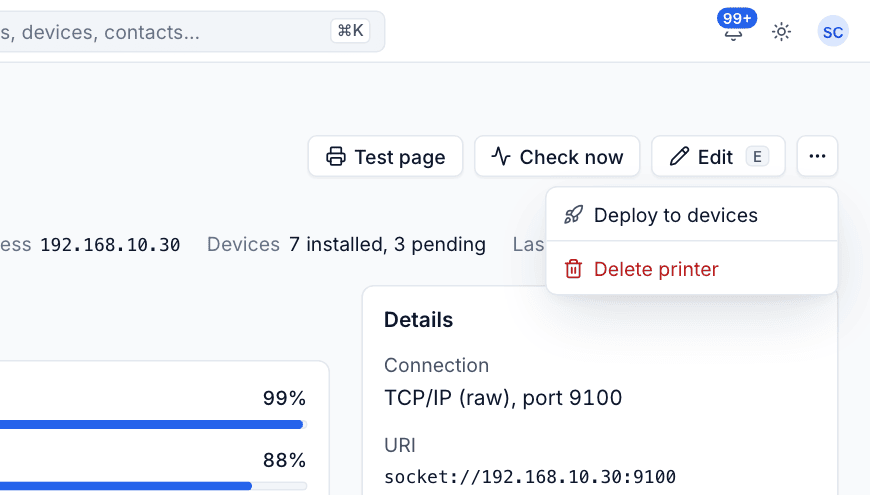
When you delete a printer, Tenvara removes it from every device it put it on.
Was this page helpful?
Thanks for the feedback.