Hosted onboarding
Order a hosted Tenvara instance from www.tenvara.io, follow it from pending to live, and sign in for the first time.
With a hosted plan we run Tenvara for you on its own instance at yourname.tenvara.app. We look after the server, updates, backups and monitoring; you sign in and get on with it. This page covers ordering, what happens while your instance is set up, and signing in.
Before you start
You need:
- An account at www.tenvara.io. Choosing a plan asks you to create one if you are not signed in. It takes a minute, and you confirm your email address.
- The address you want your team to use, for example
yourmsp.tenvara.app. Short and usually your company name. - A rough idea of how many technicians (or endpoints, depending on the plan's pricing) you need. You can change this later.
Order a hosted plan
- Go to Pricing on www.tenvara.io, choose a plan and pick Hosted.
- On the order page, check Deployment says Hosted. It reads "We run it for you at yourname.tenvara.app: updates, backups and monitoring included."
- Set the quantity with the - and + buttons, for example How many technicians?
- Under Your instance address, type the name you want in front of
.tenvara.app. Use lower case letters, numbers and hyphens, starting and ending with a letter or number, 3 to 40 characters. If it says "That address is taken", try another. Some names, such aswww,admin,portalandsupport, are reserved. - Add anything we should know under Anything we should know? (optional).
- Check the Summary on the right, tick I agree to the terms of service and continue.
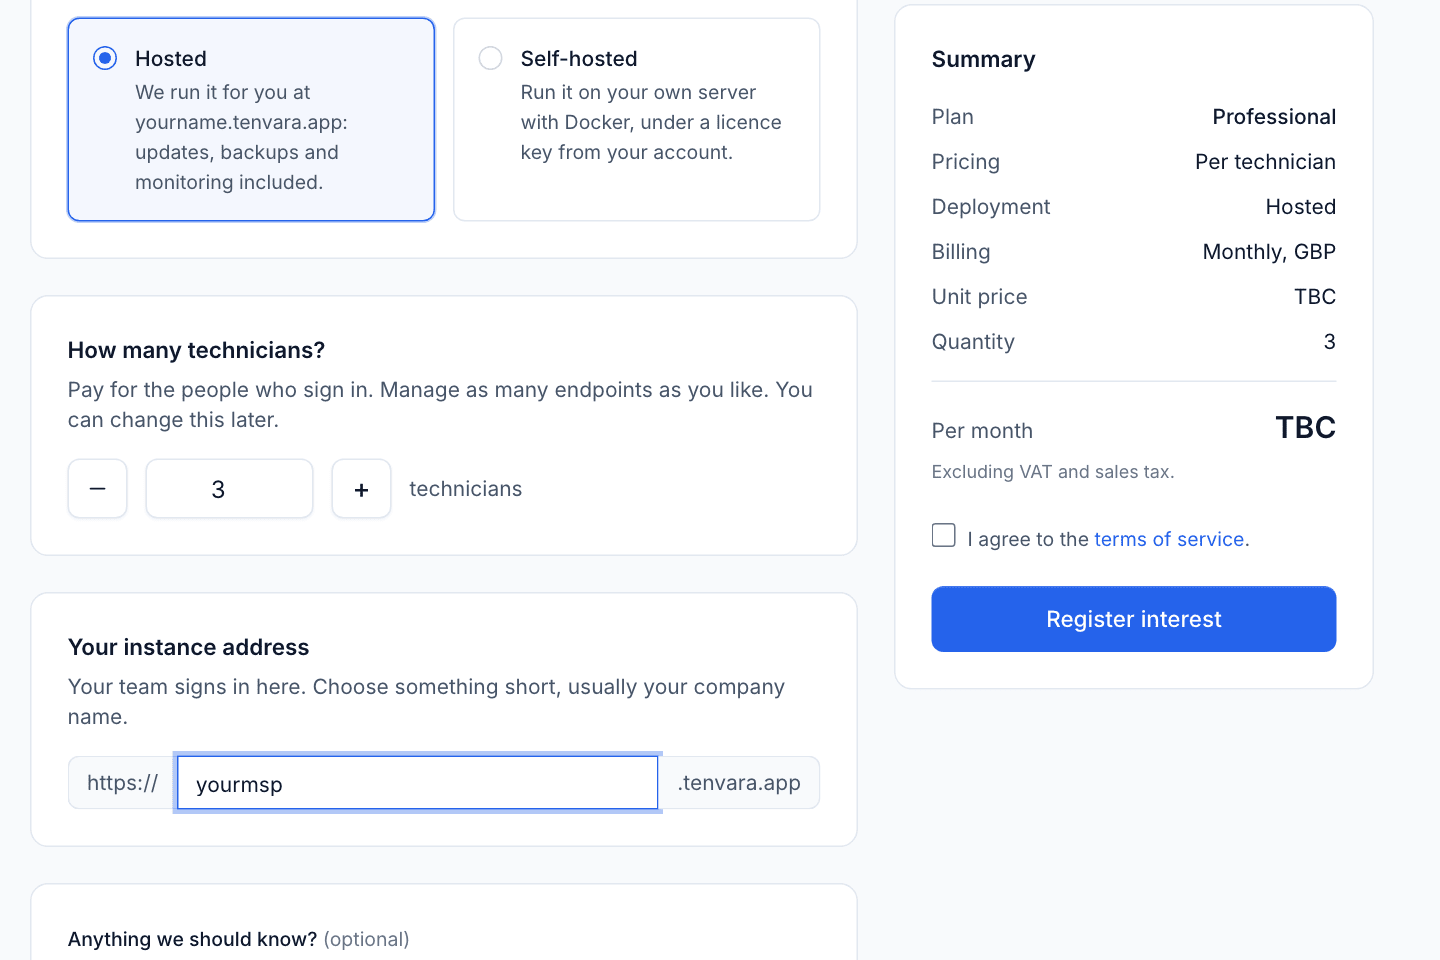
When online payment is available for the plan, you go to a secure payment page and back again once it is done. When a plan's price is not published yet, the button says Register interest instead: nothing is charged, your address is still reserved, and we get in touch with pricing to confirm.
Either way, your address is reserved the moment you place the order, and an order confirmation is emailed to you.
Follow your instance
Sign in to www.tenvara.io and open Hosted instances in the client area. Each instance shows its address, plan, order date, region, version and status:
| Status | What it means |
|---|---|
| Pending | We have reserved the address. We will email you when the instance is ready to sign in to. |
| Provisioning | We are setting your instance up now. You will get an email when it is ready. |
| Active | Your instance is live. Sign in with the administrator account from your welcome email. An Open instance button takes you there. |
| Suspended | Access is paused, for example after a billing problem. Get in touch to restore it. |
| Cancelled | The instance has been cancelled. |
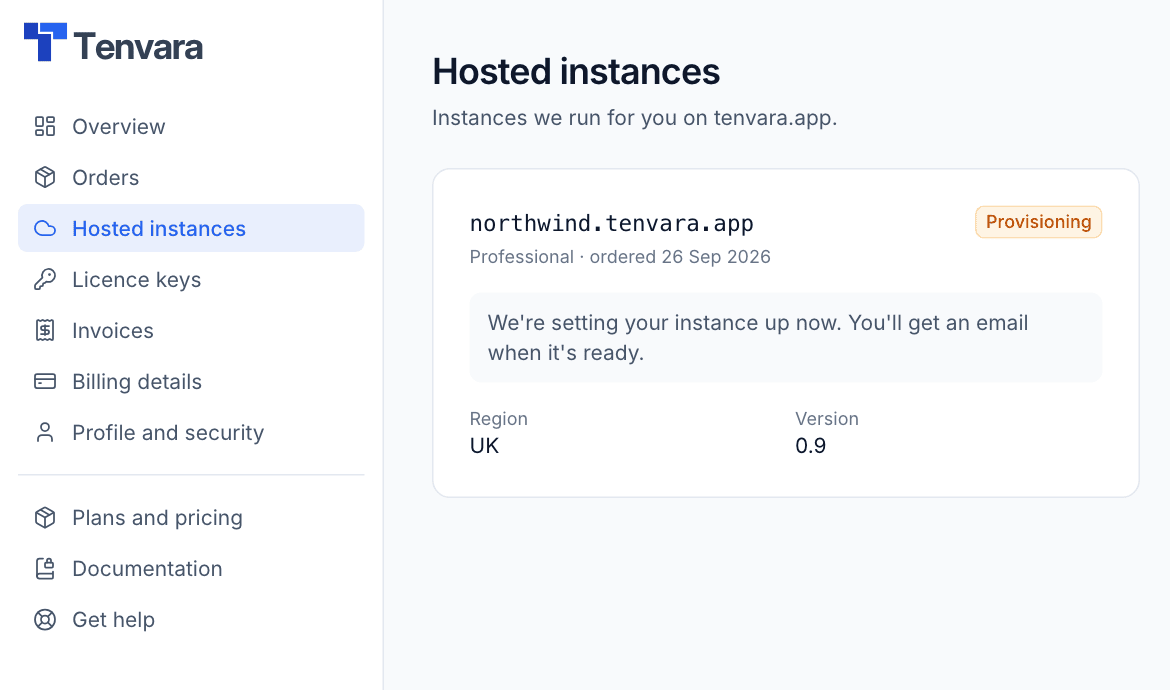
Your order stays at Pending until we have set the instance up. The rest of the client area has your Orders, Invoices, Billing details and Profile and security, and Book an onboarding call on the overview if you would like us to walk you through it.
Sign in for the first time
When the instance is ready you get a welcome email with the address and the first administrator account.
- Open
https://yourname.tenvara.app(or press Open instance in the client area). - Sign in with the administrator account from the welcome email. If you are asked to choose a password, it needs at least 12 characters.
- Set up two-factor straight away: account menu, Password and two-factor, Set up two-factor. See Signing in.
Note: The www.tenvara.io account (orders, invoices, billing) and your Tenvara instance are separate logins. Your team never needs a www.tenvara.io account; they only sign in to your instance.
What is set up for you
On a hosted instance we handle:
- The server, its operating system and security updates.
- Tenvara updates. The version your instance runs is shown in the client area and at the bottom of the account menu.
- TLS certificates for your address.
- Backups and monitoring of the instance itself.
Everything inside the app is yours to configure, in the same way as a self-hosted install.
Next steps
Go to First steps to add your first customer, invite your team and install the agent. If you would rather your team signs in with Microsoft or Google, set up Single sign-on before you invite them.
Was this page helpful?
Thanks for the feedback.