Installing self-hosted
Run Tenvara on your own Linux server with Docker Compose: what you need, the settings file, first start, the first administrator, email, upgrades and backups.
Self-hosted Tenvara is one Docker Compose install per MSP, on a server you run: in your office, your data centre or your cloud account. It is the same product as hosted, with the same features.
What you need
- A Linux server with Docker and Docker Compose v2. Monitoring history runs in ClickHouse, which is given 2 GB of memory and 2 CPUs by default, so allow for that on top of the rest.
- A DNS name for the install, for example
support.yourmsp.co.uk, pointing at the server. - Ports 80 and 443 reachable from the internet, so the built-in Caddy can get a certificate and agents can connect.
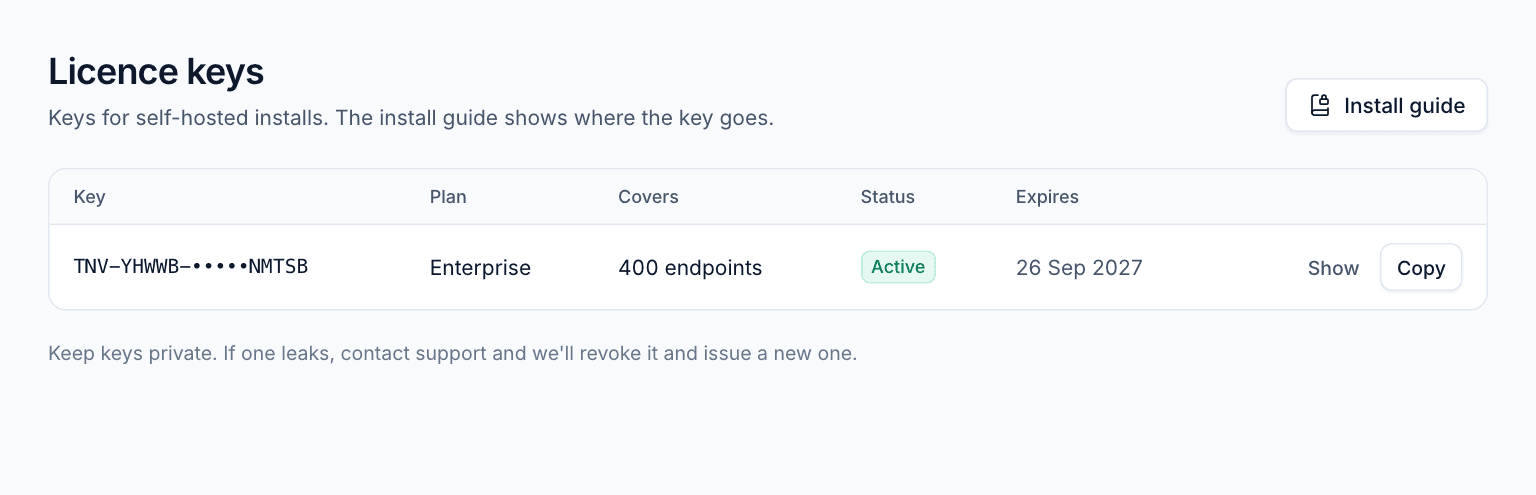
- Your licence key from Licence keys in the client area at www.tenvara.io. A key is issued there as soon as a self-hosted order is paid.
Optional, depending on what you use:
- UDP 3478 and 49160 to 49200 if remote sessions need the built-in TURN relay (devices behind strict NAT).
- Port 514 (UDP and TCP) from your firewalls and network devices, if they send syslog to Security. Open it to your network devices only, never to the internet.
- An SMTP server for outgoing email.
What runs
The Compose file starts these services:
| Service | What it does |
|---|---|
caddy |
TLS and routing: the API, websockets, the agent gateway and the web app, all on one address |
web |
The web app |
core |
The Tenvara API |
core-worker, core-worker-m365 |
Background jobs, with Microsoft 365 syncs on their own workers |
core-scheduler |
Scheduled tasks |
reverb |
Websockets for live updates |
remote |
The agent gateway, remote control and the TURN relay |
backup |
Microsoft 365 and endpoint backup |
postgres |
Postgres 17, the main database |
clickhouse |
Monitoring history and security events |
vector |
Takes security events in, including syslog from network devices |
redis |
Queues, cache and live updates |
minio |
S3 storage for backup repositories, until you point backup at your own storage |
Install
1. Get the files and make the settings file
Put the Tenvara deploy folder (with docker-compose.yml, Caddyfile and .env.example) on the server, then:
cd deploy
cp .env.example .env
2. Fill in .env
Open .env and set at least these values. Generate each secret with the command shown.
# The address people use. DNS must point here and ports 80 and 443 must be open.
TENVARA_DOMAIN=support.yourmsp.co.uk

# Your licence key from the client area.
TENVARA_LICENCE_KEY=TNV-XXXXX-XXXXX-XXXXX-XXXXX

# App key:  echo "APP_KEY=base64:$(openssl rand -base64 32)"
APP_KEY=

# Long random strings, one each.
POSTGRES_PASSWORD=
CLICKHOUSE_PASSWORD=
MINIO_ROOT_PASSWORD=

# Live updates: any random strings.
REVERB_APP_ID=tenvara
REVERB_APP_KEY=
REVERB_APP_SECRET=

# Shared secrets between services:  openssl rand -hex 32
TENVARA_INTERNAL_TOKEN=
TENVARA_VECTOR_TOKEN=
The stack will not start without POSTGRES_PASSWORD, CLICKHOUSE_PASSWORD, MINIO_ROOT_PASSWORD, TENVARA_INTERNAL_TOKEN and TENVARA_VECTOR_TOKEN, and tells you which one is missing.
Tip: To try Tenvara on your own machine first, leave
TENVARA_DOMAIN=localhost. Caddy then uses its own local certificate, which your browser will warn about.
3. Start it
docker compose up -d
On every start the core container brings the database up to date, sets up the default roles and modules (existing ones are never changed), creates its token signing key if there is none, and prepares the monitoring tables. The worker, scheduler and websocket services wait until it is healthy, so they never race it. The first start takes a few minutes while images download.
Check everything is up:
docker compose ps
4. Create the first administrator
docker compose exec core php artisan tenvara:create-admin
Follow the prompts to create the account. Passwords are at least 12 characters. Then open https://<TENVARA_DOMAIN> and sign in. Set up two-factor straight away, from the account menu, Password and two-factor.
Behind another proxy
If something in front of the server already handles TLS (a load balancer or reverse proxy), tell Caddy to answer plain HTTP and tell Tenvara the address people really use:
TENVARA_SITE_ADDRESS=http://support.yourmsp.co.uk   # or :80 to answer on any hostname
APP_URL=https://support.yourmsp.co.uk
To try it locally on a spare port, for example: HTTP_PORT=8480, TENVARA_SITE_ADDRESS=http://localhost and APP_URL=http://localhost:8480.
Until SMTP is set up, Tenvara sends nothing. Each message (password resets, portal sign-in links and invitations, notifications) is written as an .eml file to storage/app/dev-mail on the core-storage volume instead. That is fine for a trial; set up SMTP before anyone relies on email:
MAIL_MAILER=smtp
MAIL_HOST=smtp.example.com
MAIL_PORT=587
MAIL_USERNAME=
MAIL_PASSWORD=
MAIL_FROM_ADDRESS=support@yourmsp.co.uk
MAIL_FROM_NAME="Your MSP"
Run docker compose up -d again after changing .env.
Remote control behind strict NAT
Remote sessions connect the browser and the device directly when they can. Where they cannot, turn on the built-in relay:
TENVARA_TURN_ENABLED=1
TENVARA_TURN_PUBLIC_IP=203.0.113.10
TENVARA_TURN_SECRET=          # a long random string
and open UDP 3478 and 49160 to 49200 to the server.
Sign-in
Local accounts (email and password, with two-factor you can require) work with nothing else set. Single sign-on is set up in the app, not in .env: see Single sign-on. Keep at least one break-glass administrator who can sign in with a password if the identity provider is ever down.
Back up the server
Your data lives in named Docker volumes. Back these up somewhere other than this server:
| Volume | Why it matters |
|---|---|
postgres-data |
Everything in the app: customers, tickets, devices, settings |
core-storage |
The token signing key (storage/keys/jwt-private.pem) and logs |
backup-data |
The backup master key (keys.json) |
Warning: Without
keys.jsonno backup taken by Tenvara can ever be read, and the backup service refuses to start rather than make a new key. Keep a copy of thebackup-datavolume, or at leastkeys.json, off the server. Settings > Backup shows the key's fingerprint so you can check a copy is the right one.
The other volumes (clickhouse-data, redis-data, minio-data, caddy-data, caddy-config, vector-data, security-enrichment and remote-data) hold history, caches, certificates and backup repositories. Back up minio-data too if your backup repositories live in the bundled MinIO.
Upgrading
You upgrade when it suits you:
-
Back up the volumes above.
-
Read the release notes for the new version. Some releases add a required setting to
.env. -
Set the version in
.env, for exampleTENVARA_VERSION=1.2.0, or leave it unset to follow the latest release. -
Pull the new images and restart:
docker compose pull
docker compose up -d
The core container updates the database on start. Agents update themselves to the new release if Update agents automatically is on in Devices and agent.
Next steps
Go to First steps to add your first customer, invite your team and install the agent.
Was this page helpful?
Thanks for the feedback.