Booking a visit
Book technicians for a ticket or an internal job, handle clashes, and change, move, cancel or mark a visit as no access.
A booking puts one or more technicians in the diary. Most bookings are for a ticket, so the visit, the customer's confirmation and the time logged afterwards all hang off that ticket. You can also make internal bookings with no customer, such as a stand-up or training.
Where to book from
- Schedule: press New booking (or
n) on the calendar. - A ticket: in the ticket's Visits block, press Book. The customer, site and contact come from the ticket.
- A customer: on the customer's Visits tab, press Book a visit.
- Dispatch: drag a ticket onto a technician's row. See The dispatch board.
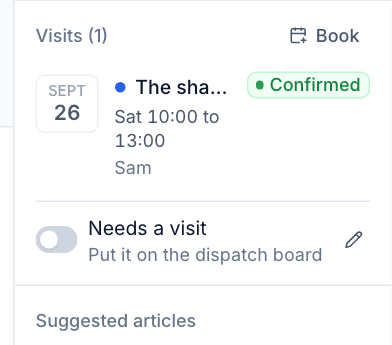
Make a booking
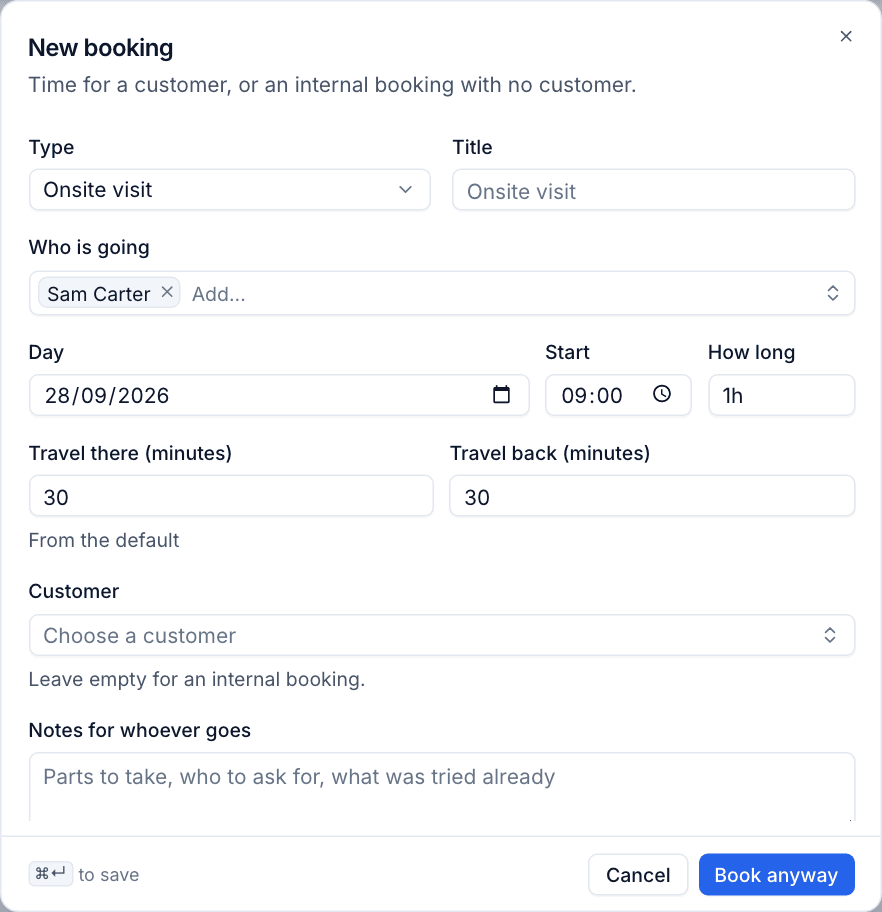
- Press New booking (or Book on the ticket).
- Choose the Type. The type sets the colour, the default length, whether it is at the customer (so travel applies) and what completing it logs. The default types are Onsite visit, Remote session, Workshop and Internal.
- Give it a Title, or leave it empty to use the ticket subject.
- In Who is going, add one or more technicians.
- Set the Day, the Start and How long (for example
1hor90m). - Check Travel there (minutes) and Travel back (minutes). For onsite types they fill in from the site's own travel time, or the default in Settings, and the note underneath says which ("From the default"). Change them for this visit if you need to.
- Choose the Customer, or leave it empty for an internal booking. For a customer booking you can also pick the Site and the Contact who gets the confirmation; the dialog shows which address will be emailed.
- Add Notes for whoever goes: parts to take, who to ask for, what was tried already.
- Choose Booked, or Pencilled in if the time is provisional.
- For a customer booking, leave Email the customer to confirm on if the contact should get a confirmation. See Customer confirmations and reminders.
- Press Book (or
Cmd+Enter). The line above the buttons sums up the time and travel, and says "No clashes" when everyone is free.
Clashes
Tenvara checks the booking as you fill it in and warns you, in plain words, if anyone on it is:
- already booked then (travel included);
- on leave, or has leave waiting for approval;
- off for a bank holiday or an office closure;
- outside their working hours, or not taking bookings.
A clash never stops you: the button changes to Book anyway (or Save anyway when changing a booking), and the booking remembers that it was booked over a clash.
The booking panel
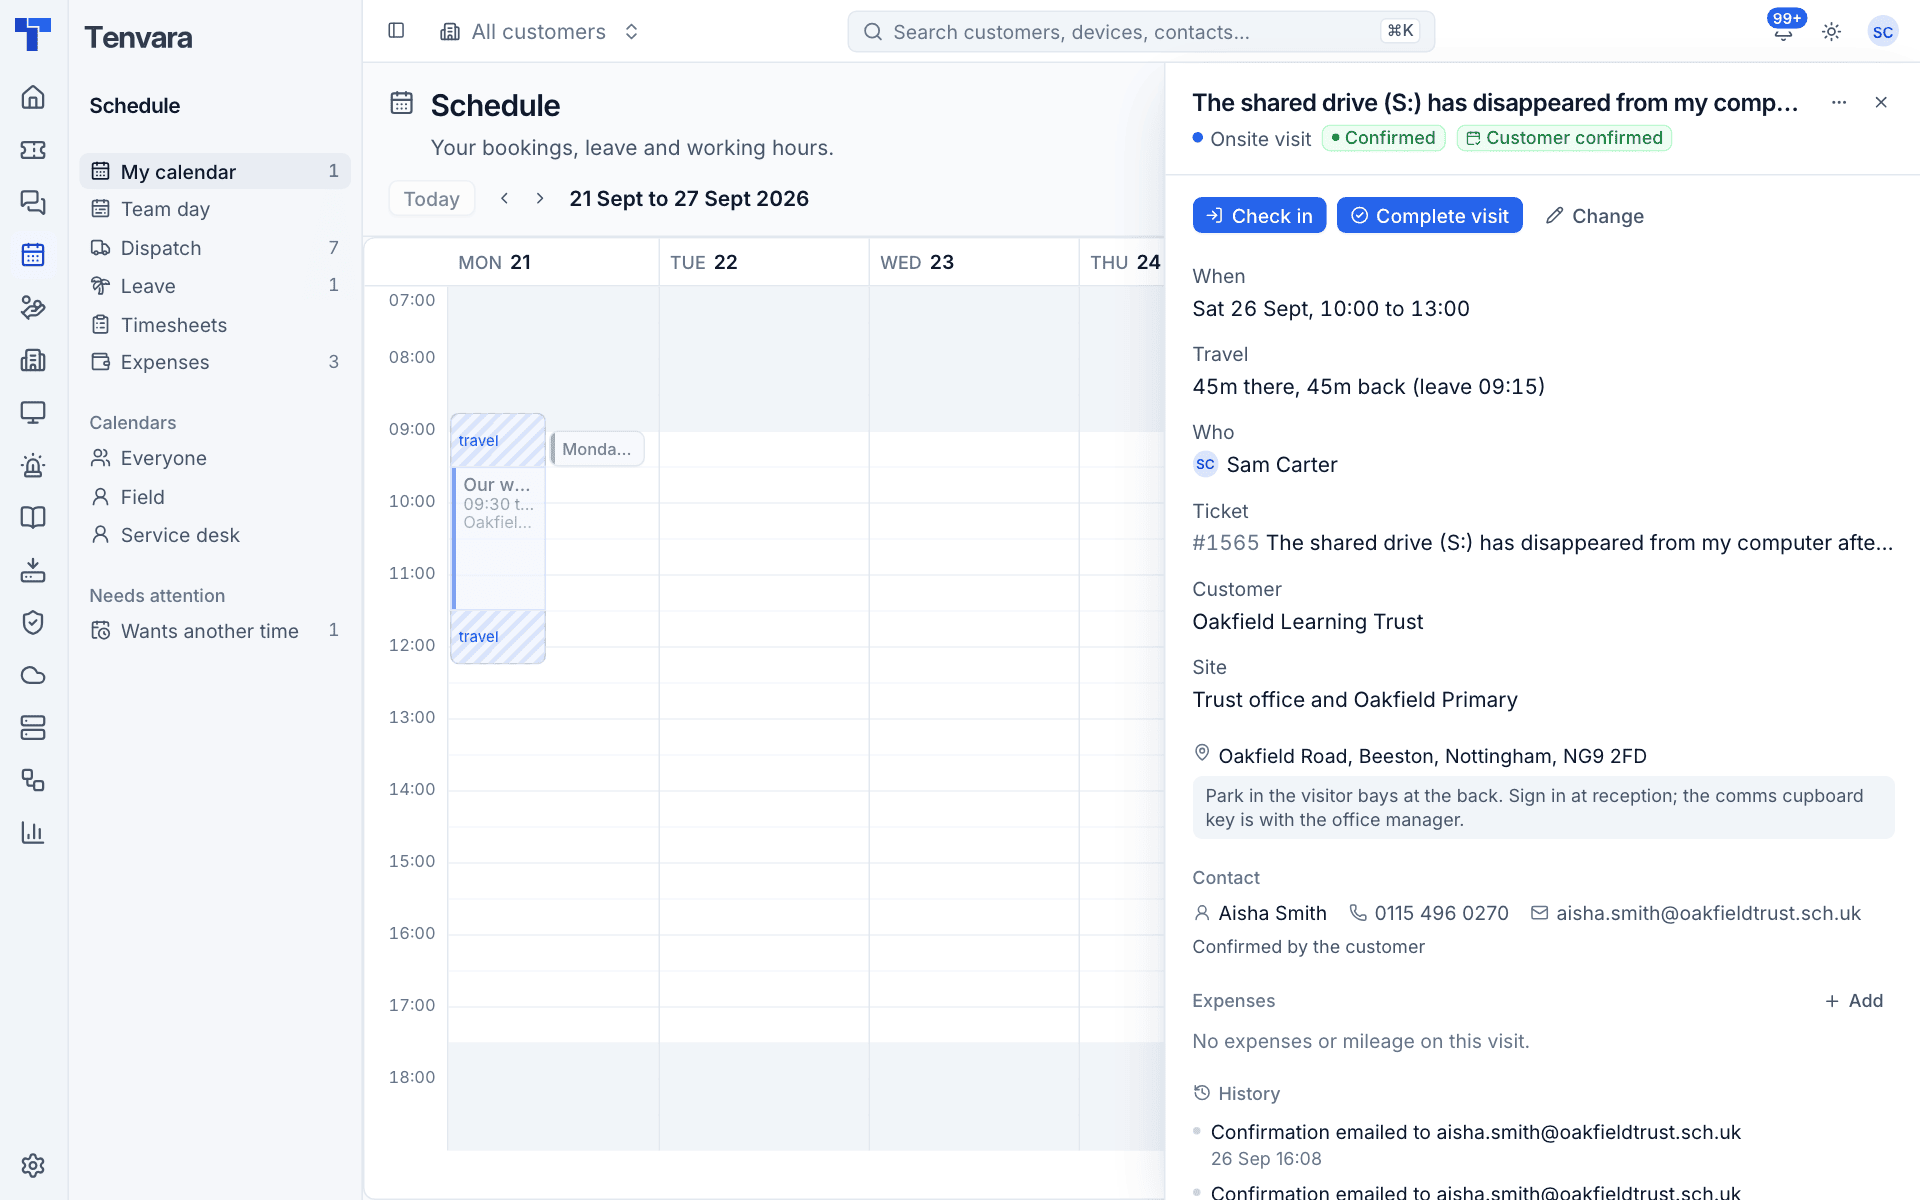
Click a booking anywhere (calendar, dispatch, a ticket or a customer) to open its panel. It shows:
- the type, status and the customer's answer at the top;
- Check in, Complete visit and Change;
- When, Travel (with the time to leave), Who, the Ticket, Customer and Site with its address and access notes;
- the Contact, with phone and email, and whether they have confirmed;
- Expenses for the visit, with Add;
- History: every change, email and answer, with who and when.
The ... menu at the top of the panel has the other actions:
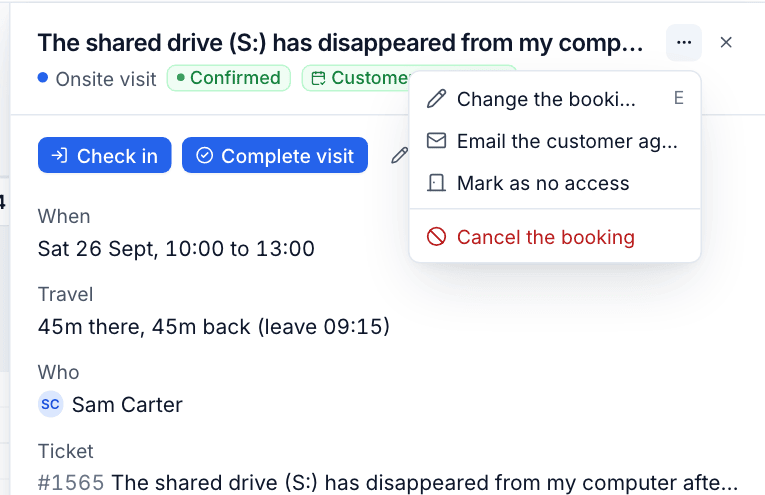
- Change the booking (
e) - Email the customer again: sends the confirmation again straight away, with a fresh link.
- Mark as no access
- Cancel the booking
Change or move a booking
To move a booking quickly, drag it to a new time on the calendar, or to another technician's row on the team view or dispatch board. Drags snap to the time slot step in Settings.
To change anything else:
- Open the booking and press Change (or
e). - Change the type, title, technicians, day, start, length, travel, site or contact.
- Press Save (or Save anyway if it now clashes).
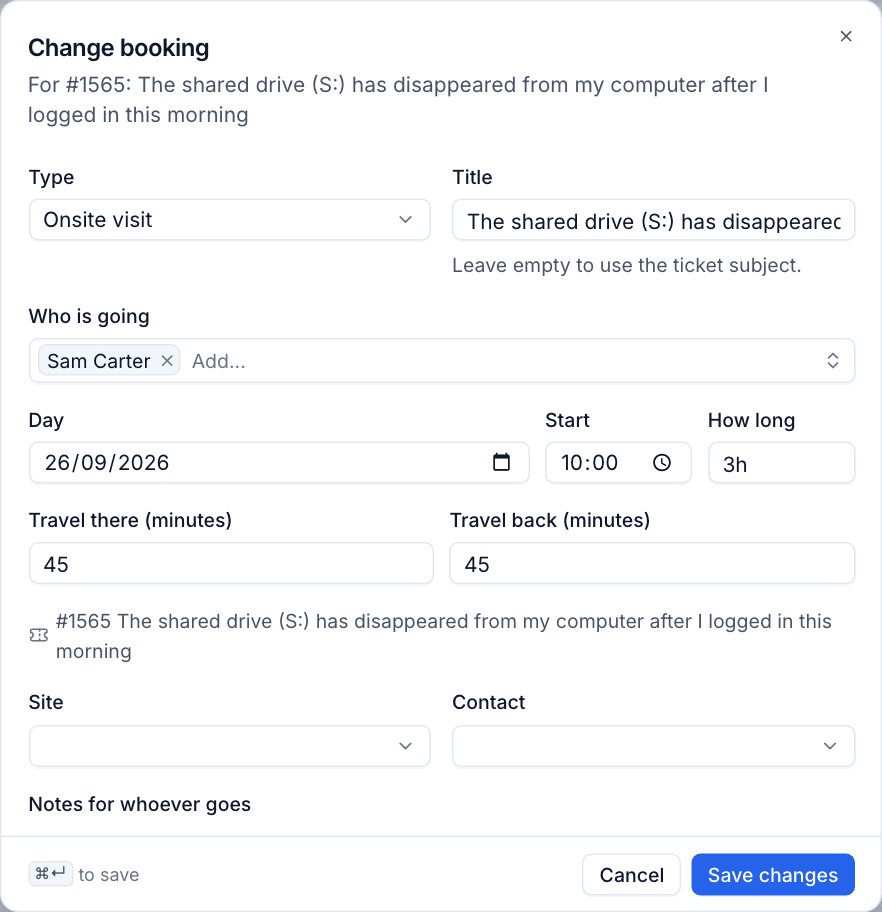
When a booking moves, the customer's earlier answer is cleared and, if Settings say so, they are emailed the new time with an invitation that updates their calendar. The technicians are notified that they were moved, added or taken off.
Cancel a booking
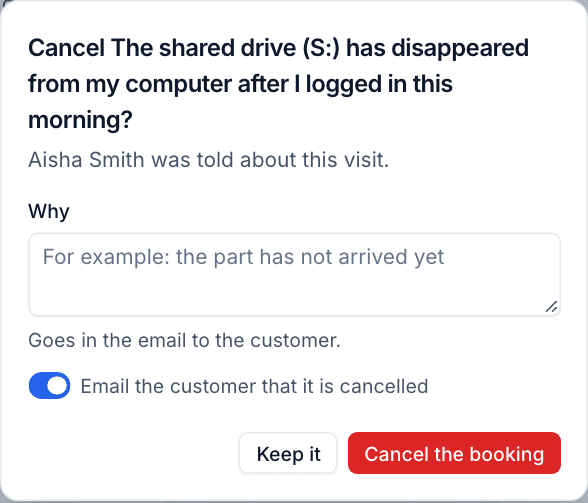
- Open the booking, press ... and choose Cancel the booking.
- Say Why. It goes in the email to the customer.
- Leave Email the customer that it is cancelled on if they should hear about it. The email withdraws the calendar invitation.
- Press Cancel the booking, or Keep it to back out.
Mark a visit as no access
If nobody was there to let the technician in, open the booking, press ... and choose Mark as no access. Describe What happened (for example "reception closed, no answer on the phone, left a card") and confirm. Whoever booked it is told so they can rebook it with the customer, and no time is logged. See Checking in and completing a visit.
Booking types
Booking types live in Settings > Scheduling > Booking types. Each type has:
| Setting | What it does |
|---|---|
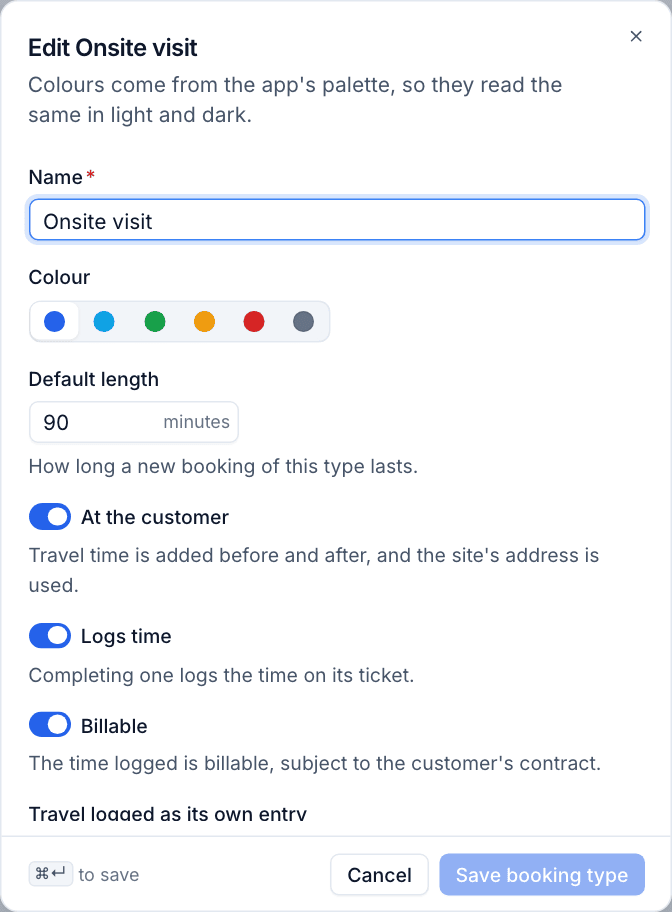
| Name and Colour | How it appears on the calendar. Colours come from the app's palette so they work in light and dark |
| Default length | How long a new booking of this type lasts |
| At the customer | Adds travel before and after, and uses the site's address |
| Logs time | Completing it logs time on the ticket |
| Billable | The time logged is billable, subject to the customer's contract |
| Travel logged as its own entry | Not logged, Non-billable or Billable |
| Default type | New bookings start with this type. Only one type is the default |
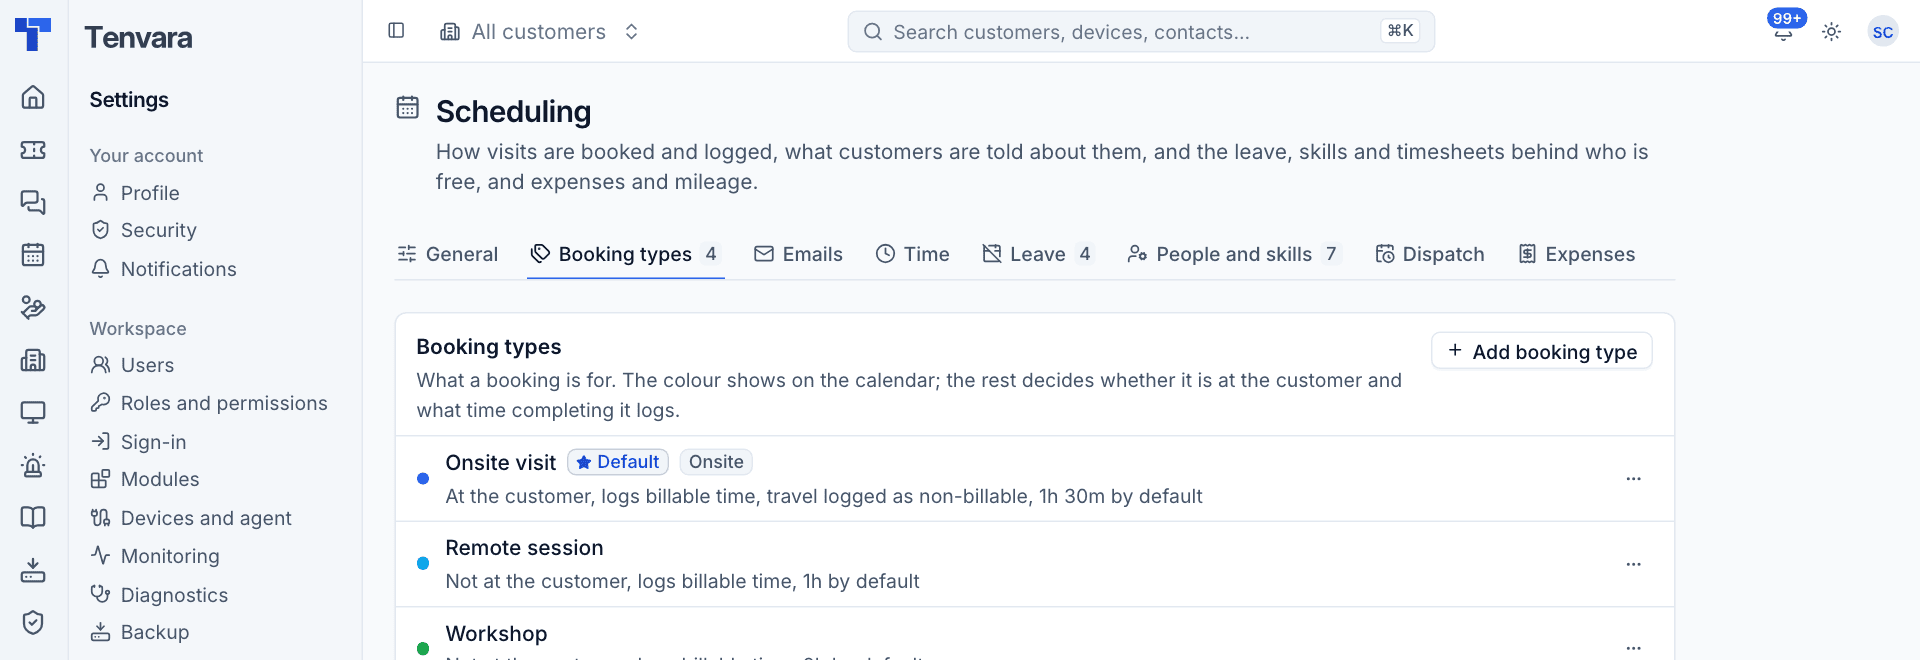
To change one, click it, edit and press Save booking type. Press Add booking type to add another, for example "Installation" or "Out of hours".
Was this page helpful?
Thanks for the feedback.