Site databases, SFTP, cron and logs
Create and restore a site's databases, give developers SFTP access, schedule cron jobs and read the site's logs from Tenvara.
Every one of these runs as an operation on the web server through the agent. You need Infrastructure Manage and an adopted server. Each operation is recorded under the site's Operations tab and in Infrastructure > Web servers > Operations.
Databases
Open the site's Database tab. It lists the site's databases (MariaDB or MySQL on Linux, SQL Server Express on Windows), one user per database, with size, tables, the user, the password (hidden) and the last dump.
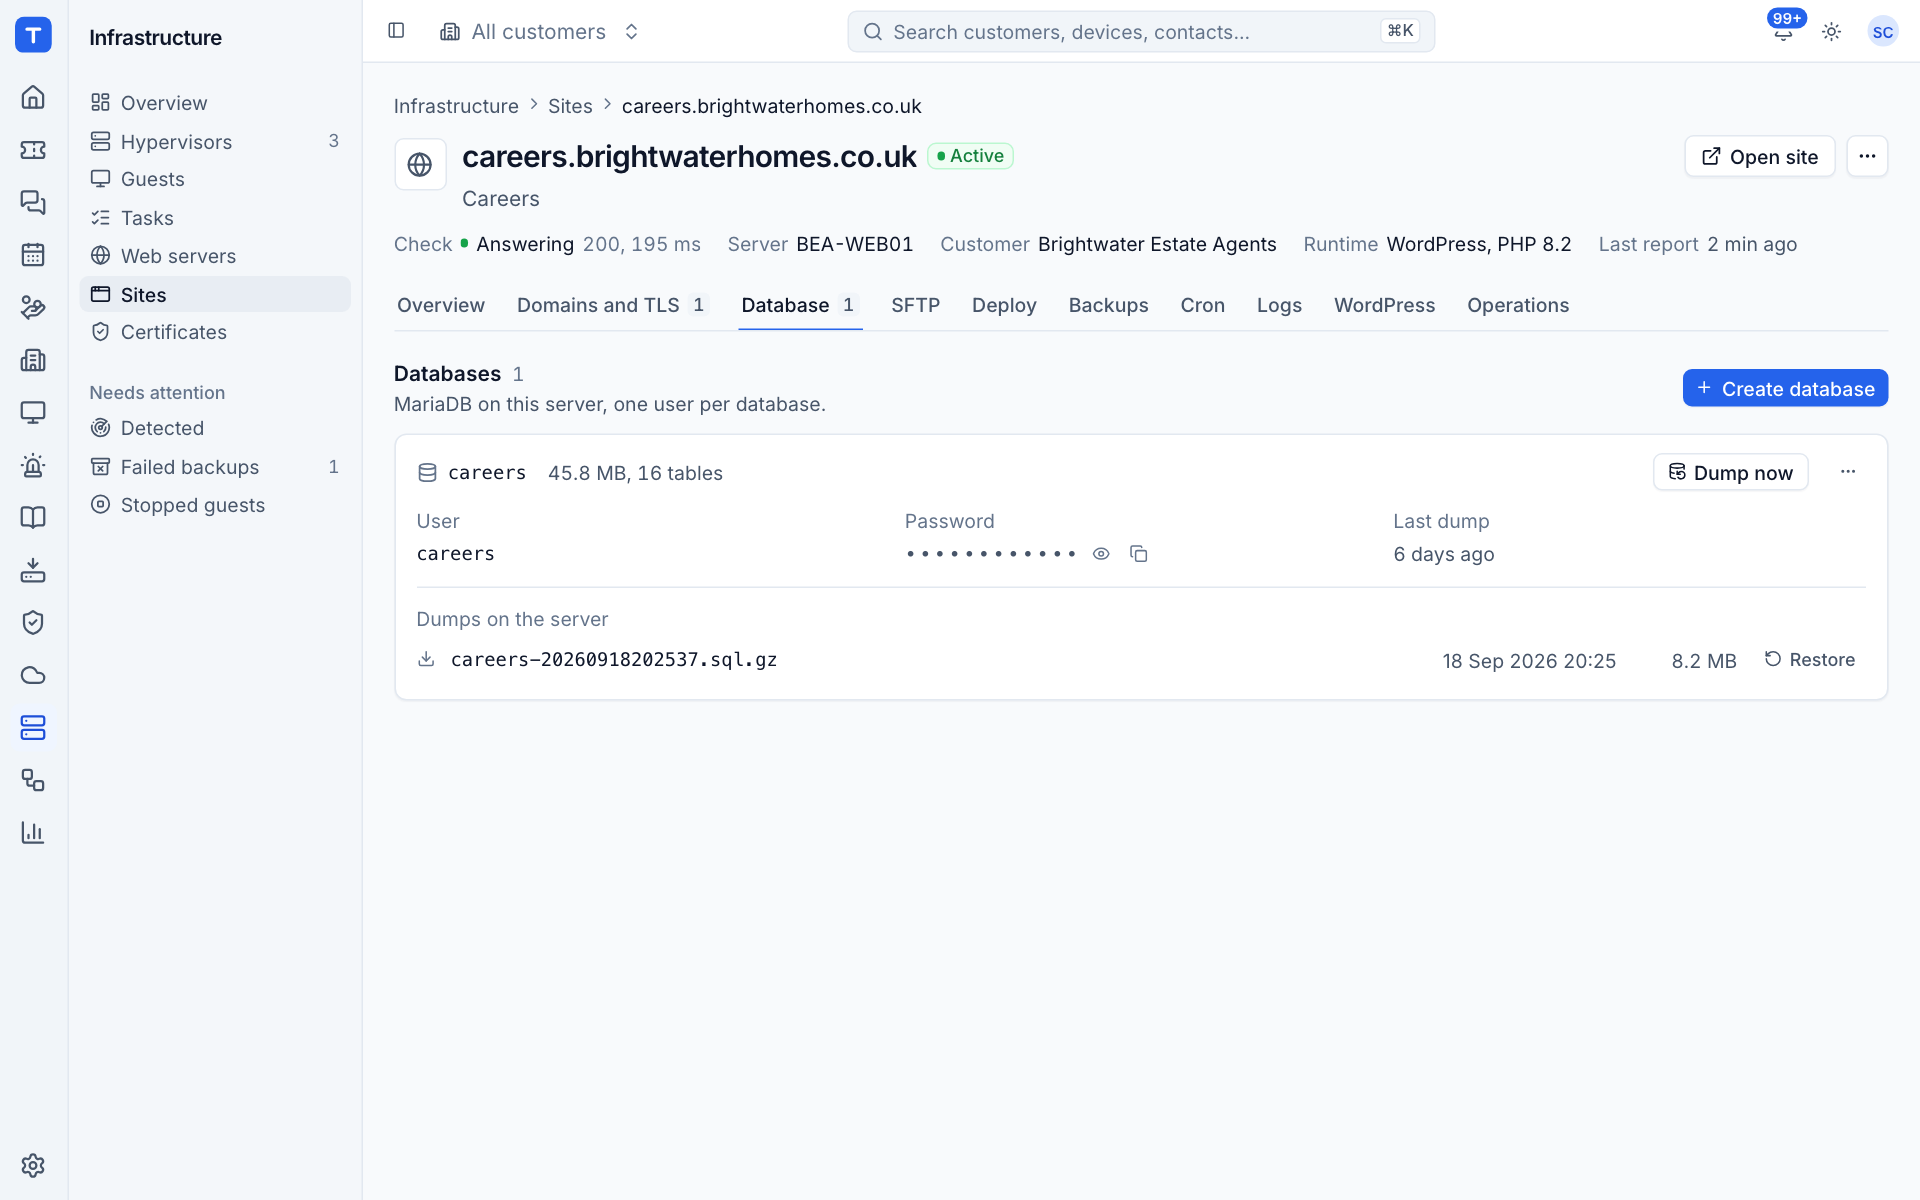
Create a database
- Press Create database.
- Enter a Name (lower case letters, digits and underscores, starting with a letter).
- Enter a User, or leave it empty to use the database's name.
- Create it. The password is generated on the server and kept encrypted in Tenvara; reveal it once the database is created.
Dump and restore
- Dump now writes a compressed dump to the server's backup folder. It appears under Dumps on the server with its time and size.
- Restore beside a dump replaces everything in the database with that dump. Confirm with Restore.
A database can also be restored from a site backup (see Deploys and site backups).
New password and drop
From the database's menu:
- New password: the server generates a new one and Tenvara keeps it encrypted. Anything using the old one (the site's own configuration included) must be updated.
- Drop database (administrators only): the database and its user are removed from the server. Dumps and backups already taken stay. This cannot be undone from Tenvara.
Databases found on the server that do not belong to a managed site are shown under Found on the server and cannot be changed.
SFTP
Open the SFTP tab to give a developer or the customer file access. The SFTP user is chrooted to the site's folder: they see current, releases, shared and logs, and nothing else on the server.
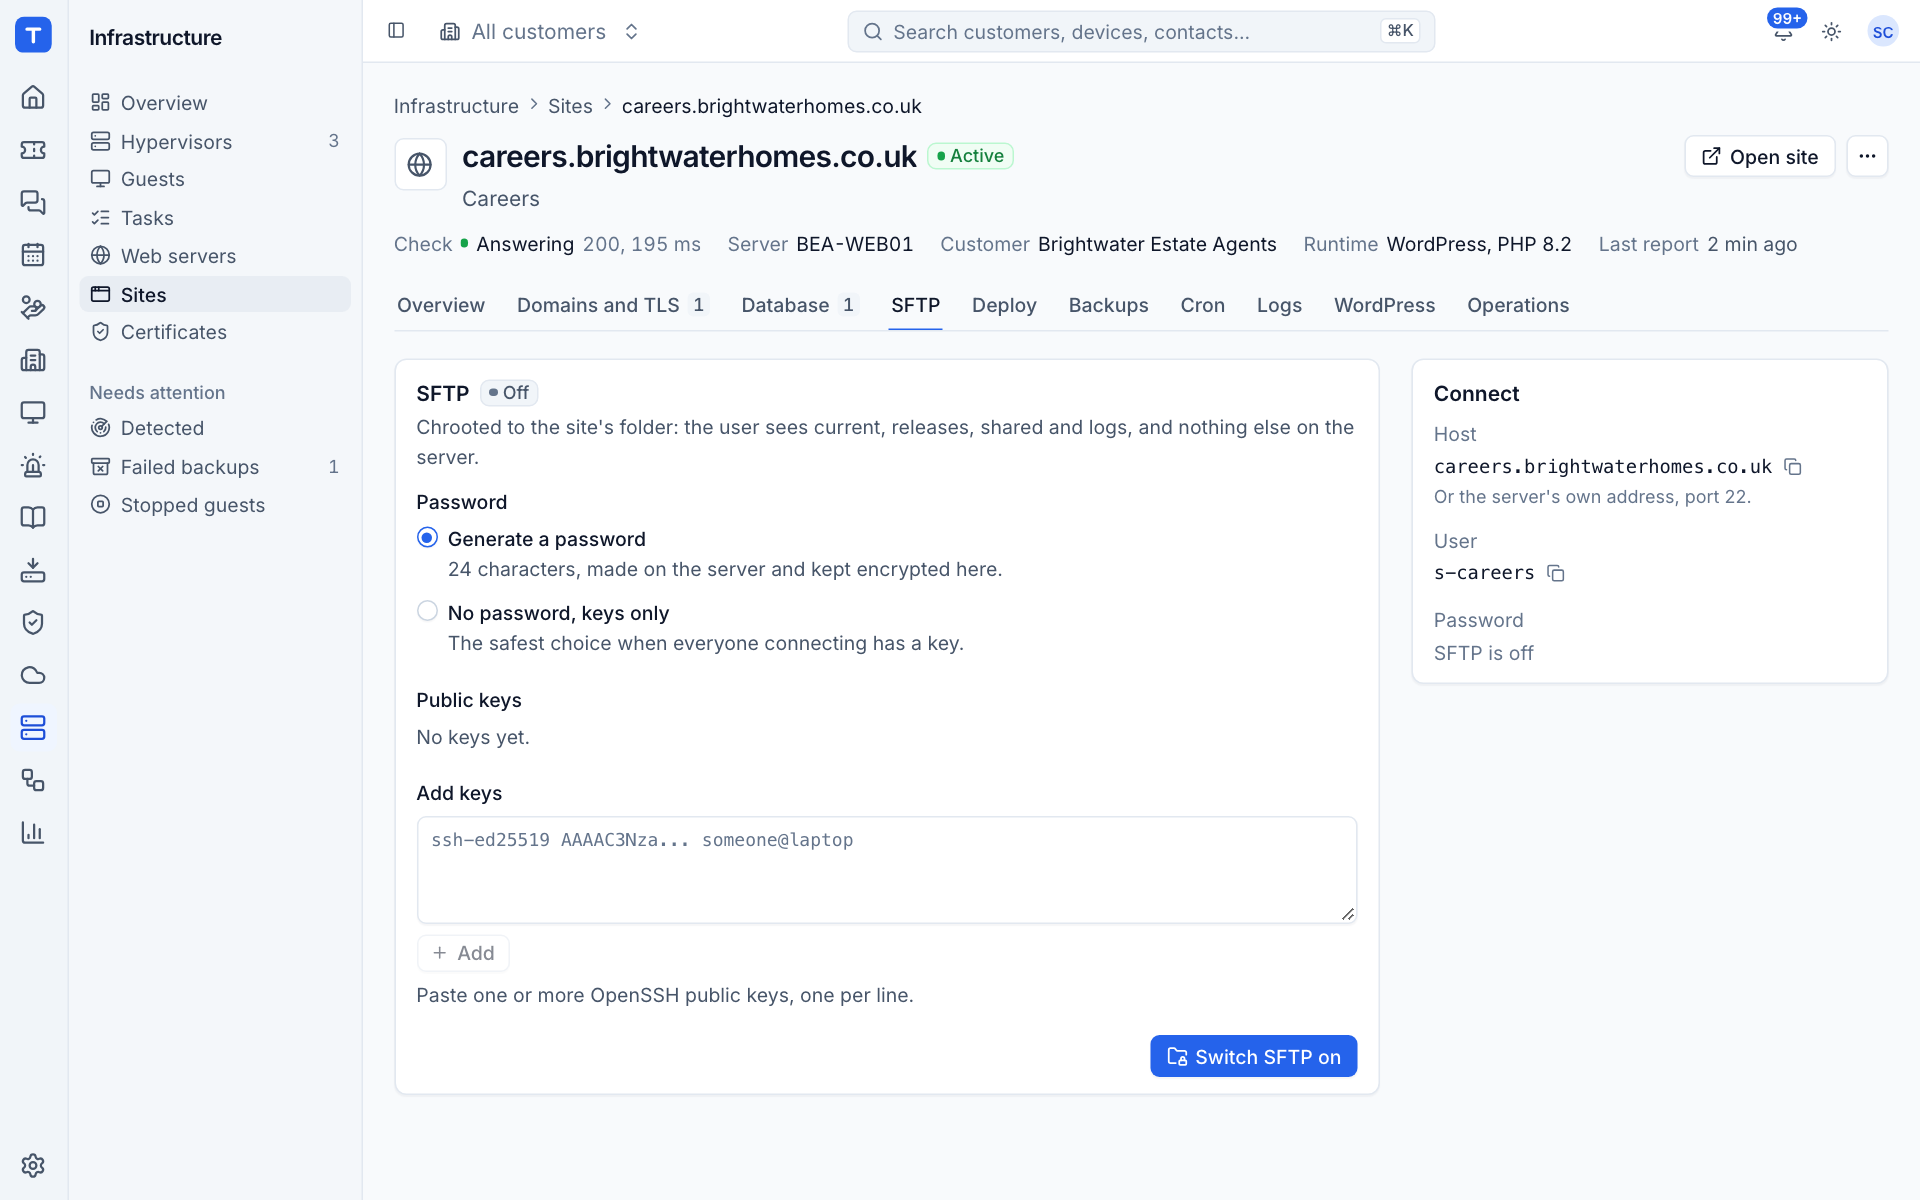
- Choose how the user signs in:
- Generate a password: 24 characters, made on the server and kept encrypted in Tenvara.
- No password, keys only: the safest choice when everyone connecting has a key.
- Keep the current password when SFTP is already on.
- Under Public keys, press Add keys and paste one or more OpenSSH public keys, one per line.
- Press Switch SFTP on (or Save SFTP to change it later).
Connect shows the host, port 22 and the user name (s- followed by the site's short name). Switch SFTP off removes the password and keys, and the user can no longer connect.
Cron
Open the Cron tab. Entries run as the site's own user in the current release, with output going to the site's cron log. Times are the server's.
- Press Add entry.
- Choose a Schedule from the list, or Custom schedule and enter a cron expression.
- Enter the Command, one line only. For a Laravel site, the scheduler every minute is
php artisan schedule:run. - Add more entries, or remove the ones you no longer need.
- Press Save cron.
Logs
Open the Logs tab to read a site's logs without signing in to the server.

- Choose the Log: Access, Error, PHP, Cron, Deploy or App (the application's own log, such as Laravel's).
- Set Lines (up to 5,000).
- Optionally enter text in Containing, for example
500or/wp-login.php. - Press Fetch. Tick Every 15 s to keep it refreshing while you watch.
The server reads the last lines and they show on the page. Nothing is kept in Tenvara but the operation itself.
Was this page helpful?
Thanks for the feedback.