Customers, sites and contacts
Add the companies you look after, their offices and their people, and use the customer page as the one place to see everything about a customer.
Everything in Tenvara hangs off a customer: its devices, tickets, contracts, alerts, documentation and backups. A customer has sites (the offices and locations it works from) and contacts (the people you deal with). Get these right first and the rest of the service desk follows: email is matched to contacts, tickets carry the right site and the portal knows who can sign in.
The customer list
Customers lists every customer with its Status, Primary contact, number of Sites, Contacts and Devices, Open alerts and when it was Added. The sidebar filters by status (Active, Onboarding and Inactive) and has links to the Sites and Contacts lists.
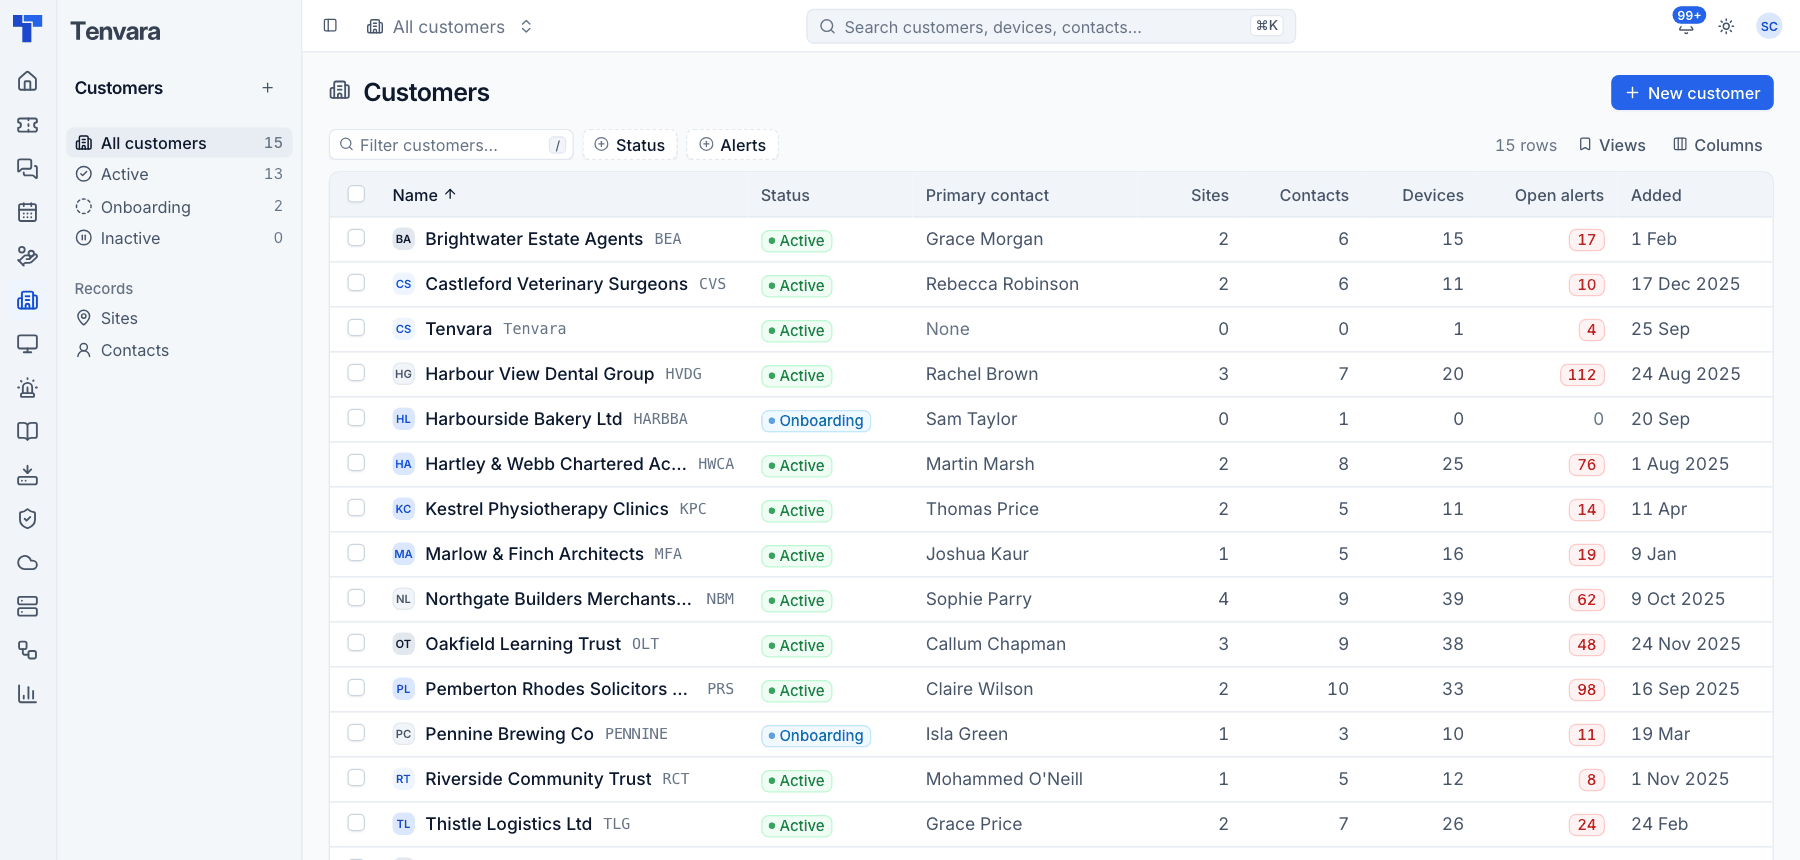
Filter by text, Status or Alerts, choose Columns, and save the filters you use under Views.
Tip: The All customers switcher at the top of every page narrows the whole app to one customer. The ticket inbox, time and contracts all follow it, which is handy when you are working through one customer's issues.
Add a customer
- Go to Customers and press New customer.
- Enter the Name.
- Enter a Code or leave it blank to have one made from the name. The code is a short unique reference, such as
HVDG, shown next to the name across the app. - Choose the Status: Active, Onboarding or Inactive.
- Add the company Email, Phone and Website if you have them.
- External reference is the company's id in another PSA, if you sync with one. Leave it blank otherwise.
- Add any Notes for the team.
- Press Create customer.
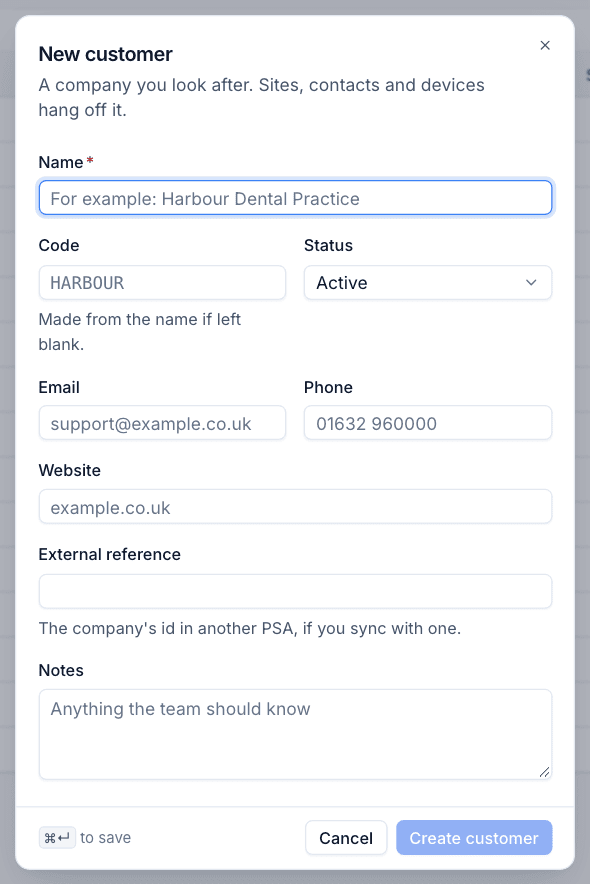
To change a customer later, open it and press Edit (or press e). The More actions menu on the customer page has Mark onboarding and Mark inactive to change the status quickly, plus Run script on their devices, New quote, Search security events, Copy code and Delete customer.
The customer page
Open a customer to see it all in one place. The header shows the code, primary contact, phone, website and how long they have been a customer, with New ticket, Add devices and Edit.
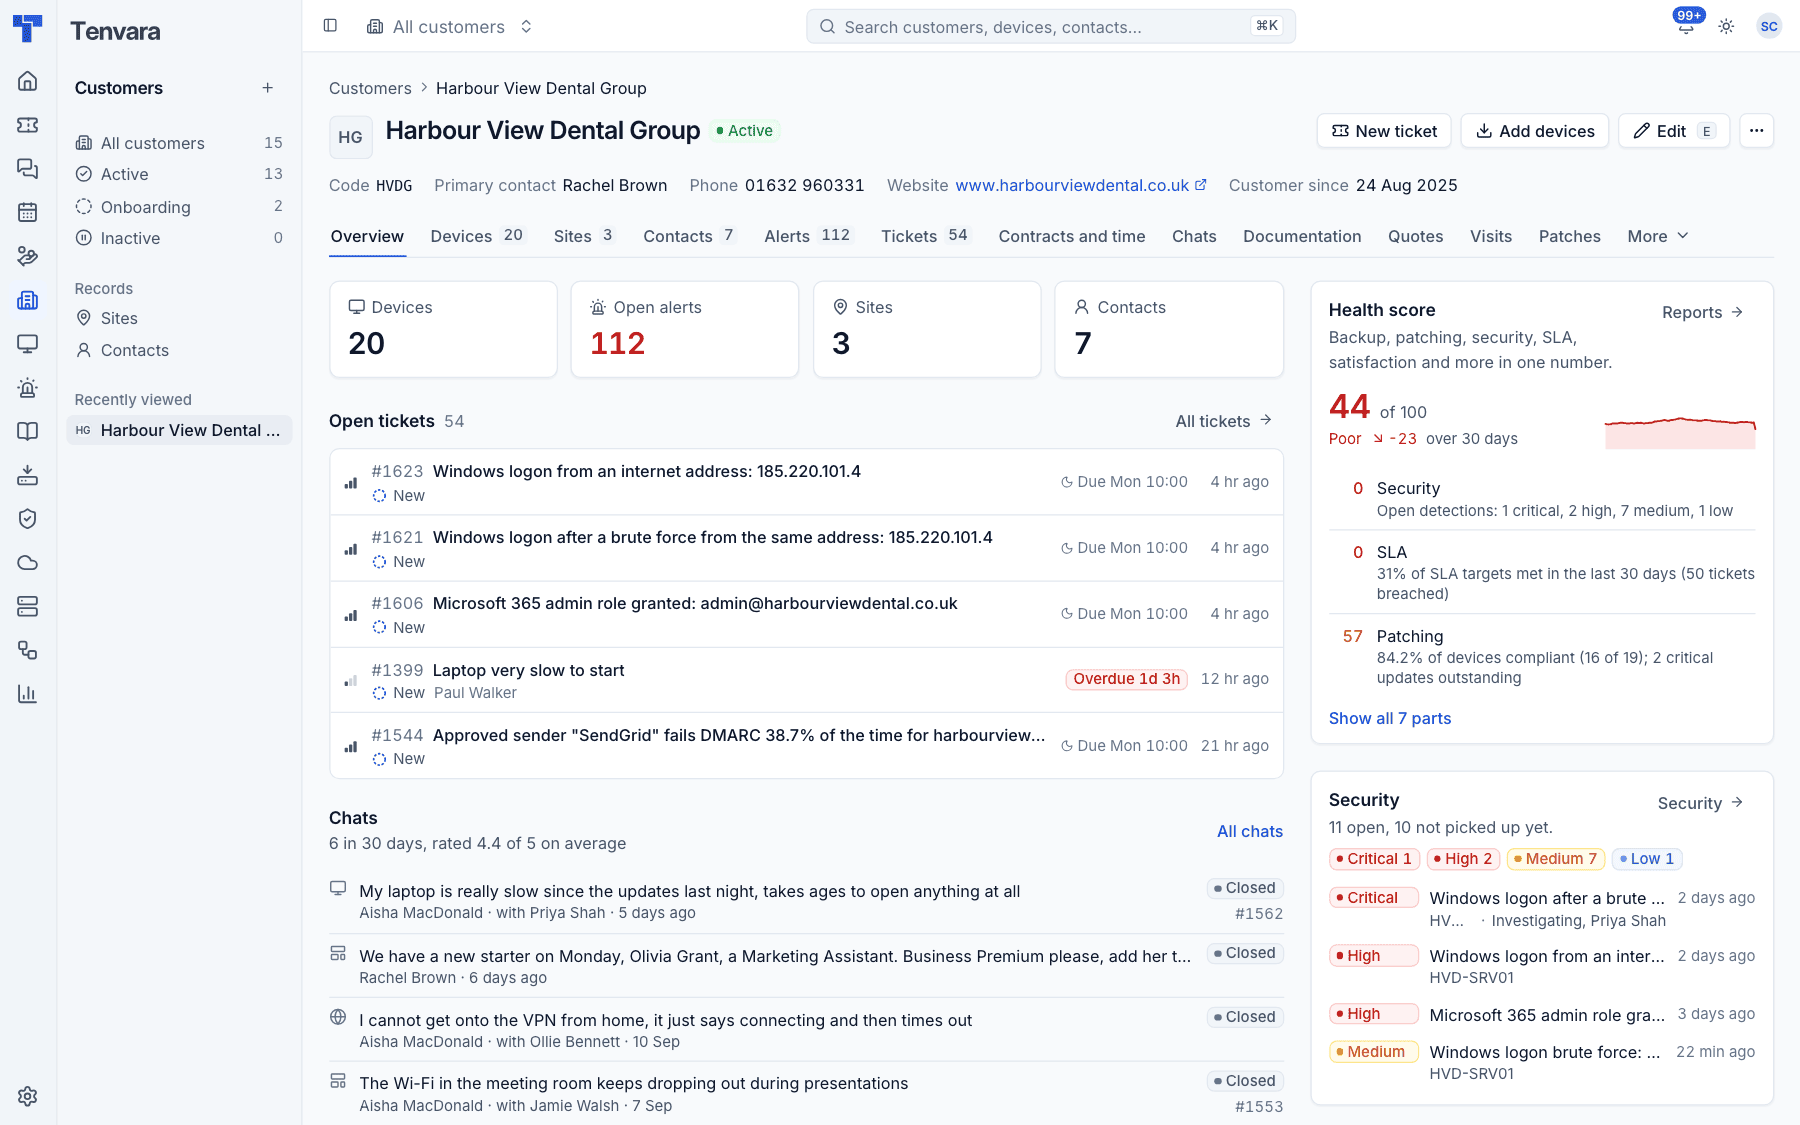
The Overview tab brings together counts of devices, open alerts, sites and contacts, the open tickets, recent chats, open alerts, device health, patching, software, scripts, printers, backup, the health score and security. The other tabs go deeper:
| Tab | Shows |
|---|---|
| Devices, Sites, Contacts | The customer's records |
| Alerts | Open alerts for the customer |
| Tickets | Open or all tickets, with New ticket and Open in the inbox |
| Contracts and time | Contracts, licences billed through them and the last 90 days of time |
| Chats, Documentation, Quotes, Visits, Patches | The matching records for this customer |
| More | Further tabs such as software, printers, backup, activity, reports and security |
Sites
A site is an office or location the customer works from. Contacts and devices can be placed at a site, and a ticket records the site it is about.
- Go to Customers > Sites and press New site (or use the Sites tab on the customer).
- Choose the Customer and enter a Name, such as "Leeds head office".
- Fill in the Address, Town or city, County, Postcode, Country and Phone.
- Turn on Primary site for the customer's main location. Only one site can be primary.
- Press Create site.
Contacts
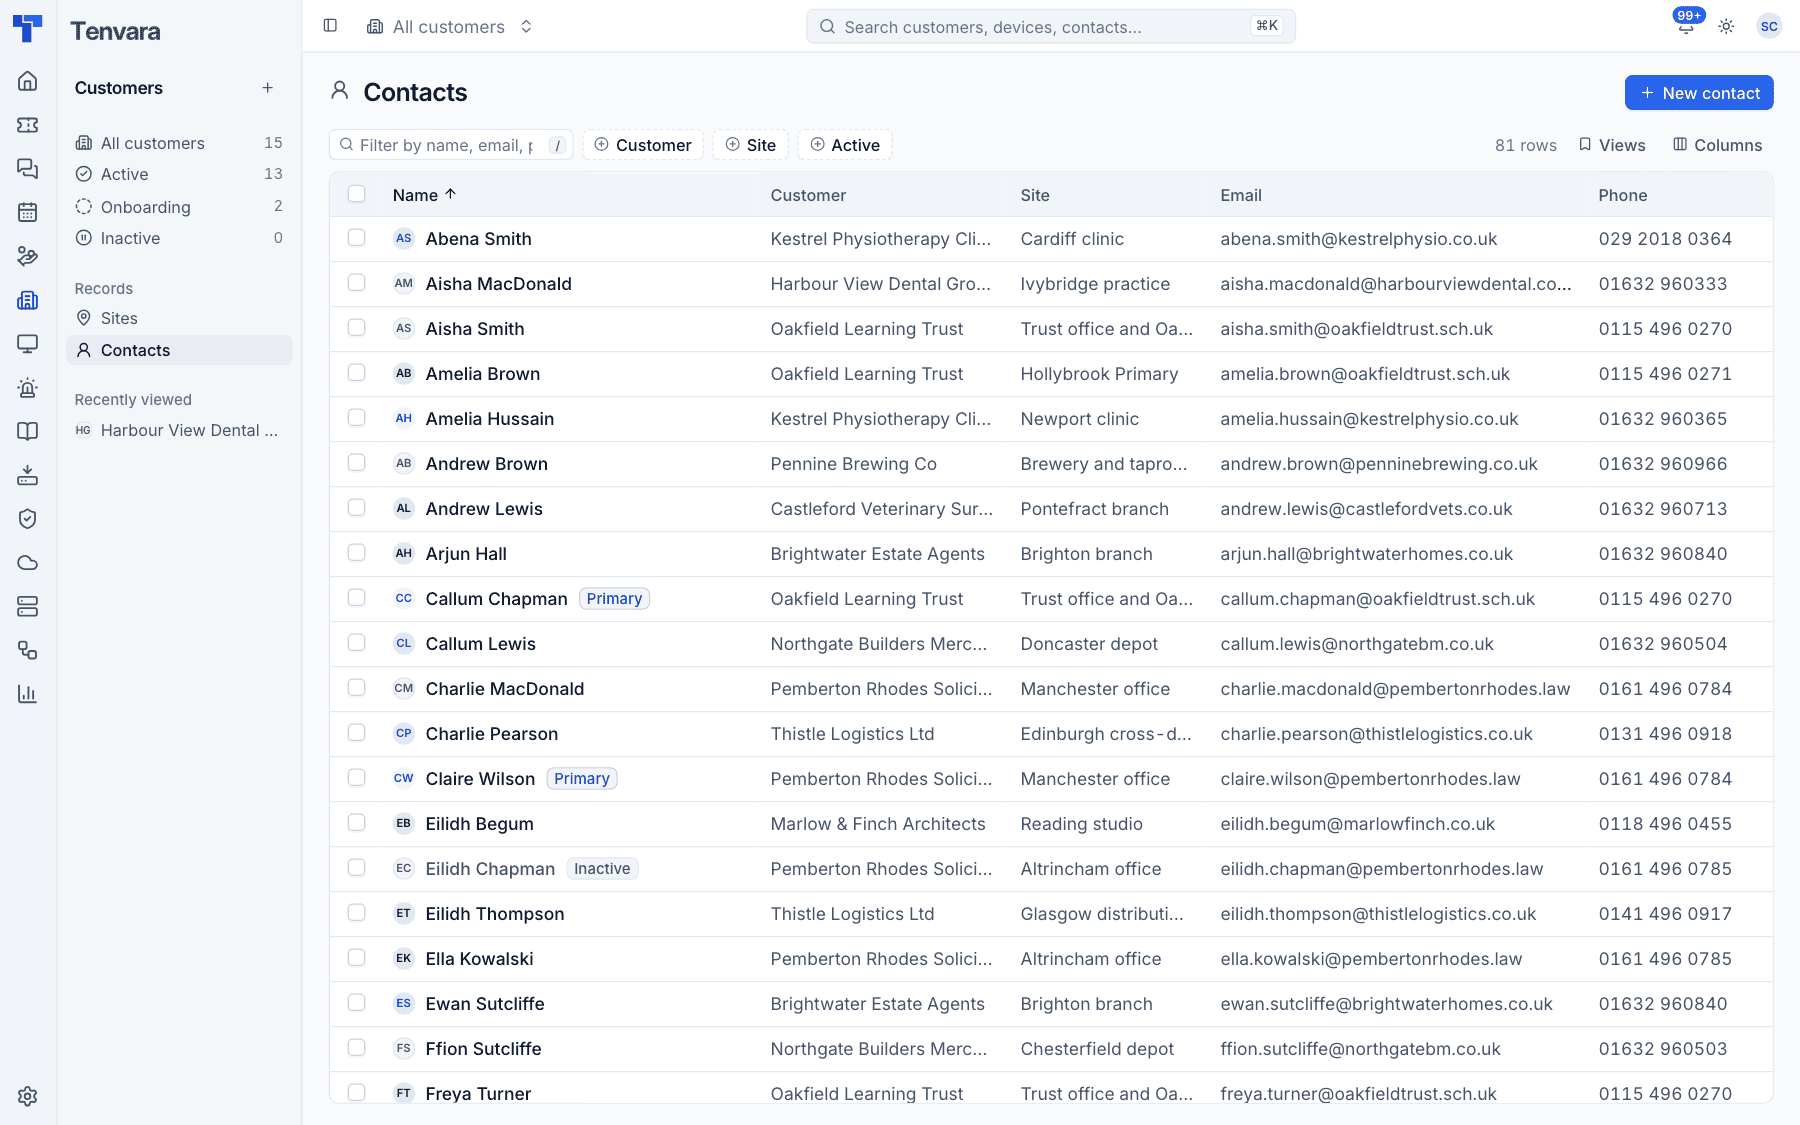
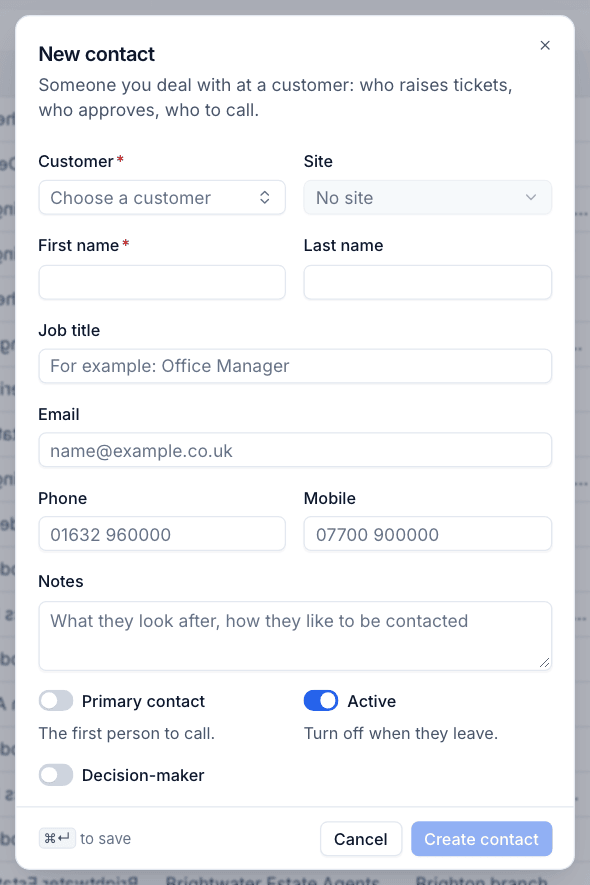
A contact is someone you deal with at a customer: who raises tickets, who approves work, who to call. Customers > Contacts lists everyone with their customer, site, email and phone, with filters for Customer, Site and Active.
Add a contact
- Go to Customers > Contacts and press New contact.
- Choose the Customer and, if you like, the Site.
- Enter the First name, and the Last name, Job title, Email, Phone and Mobile.
- Add Notes, such as what they look after or how they like to be contacted.
- Set the switches:
- Primary contact: the first person to call at this customer.
- Active: turn off when they leave.
- Decision-maker: they get the Net Promoter Score survey.
- Customer portal: let them sign in to see and raise tickets. Turning it off signs them out.
- Press Create contact.
Note: The email address matters. Mail from that address is matched to the contact, so their tickets land on the right customer with them as the requester.
The contact page
A contact's page shows their details and badges (such as Primary contact, Decision-maker and Portal on), how to reach them, their Tickets (open or all, with New ticket), chats, visits, their Microsoft 365 account if they have one, documentation linked to them, notes and activity. The right-hand side shows the customer, their portal access and their site.
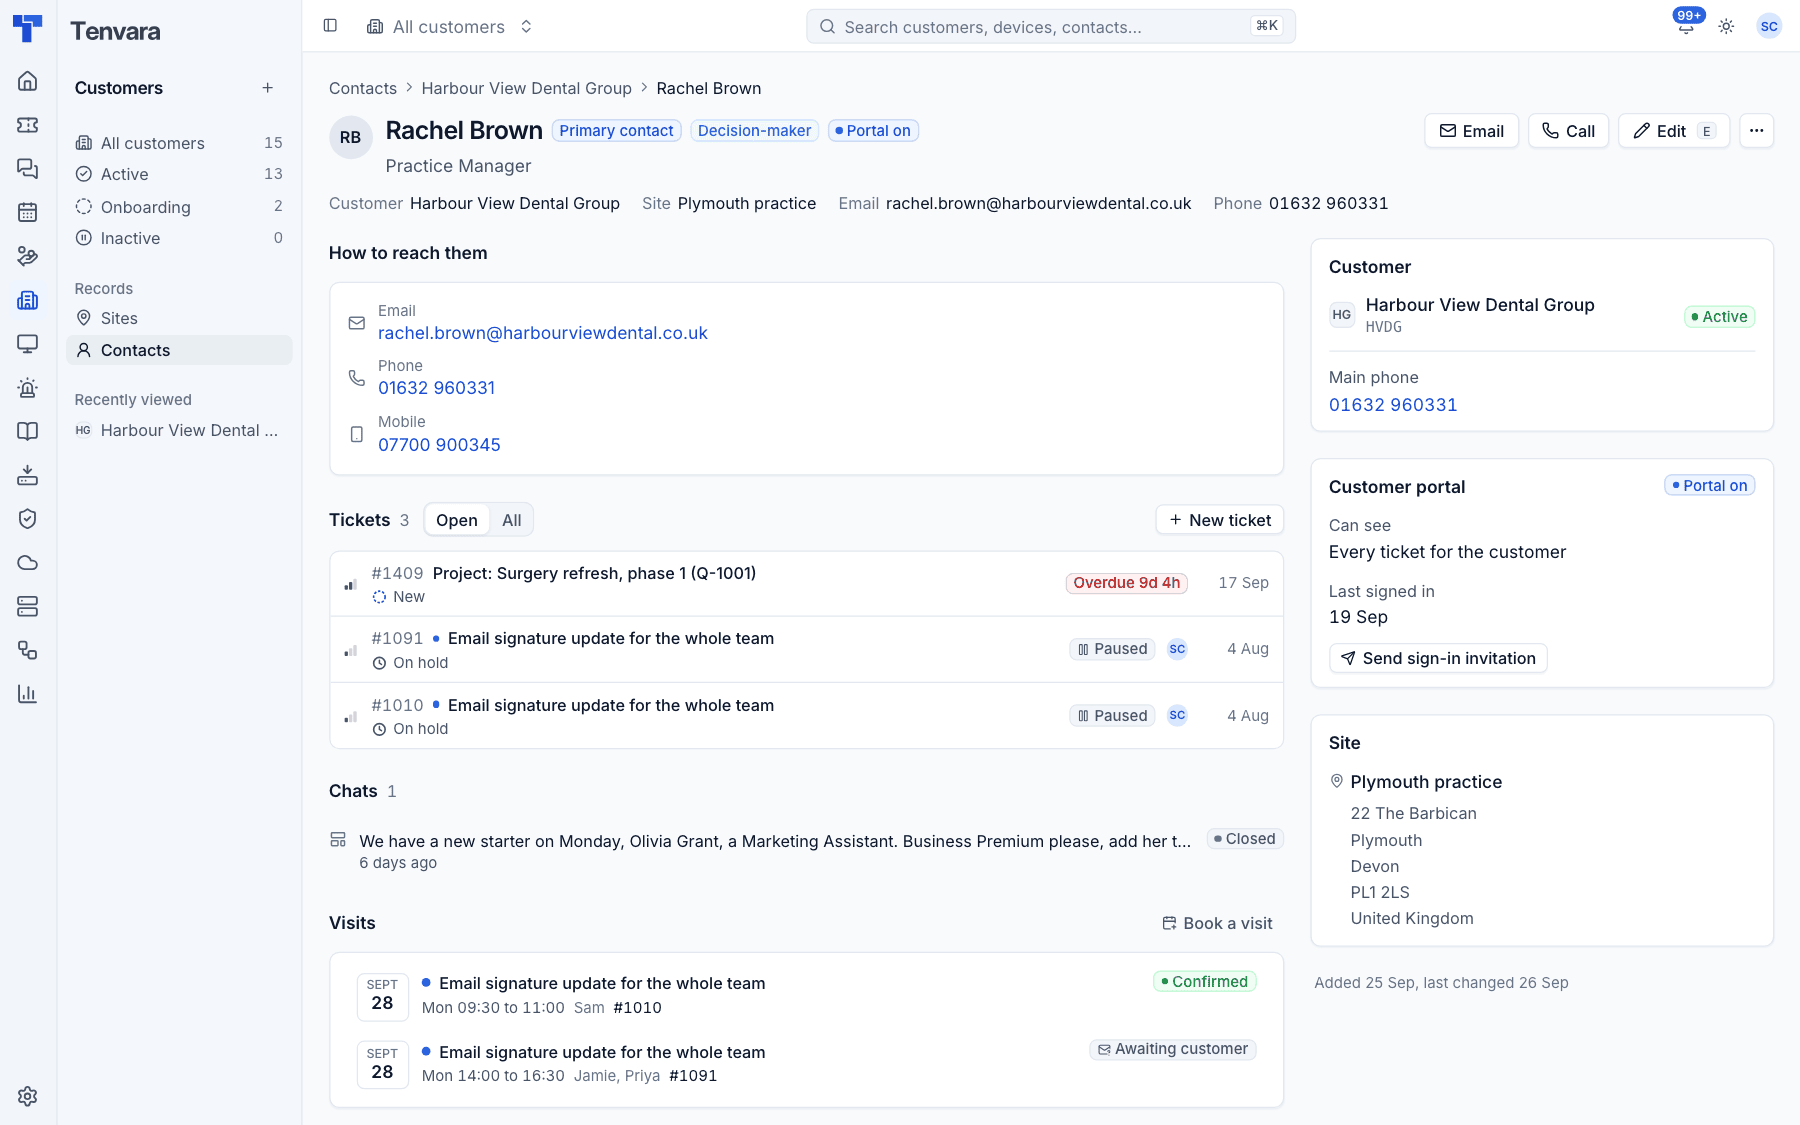
The More actions menu has:
- Decision-maker or Not a decision-maker, to flag them for the Net Promoter Score survey,
- Invite to portal, which emails them a sign-in link,
- Mark inactive,
- Copy email and Copy name and email,
- Delete contact.
Portal access
When editing a contact with Customer portal on, choose what They can see:
- Their own tickets, or
- Every ticket for the customer, useful for an office manager who keeps an eye on everyone's requests.
The Customer portal card on the contact page shows this, when they last signed in and a Send sign-in invitation button. See The customer portal and feedback.
Was this page helpful?
Thanks for the feedback.