Alerts into tickets and notifications
Use alert rules to decide which alerts open tickets, where they go and who gets them, and choose how critical alerts reach you.
An alert on its own stays in the alert list. Alert rules decide which alerts become tickets, in which queue, at what priority and for whom, and whether the ticket resolves itself when the alert clears. Your personal notification settings decide how critical alerts reach you.
Alert rules
Open Settings > Alert rules.
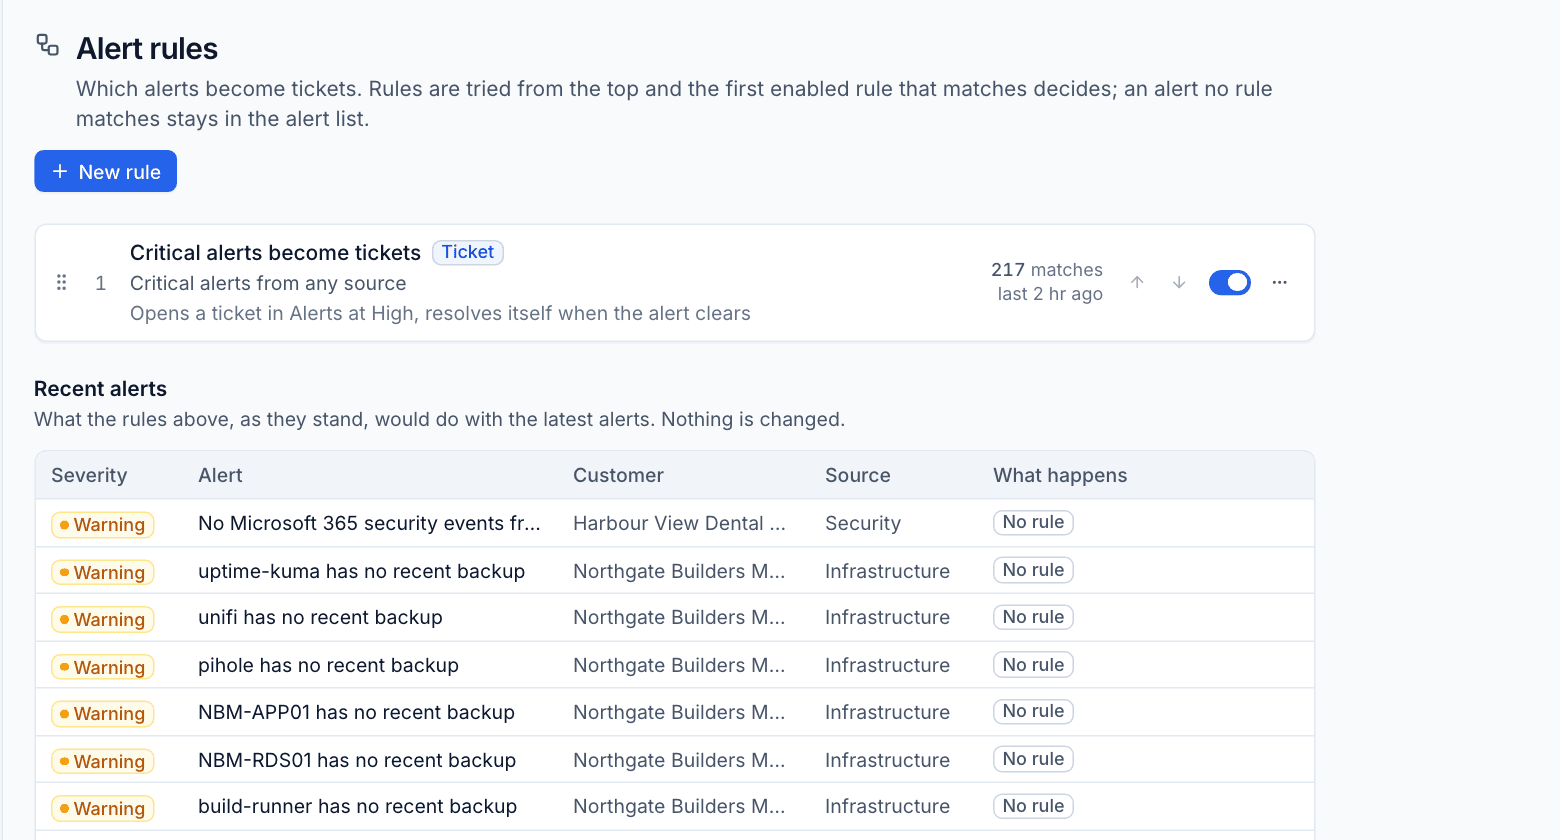
Rules are tried from the top, and the first enabled rule that matches an alert decides what happens to it. An alert no rule matches stays in the alert list. Each rule shows what it matches, what it does, how many alerts it has matched and when it last did.
Below the rules, Recent alerts shows what the rules, as they stand, would do with the latest alerts, and which rule would take each one. Nothing is changed; it is a safe way to check your rules.
Create a rule
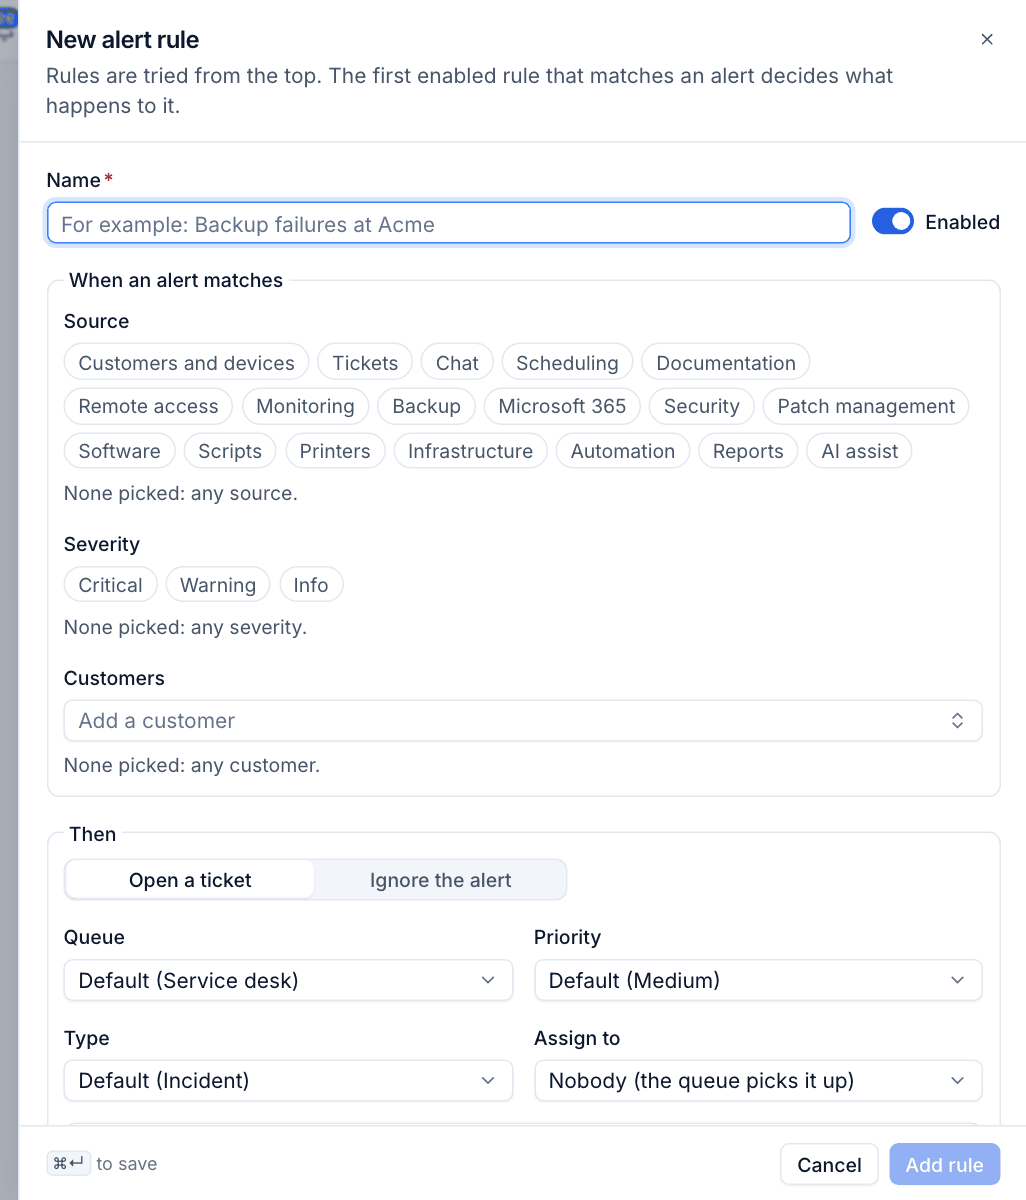
- Click New rule and give it a Name, for example Backup failures at Acme. Leave Enabled on.
- Under When an alert matches, pick any of:
- Source: Monitoring, Backup, Patch management, Security, Microsoft 365, Infrastructure and the rest. None picked means any source.
- Severity: Critical, Warning or Info. None picked means any severity.
- Customers: none picked means any customer.
- Under Then, choose Open a ticket or Ignore the alert.
- For a ticket, choose the Queue, Priority, Type (such as Incident or Alert) and Assign to (or leave it for the queue to pick up).
- Tick Resolve the ticket when the alert clears if you want it closed automatically. It only resolves when every alert on the ticket has cleared and nobody has replied to the customer.
- Use Test against recent alerts to see which recent alerts the rule would catch, then click Add rule.
The same problem again (same source and the same underlying issue) is added to its open ticket instead of opening another. Alerts that are not for a customer never open tickets.
Order, switch off and edit
- Drag a rule, or use the up and down arrows, to change the order. Put narrow rules (one customer, one source) above broad ones.
- Use the switch to disable a rule without deleting it.
- The ... menu edits or deletes a rule.
Tip: A common set-up is a first rule that ignores info alerts, then rules for the sources you care about most, then a catch-all such as Critical alerts become tickets at the bottom.
How alerts reach you
Each person chooses where notifications reach them under Settings > Notifications.
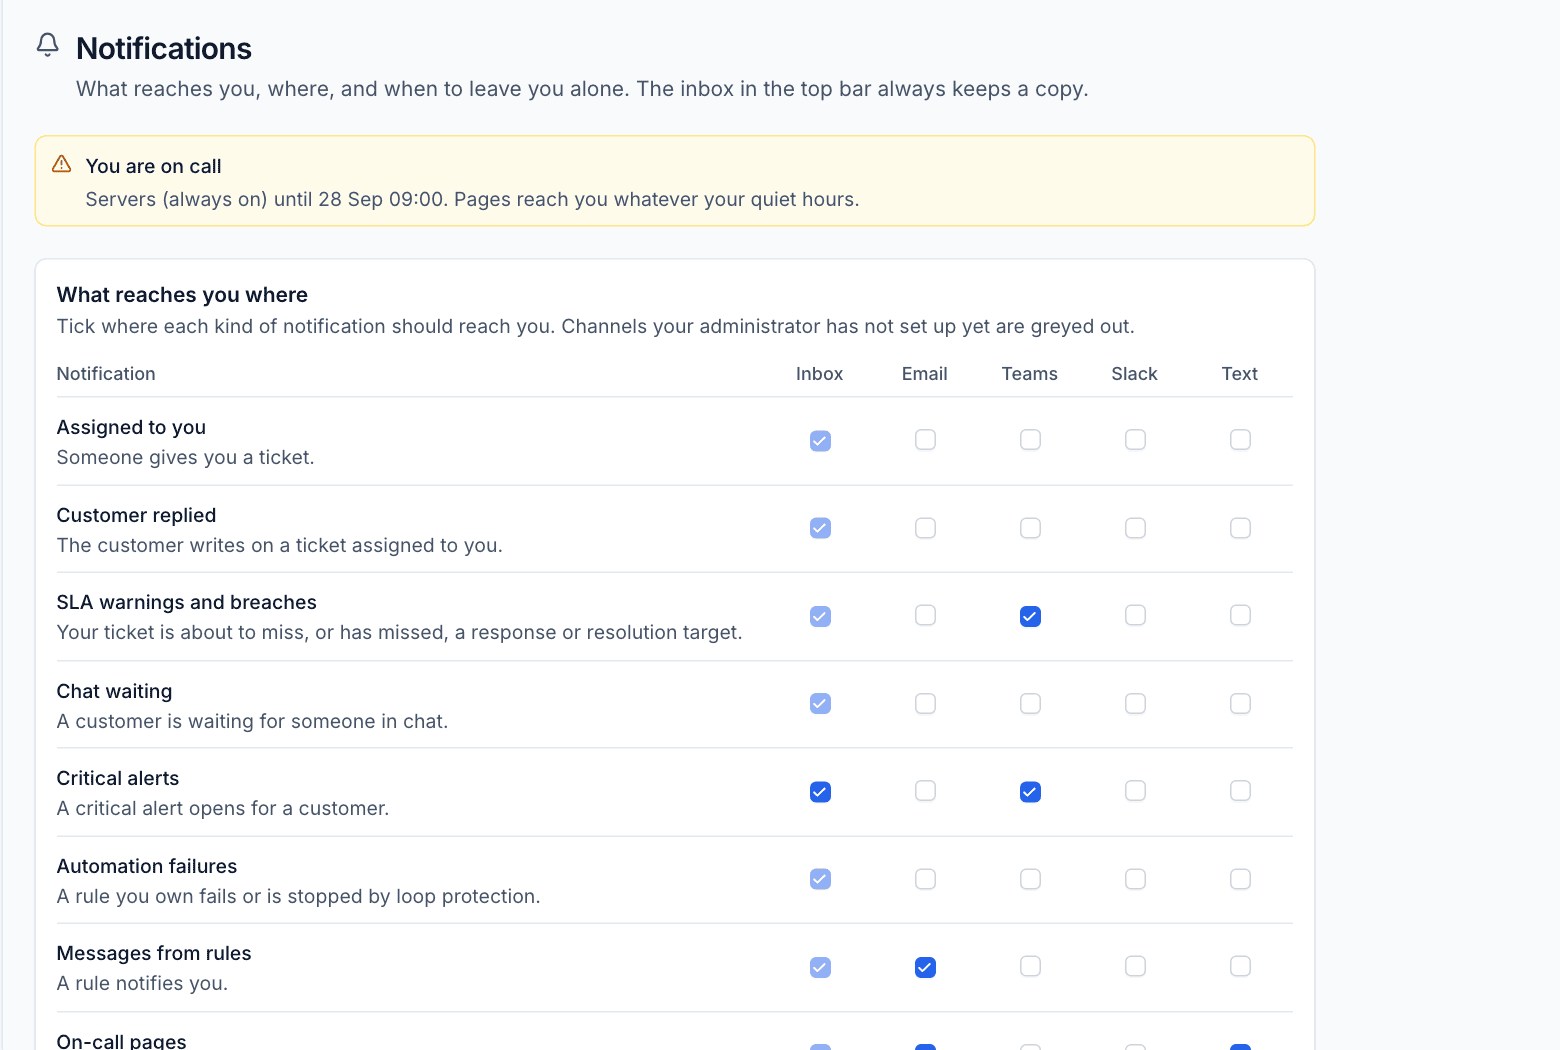
- In What reaches you where, find Critical alerts (a critical alert opens for a customer).
- Tick the channels you want: Inbox, Email, Teams, Slack or Text. Channels your administrator has not set up yet are greyed out. The inbox in the top bar always keeps a copy.
- Under How to reach you, add your mobile number, Teams sign-in or Slack member ID as needed, and use Send yourself a test.
- Set Quiet hours if you want email, Teams, Slack and texts to wait outside working hours. On-call pages always get through.
- Click Save notification settings.
Once an alert becomes a ticket, the usual ticket notifications apply too, such as Assigned to you.
Out of hours: on-call
For alerts that must reach someone at night, use the on-call rotas in Automation > On-call. Automation rules can page whoever is on call when an alert opens, escalate if nobody acknowledges, and record who acknowledged each page. When you are on call, Settings > Notifications says so at the top, and pages reach you whatever your quiet hours. See Automation.
Was this page helpful?
Thanks for the feedback.