Expenses and mileage
Record what technicians spend and the business miles they drive, claim it back through approval and payroll, and rebill it to customers on their invoice.
Technicians spend money on visits and tickets: parking, tolls, parts, train fares. They also drive their own cars on business. Tenvara records both against the visit or ticket they were for, pays them back through an approval like a timesheet, and, when marked to rebill, charges them to the customer on the contract's monthly invoice exactly once.
Open Schedule > Expenses. The line under the title shows how many miles you have claimed this tax year and how many are left at the higher rate.
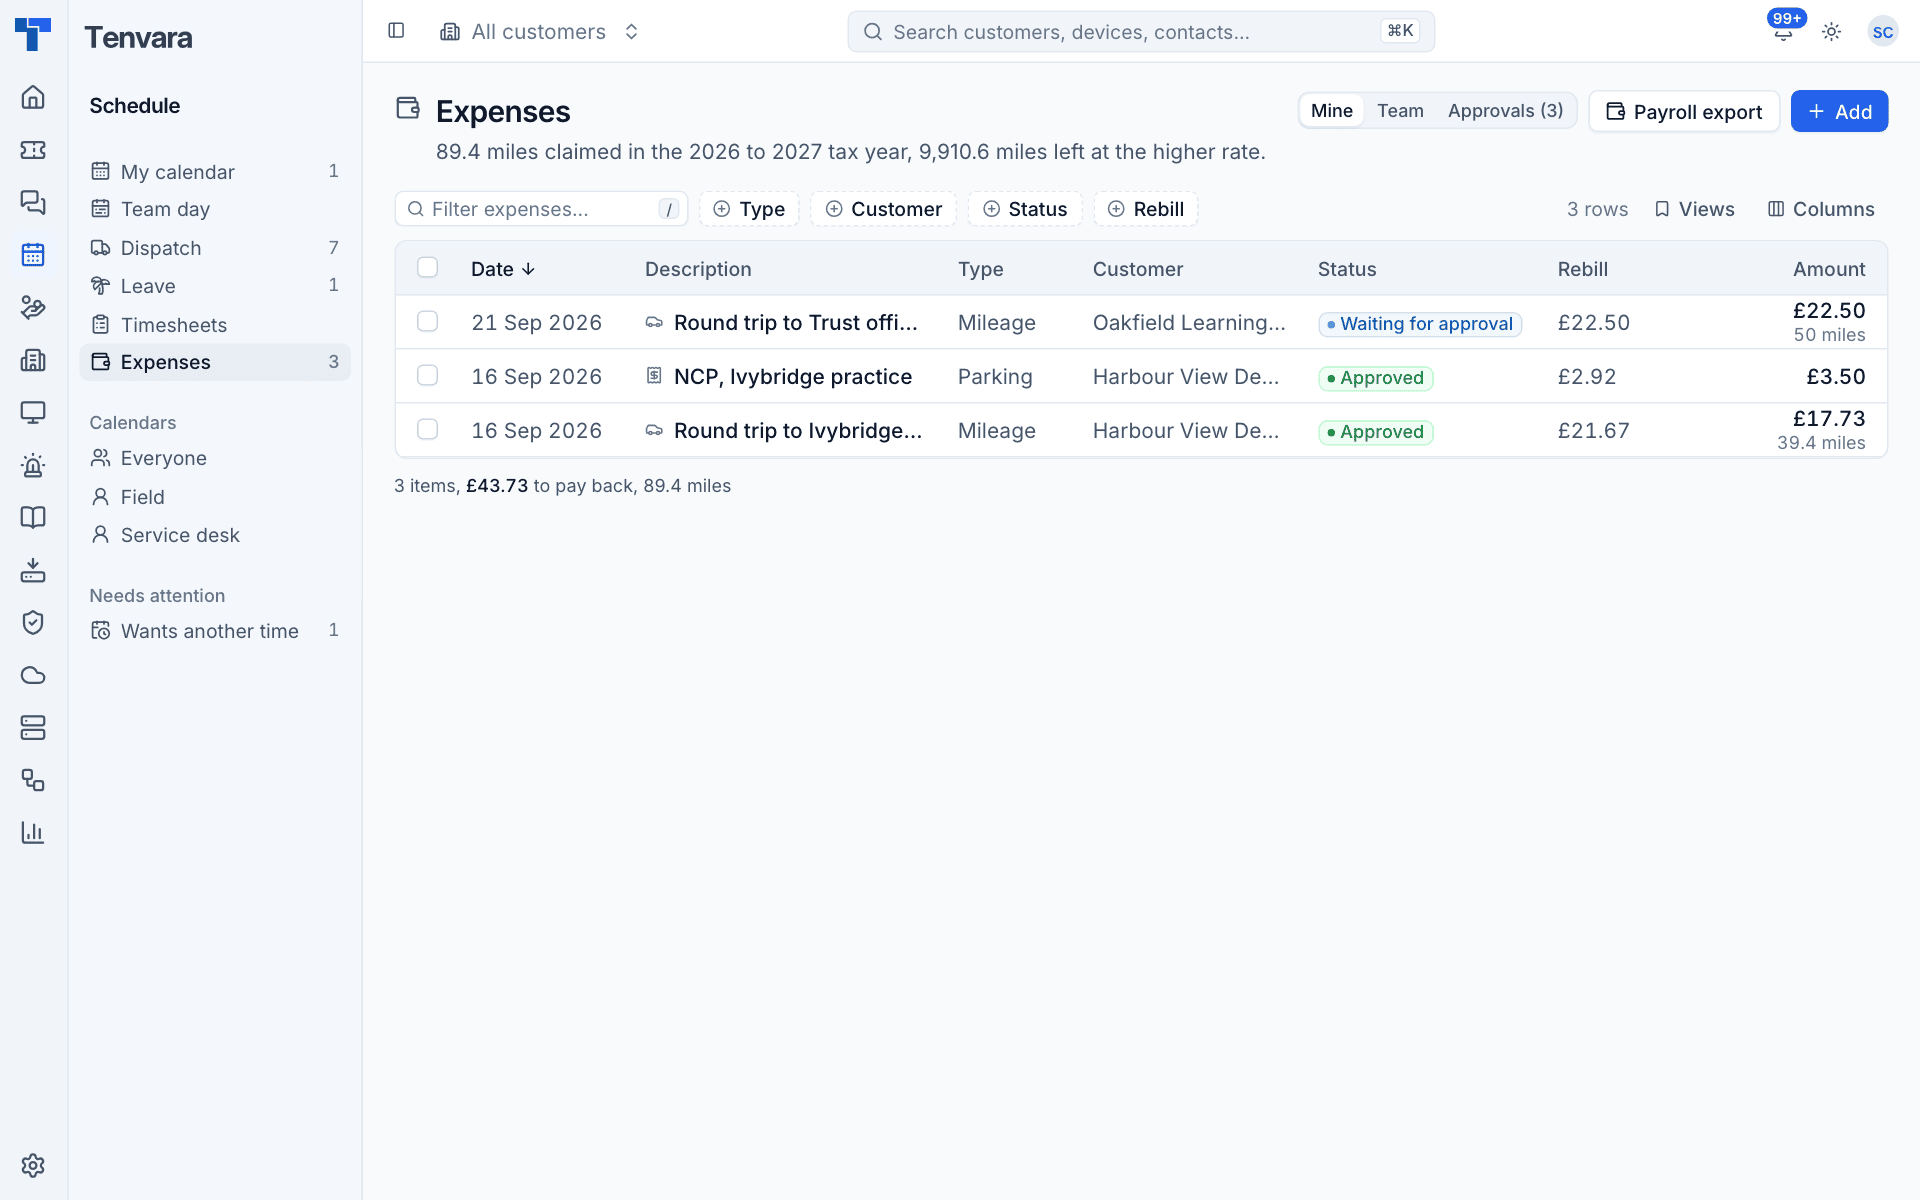
The switch at the top has Mine, Team and Approvals (with how many are waiting). The list shows the date, description, type, customer, status, the rebill amount and the amount to pay back, and the total underneath. Filter by type, customer, status and rebill, and save views you use often. Click a row to see the item in full, with its ticket, visit, VAT, rebill and receipt.
Where expenses are added
- Completing a visit: the Complete visit dialog offers the mileage for the round trip and has Add an expense. See Checking in and completing a visit.
- The booking panel: the Expenses section has Add, for anyone else who went on the visit.
- A ticket: the Expenses block in the ticket's details, after Time.
- Schedule > Expenses: Add, for anything else.
On a visit, the ticket and customer come from the booking; on a ticket, the customer comes from the ticket; elsewhere you choose the customer.
Add an expense
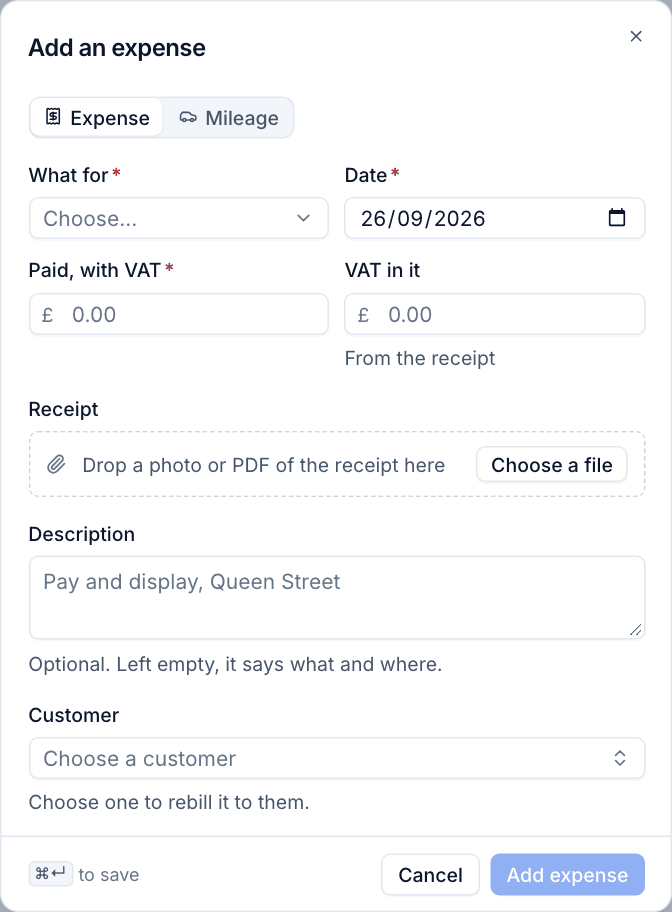
- Press Add and leave Expense selected.
- Choose What for: Parking, Tolls, Parts, Train or Other (or your own kinds).
- Set the Date and Paid, with VAT. VAT in it is worked out from the kind's VAT rate until you type your own figure from the receipt.
- Drop a photo or PDF of the Receipt, or press Choose a file (up to 10 MB).
- Add a Description such as "Pay and display, Queen Street". Left empty, it says what and where.
- Choose the Customer if it should be rebilled to them, and set whether it is rebilled and with what markup. The kind of expense sets the starting values.
- Press Add expense.
Add mileage
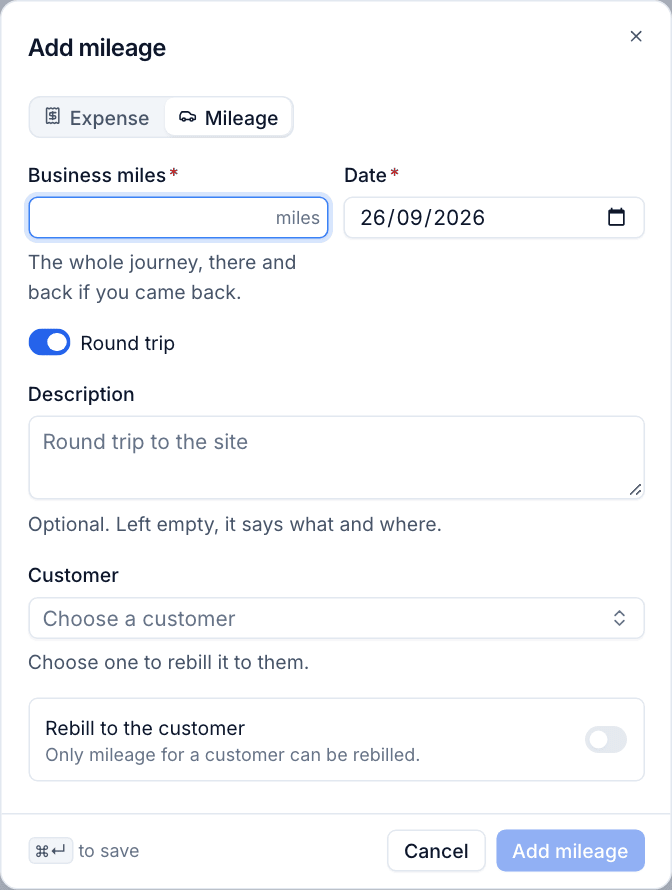
- Press Add and choose Mileage.
- Enter the Business miles and the Date. Leave Round trip on if you came back the same way.
- Add a Description, such as "Round trip to the site".
- Choose the Customer and turn on Rebill to the customer to charge it on their invoice. Only mileage for a customer can be rebilled.
- Press Add mileage.
How mileage is paid
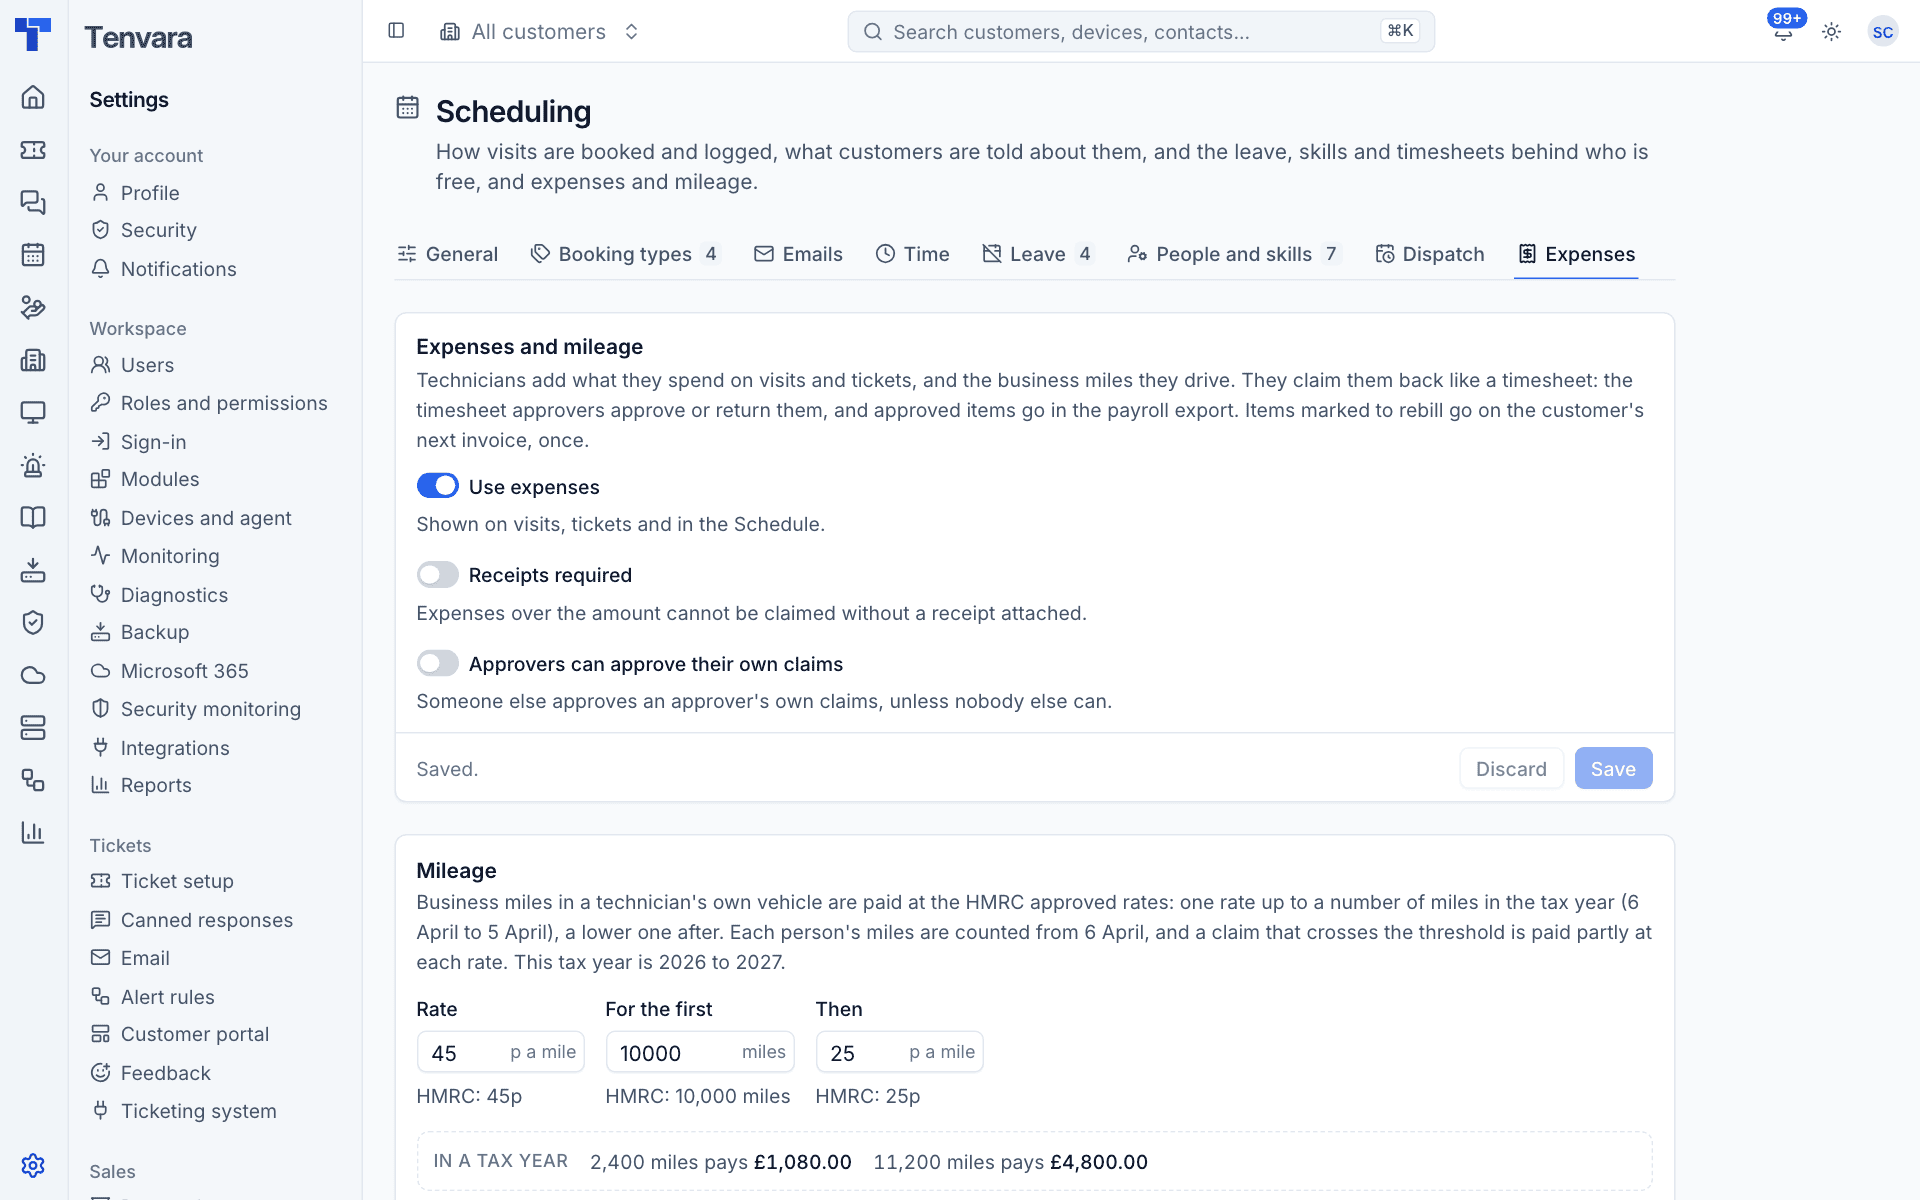
Mileage is paid at the HMRC approved rates in Settings: 45p a mile for the first 10,000 miles in the tax year, then 25p. The tax year runs from 6 April, and each person's count starts again then.
- A claim that crosses the threshold is paid partly at each rate, and the split is shown.
- If an earlier claim is added late, every unpaid claim that year is worked out again in date order, so the threshold always falls in the right place.
- Claims already paid through payroll keep what they paid.
Rebilled mileage is charged to the customer at their own rate per mile (on the customer's Visits tab), or the default in Settings. Technicians are still paid the HMRC rates.
Claim, approve and return
Items start as not claimed. When you are ready, claim them from Mine: all of them, or just the ones you select, with an optional note. The approvers (the timesheet approvers and administrators) are told.
Approvers open Approvals, select items and press Approve or Return. A returned item comes back with the approver's note: change it and claim it again. The claimant is told either way.
Note: Nobody approves or changes their own claims once claimed, unless Approvers can approve their own claims is on, or they are the only approver. Settings can also require a receipt for expenses over an amount before they can be claimed.
Approvers can add items on someone else's behalf.
Pay back through payroll
- On Schedule > Expenses, press Payroll export (approvers only).
- Under Items, choose Not paid yet (every approved item not in an export before, spent up to the date you choose) or All in a period (to list a period again).
- Check the summary: items, expenses, mileage and total for each person.
- Under In the file, choose One row per item or One row per person.
- Press Download CSV and give it to payroll.
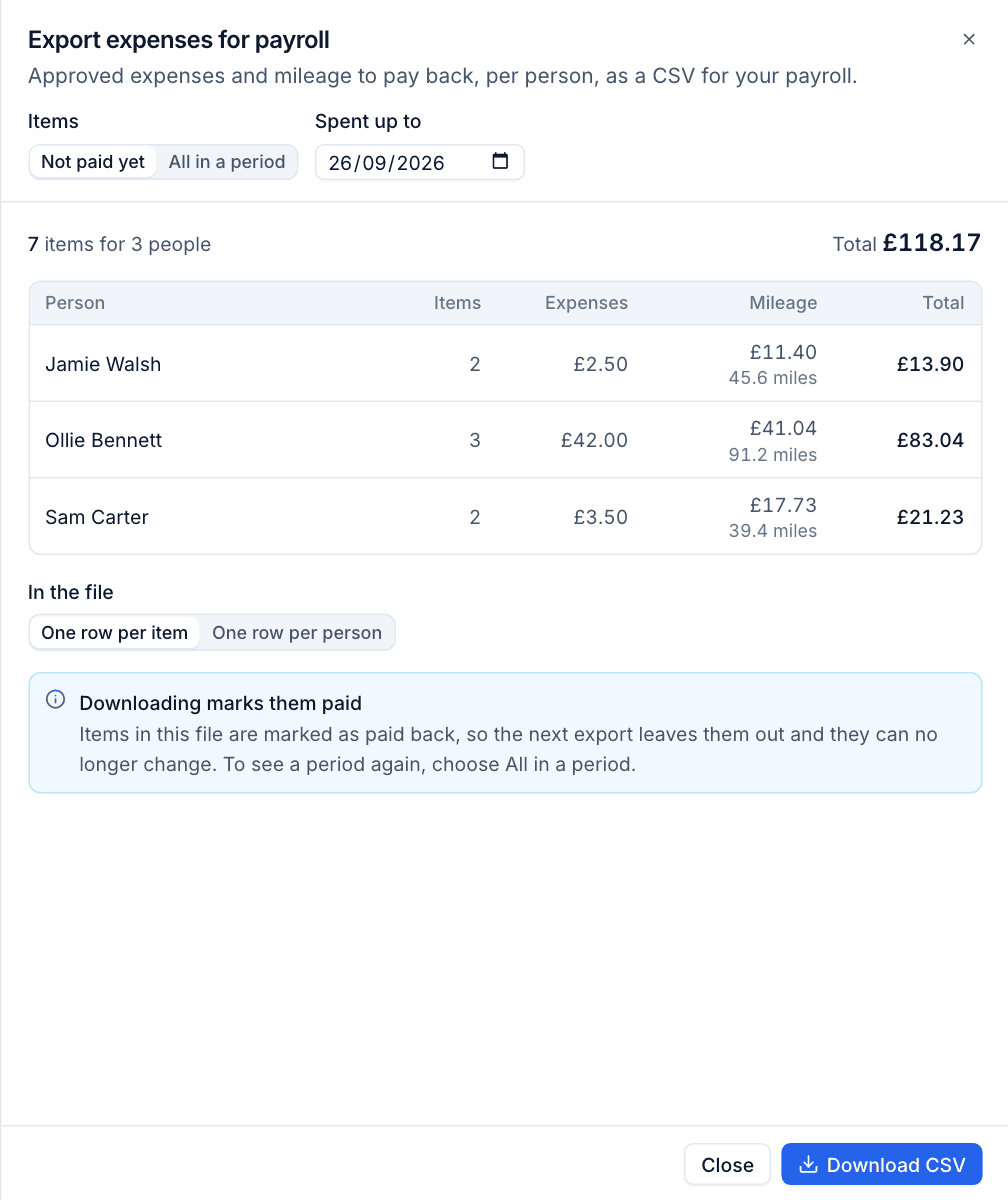
Warning: Downloading Not paid yet marks those items paid back, so the next export leaves them out and they can no longer change. All in a period marks nothing.
Rebill to the customer
Approved items marked to rebill go on the customer's invoice in the contracts Xero export, for the month they were spent in (or the next month exported after it), each as its own line, for example "Mileage: ..., 24 miles at 55p". An expense is rebilled at its price before VAT plus the markup. Downloading the export marks them billed with the invoice number, so they can never go on a second invoice. A customer with no contract gets no invoice, so its rebills wait until it has one.
The contract page lists the customer's rebilled items: on the next invoice, approved, and already billed.
Expense settings
Settings > Scheduling > Expenses holds:
- Use expenses: shows expenses on visits, tickets and in the Schedule.
- Receipts required: expenses over the amount cannot be claimed without a receipt.
- Approvers can approve their own claims.
- Mileage: the Rate, the miles it applies For the first in a tax year, and the rate Then, with a worked example; Rebill mileage to customers (new mileage starts marked to rebill) and the default rate customers are charged.
- Kinds of expense: each with its VAT rate, whether it is rebilled and the markup, for example Parts at 20% VAT, rebilled with a 20% markup.
- On the invoice: the Xero Item code for expenses, Item code for mileage and Account code used for the rebilled lines.
Was this page helpful?
Thanks for the feedback.