Customer portal settings
Turn the customer portal on or off, name it, share its address and choose whether new contacts get access.
The customer portal is where your customers' contacts sign in to see and raise tickets. They sign in with a link emailed to them; there are no passwords. Settings > Customer portal controls the portal as a whole. Who can sign in is set on each contact.
For what contacts see once they are in, see The customer portal.
Open the portal
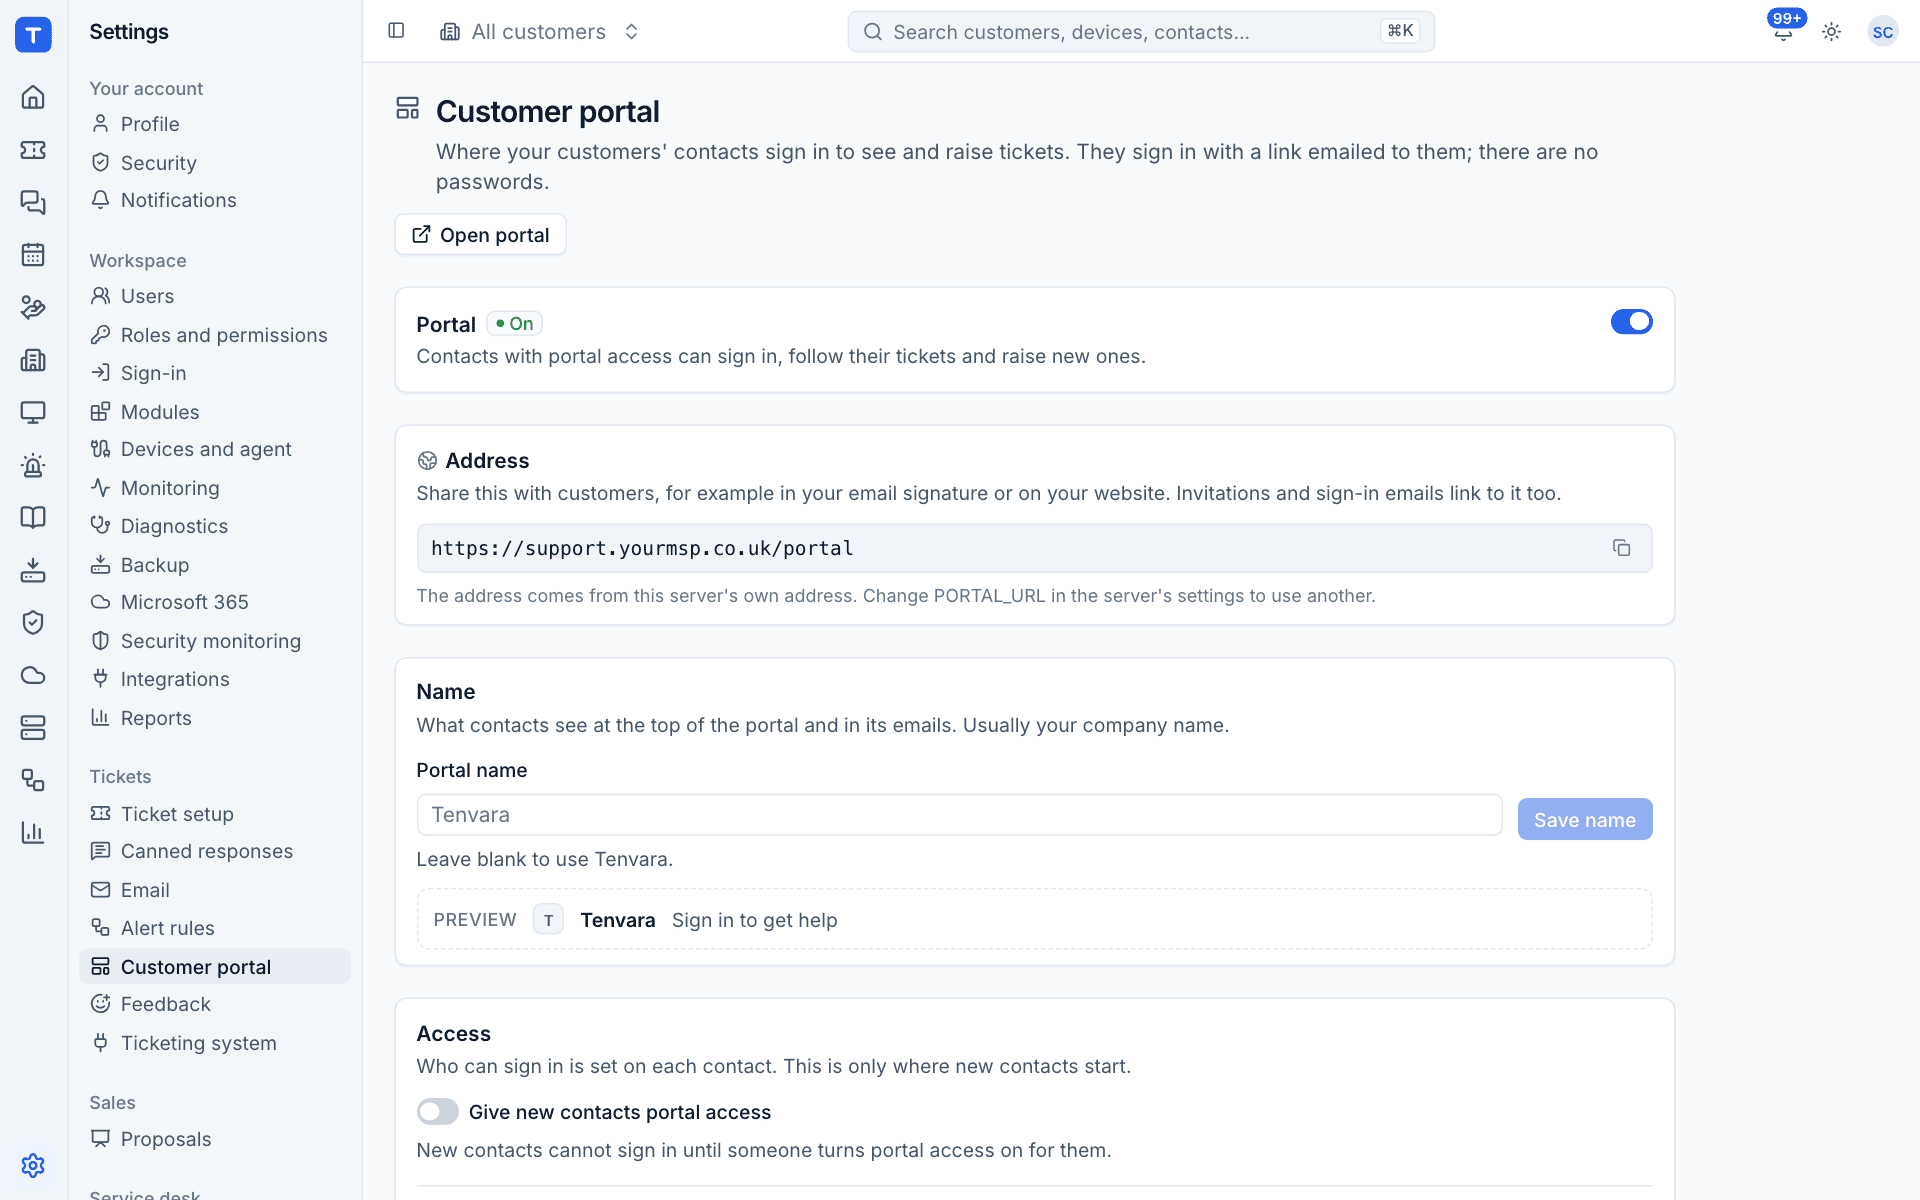
Open portal at the top opens the portal in a new tab, so you can see what your contacts see.
Turn the portal on or off
The Portal switch says On or Off. When it is on, contacts with portal access can sign in, follow their tickets and raise new ones. Turn it off to close the portal for everyone, for example while you are still setting up. Contacts keep their access and can sign in again when you turn it back on.
The address
Address shows where the portal lives, for example https://support.yourmsp.co.uk/portal. Press the copy button and share it with customers: in your email signature, on your website, or on the stickers on their machines. Invitations and sign-in emails link to it too.
The address comes from your server's own address. On a self-hosted install, change PORTAL_URL in the server's settings to use another, for example a separate help.yourmsp.co.uk.
The name
What contacts see at the top of the portal and in its emails. Usually your company name.
- Type it in Portal name. Leave it blank to use Tenvara.
- Check the Preview underneath: it shows the portal's header as contacts will see it.
- Press Save name.
Tip: Set the name before you invite anyone. Contacts should see your company, not the name of your software.
Access for new contacts
Who can sign in is set on each contact. This setting is only where new contacts start.
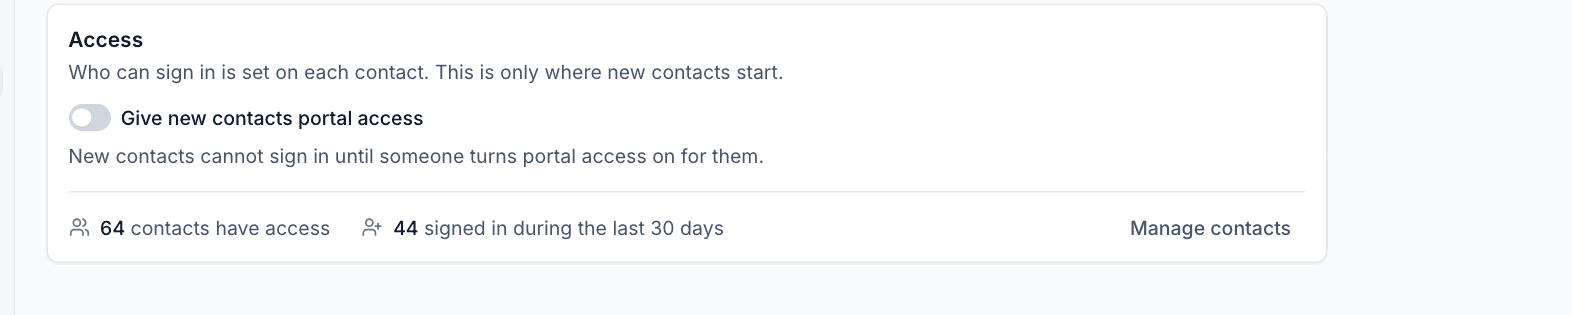
- Give new contacts portal access off (the default): new contacts cannot sign in until someone turns portal access on for them. Choose this if you want to decide who uses the portal.
- On: every new contact starts with portal access, so they can sign in straight away.
Underneath, the page shows how many contacts have access and how many signed in during the last 30 days. Manage contacts takes you to the contact list.
Give one contact access
- Open the contact.
- In the Customer portal card, turn portal access on and choose what they can see: their own tickets, or every ticket for their company. Give company-wide access to the people who look after IT for the customer, such as an office manager.
- Press Send sign-in invitation. They get an email with a link to the portal.
The card then shows Portal on, what they can see, and when they last signed in. To stop someone signing in, turn their portal access off.
What else shapes the portal
The portal pulls together several other areas, each set up in its own place:
| Portal page | Set up in |
|---|---|
| Tickets | The service desk. Contacts only ever see public replies, never internal notes |
| Quotes | Sales, when you send a quote to the customer |
| Reports | Reports, when you publish a monthly customer report |
| Help articles | Docs, when you publish a knowledge base article to customers |
| Chat | Chat, including opening hours and what contacts see when you are closed. See Chat settings |
Pages for modules that are switched off in Modules do not appear.
Permissions
The customer portal is part of the Tickets area in Roles and permissions, and is switched on and off with the Tickets module.
Was this page helpful?
Thanks for the feedback.