Website widget, portal and tray
Add the chat widget to your website or a customer's site, and see what visitors get in the widget, the customer portal and the tray on managed computers.
Visitors reach your team from three places. The website widget needs setting up once for each website; the portal and the tray work as soon as chat is switched on.
Website widgets
A widget is the chat button for one website. Add one for your own site, and one for each customer who wants chat on their own website. Each widget has its own embed code.
Open Settings > Chat > Widgets.
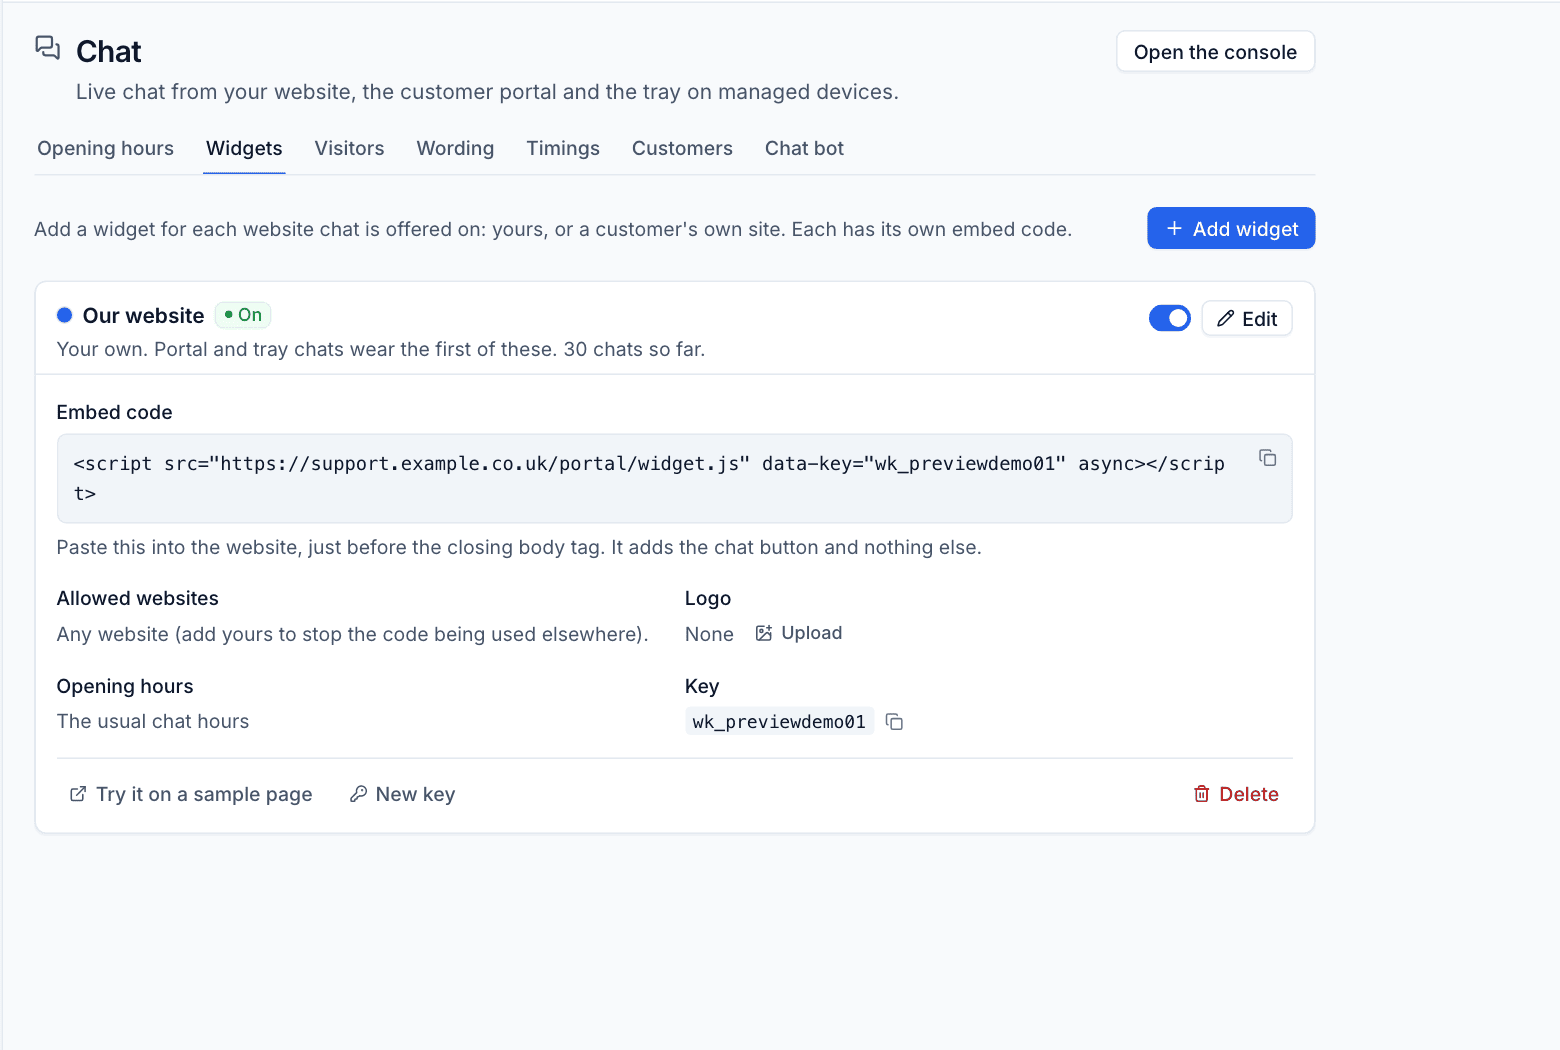
Each widget card shows whether it is On, how many chats it has had, its Embed code, Allowed websites, Logo, Opening hours and Key, with Try it on a sample page, New key and Delete at the bottom. Use the switch at the top right to turn a widget off without deleting it.
Note: Portal and tray chats wear the brand of your first widget that is switched on (its name, colour and logo), so set up your own website's widget first.
Adding a widget
- Press Add widget.
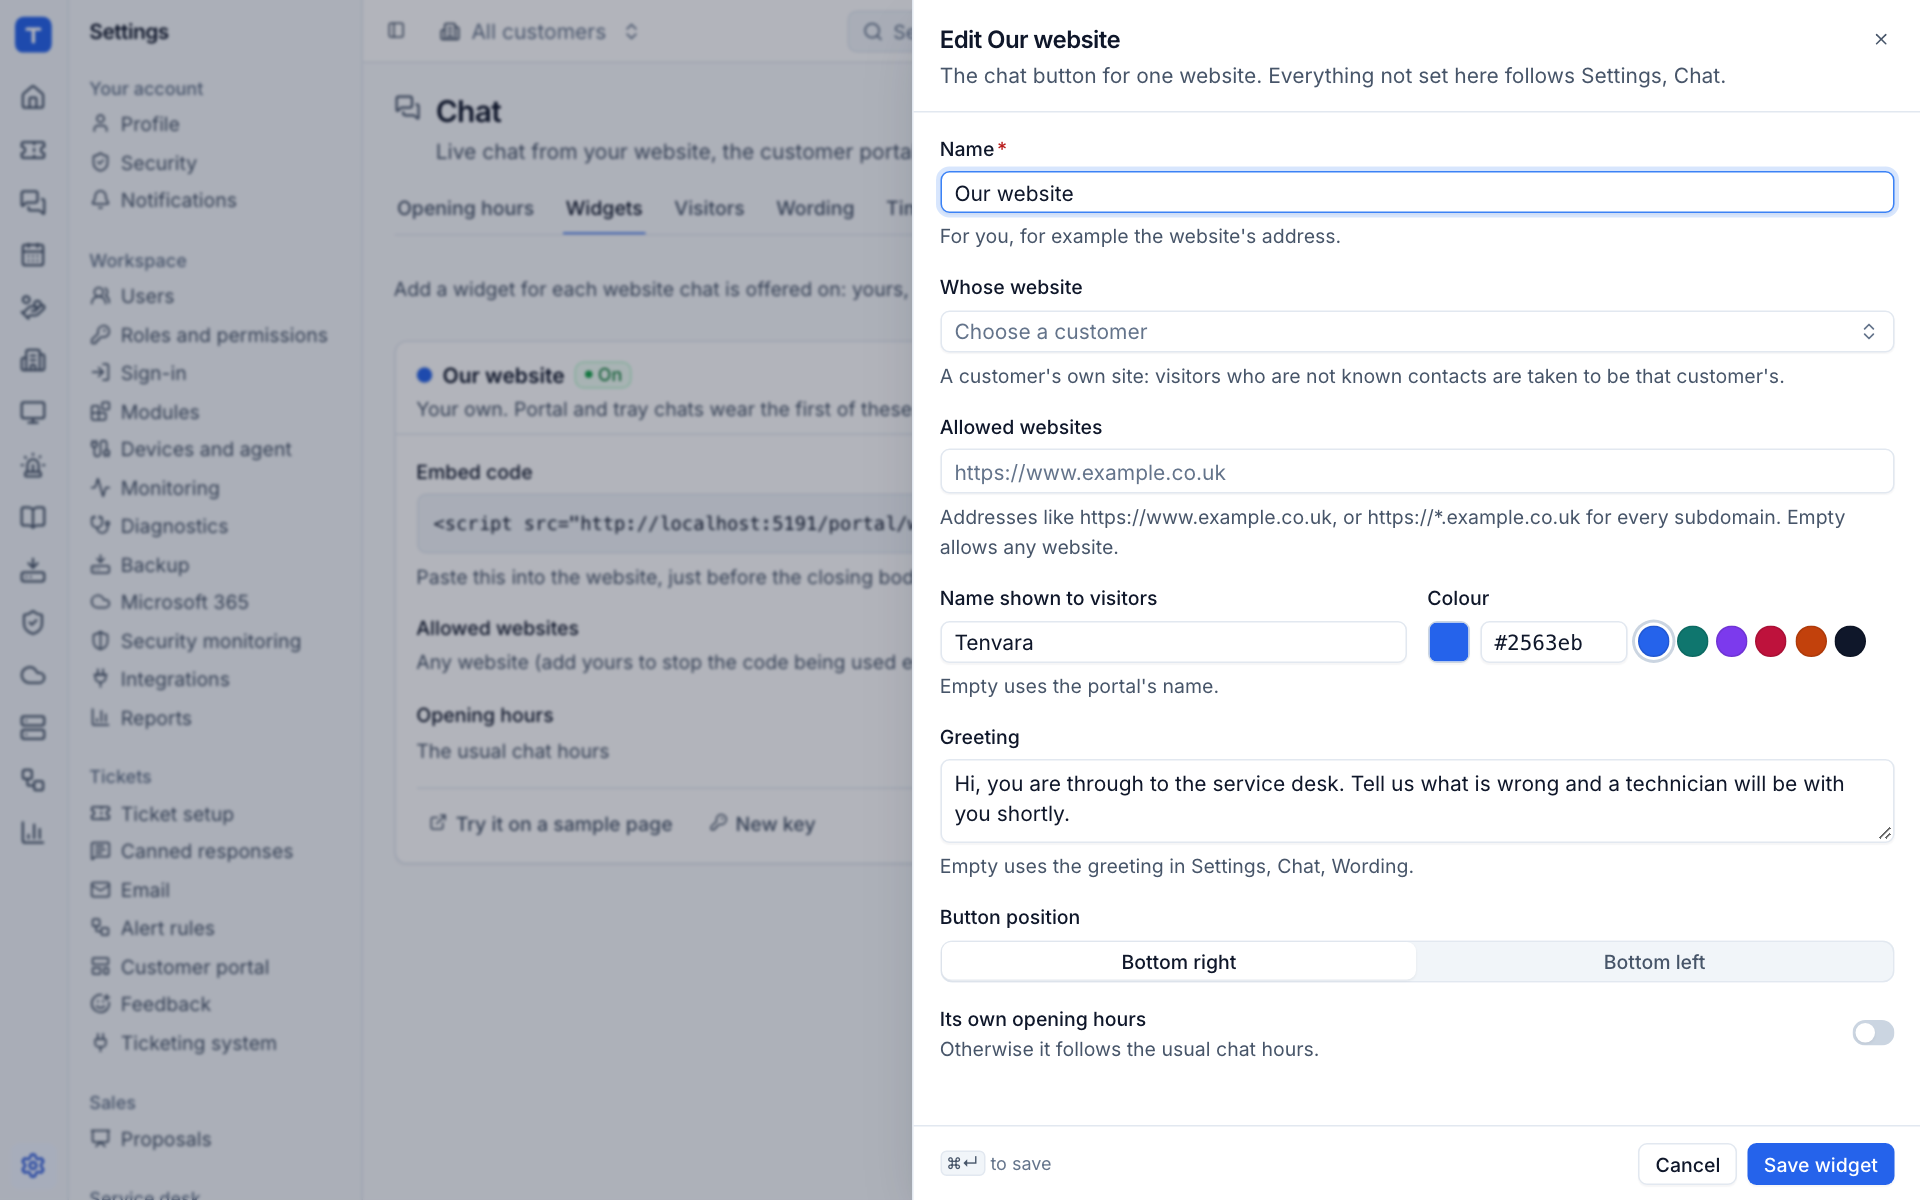
- Enter a Name, for you, such as the website's address.
- Under Whose website, leave it empty for your own site, or choose the customer whose site it is. Visitors on a customer's widget who are not known contacts are taken to be that customer's.
- Under Allowed websites, enter the addresses the widget may run on, such as
https://www.example.co.uk, orhttps://*.example.co.ukfor every subdomain. Leave it empty to allow any website. - Set the Name shown to visitors (empty uses the portal's name) and the Colour. Pick a swatch or type a hex colour.
- Optionally write a Greeting. Empty uses the greeting in Settings > Chat > Wording.
- Choose the Button position: Bottom right or Bottom left.
- Turn on Its own opening hours if this website should keep different hours from the rest of chat. Otherwise it follows the usual chat hours.
- Press Save widget.
To add a logo, press Upload beside Logo on the widget card. PNG, JPEG, WebP or GIF files up to 1 MB are accepted.
Tip: Always fill in Allowed websites for a live site. It stops anyone copying your embed code onto another website.
Putting the widget on a website
-
On the widget card, press the copy button beside Embed code. It is one line:
<script src="https://your-tenvara-address/portal/widget.js" data-key="wk_..." async></script> -
Paste it into the website, just before the closing
</body>tag. On WordPress and most site builders, use the footer scripts setting. -
Load the website. The chat button appears in the corner you chose.
The code adds the chat button and nothing else. The widget is sealed off from the website's own styles, so it looks the same everywhere, and it follows the visitor's light or dark setting. To put the button on the other side for one website only, add data-position="left" (or right) to the tag.
Press Try it on a sample page to see the widget on a demonstration website before you put it live.
New key and deleting
- New key replaces the widget's key. The old embed code stops working, so update every website that uses it.
- Delete removes the widget. Its past chats stay in history.
What website visitors see
A visitor presses the chat button and the panel opens: docked in the corner on a computer, full screen on a phone.
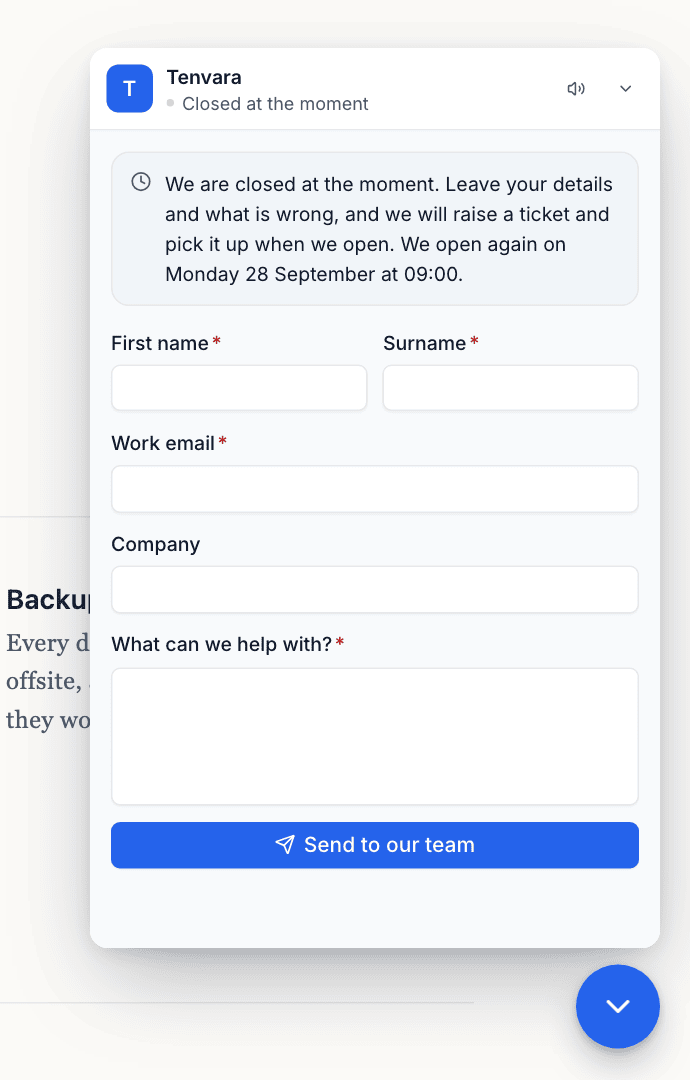
- Their details: first name (always), and the surname, work email, phone and company, as set in Settings > Chat > Visitors. The email is matched to your contacts.
- What is wrong: a short description of the problem. Too short, or just "hello", gets a friendly nudge to say more.
- Waiting: their place in the queue and how long they have waited.
- Chatting: messages both ways, typing indicators, Seen receipts, and files by picker, paste or drag and drop.
- Ended: a rating from 1 to 5 with a comment, email me the transcript, and the option to start again.
The widget remembers the visitor on that website, so if they come back while their chat is open, they carry on where they left off. Not you? forgets them. Unsent messages are kept and sent again when the connection comes back.
When chat is closed, the widget shows the closed message and the next opening, and offers the ticket request form instead (or the button is hidden, if you chose Hide the chat button).
The customer portal
Signed-in contacts see Chat in the portal's navigation while chat is on for their company.
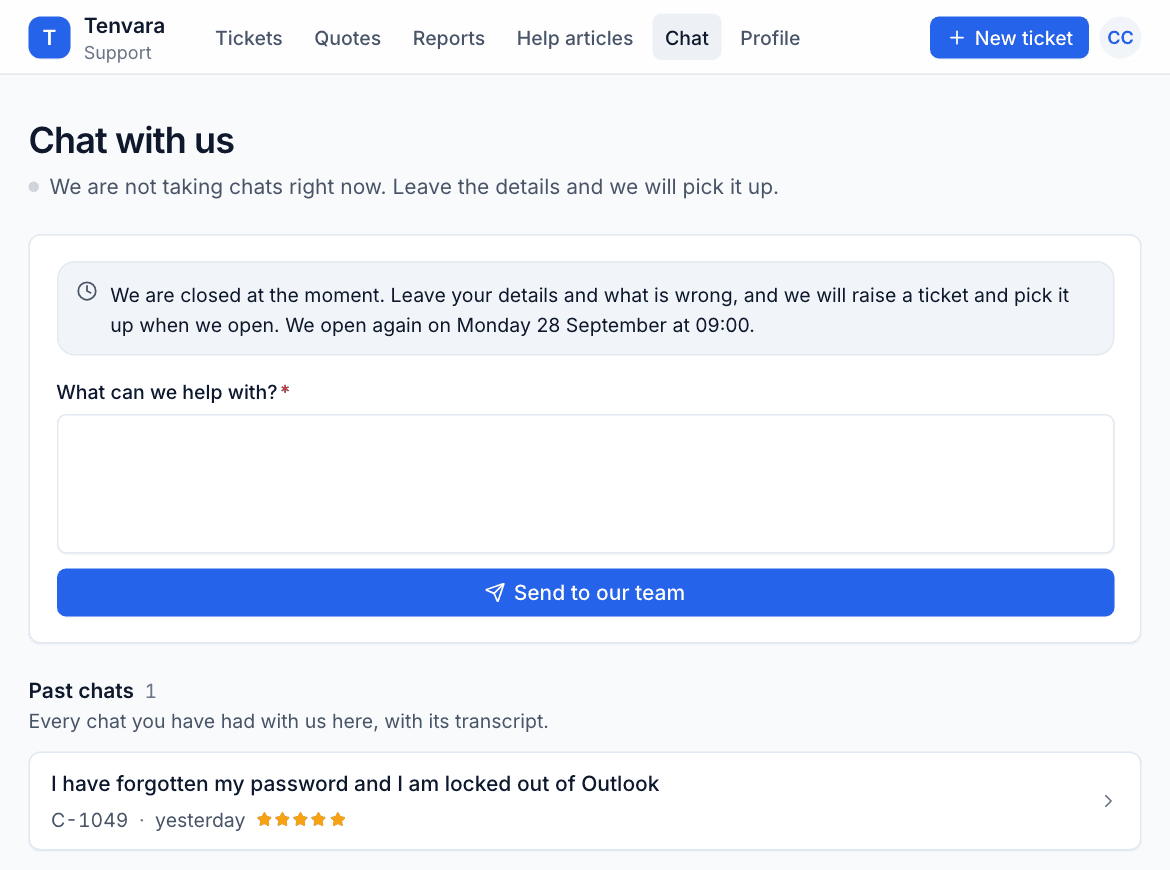
- There are no details to fill in: the portal already knows who they are.
- The current chat is live, with End chat, a mute button, and the same rating and transcript at the end.
- Out of hours, they see the closed message, the next opening and a request form with just What can we help with?.
- Past chats lists their earlier chats, newest first, each opening a read-only transcript. Chats that became tickets link to the ticket.
The portal's home page also shows a small Chat with us card while a chat can start.
The tray on managed computers
On a managed computer, the Tenvara tray offers Chat with support. It opens a chat window tied to that computer.
- If Tenvara recognises the signed-in account (a Microsoft 365 sign-in or an email address matching a contact), the person goes straight to describing the problem.
- If not, they are asked for their name and email first, which are matched to a contact at the device's customer.
In the console, tray chats show Device, with the computer, who is signed in and Remote in. The person sees all their earlier chats from the same computer and account.
Was this page helpful?
Thanks for the feedback.