Customer documentation and records
Keep each customer's articles and structured records together, fill in records from templates, and link them to devices and credentials.
Customer documentation is everything you know about one customer: articles written for them, and records filled in from templates. Records are the facts you would otherwise keep in a spreadsheet per customer, such as VLANs, Wi-Fi networks, the Microsoft 365 tenant, suppliers and alarm codes.
The customer documentation list
Open Docs and choose Customer documentation to see every customer's articles and records in one list, newest first.
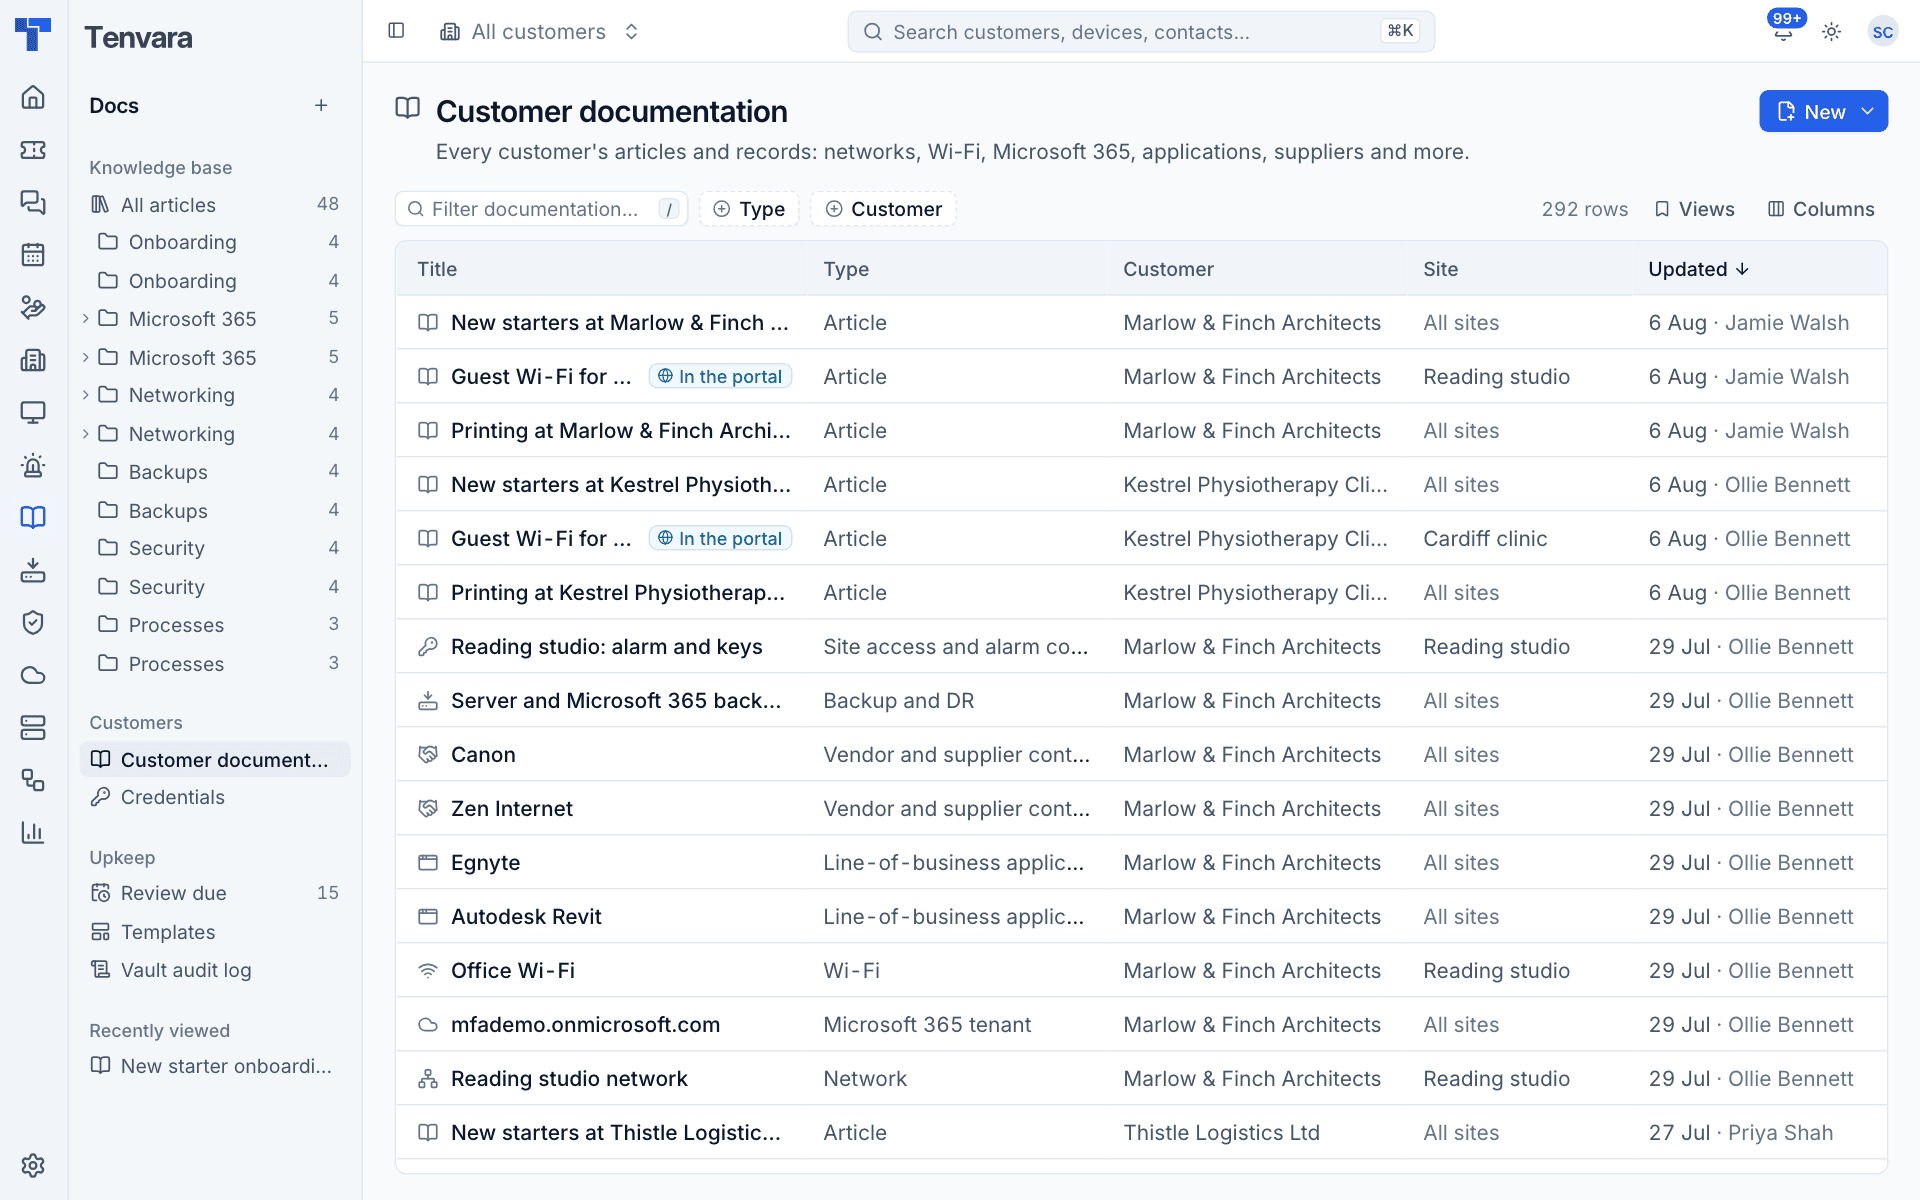
Each row shows the Title, its Type (Article, or the template a record was made from), the Customer, the Site it belongs to (or All sites) and when it was last updated. Articles published to the portal carry an In the portal badge. Filter by Type or Customer to narrow it down.
The customer's Documentation tab
On a customer, open the Documentation tab. It shows:
- Records: one card per template. Each card lists the customer's records of that kind with their site. An empty card shows what is still to document, and its + adds a record of that kind.
- Articles: the customer's own articles, with their review status and whether they are in the portal. New article writes one for this customer.
- Credentials: the customer's credentials. New credential adds one. See The credentials vault.
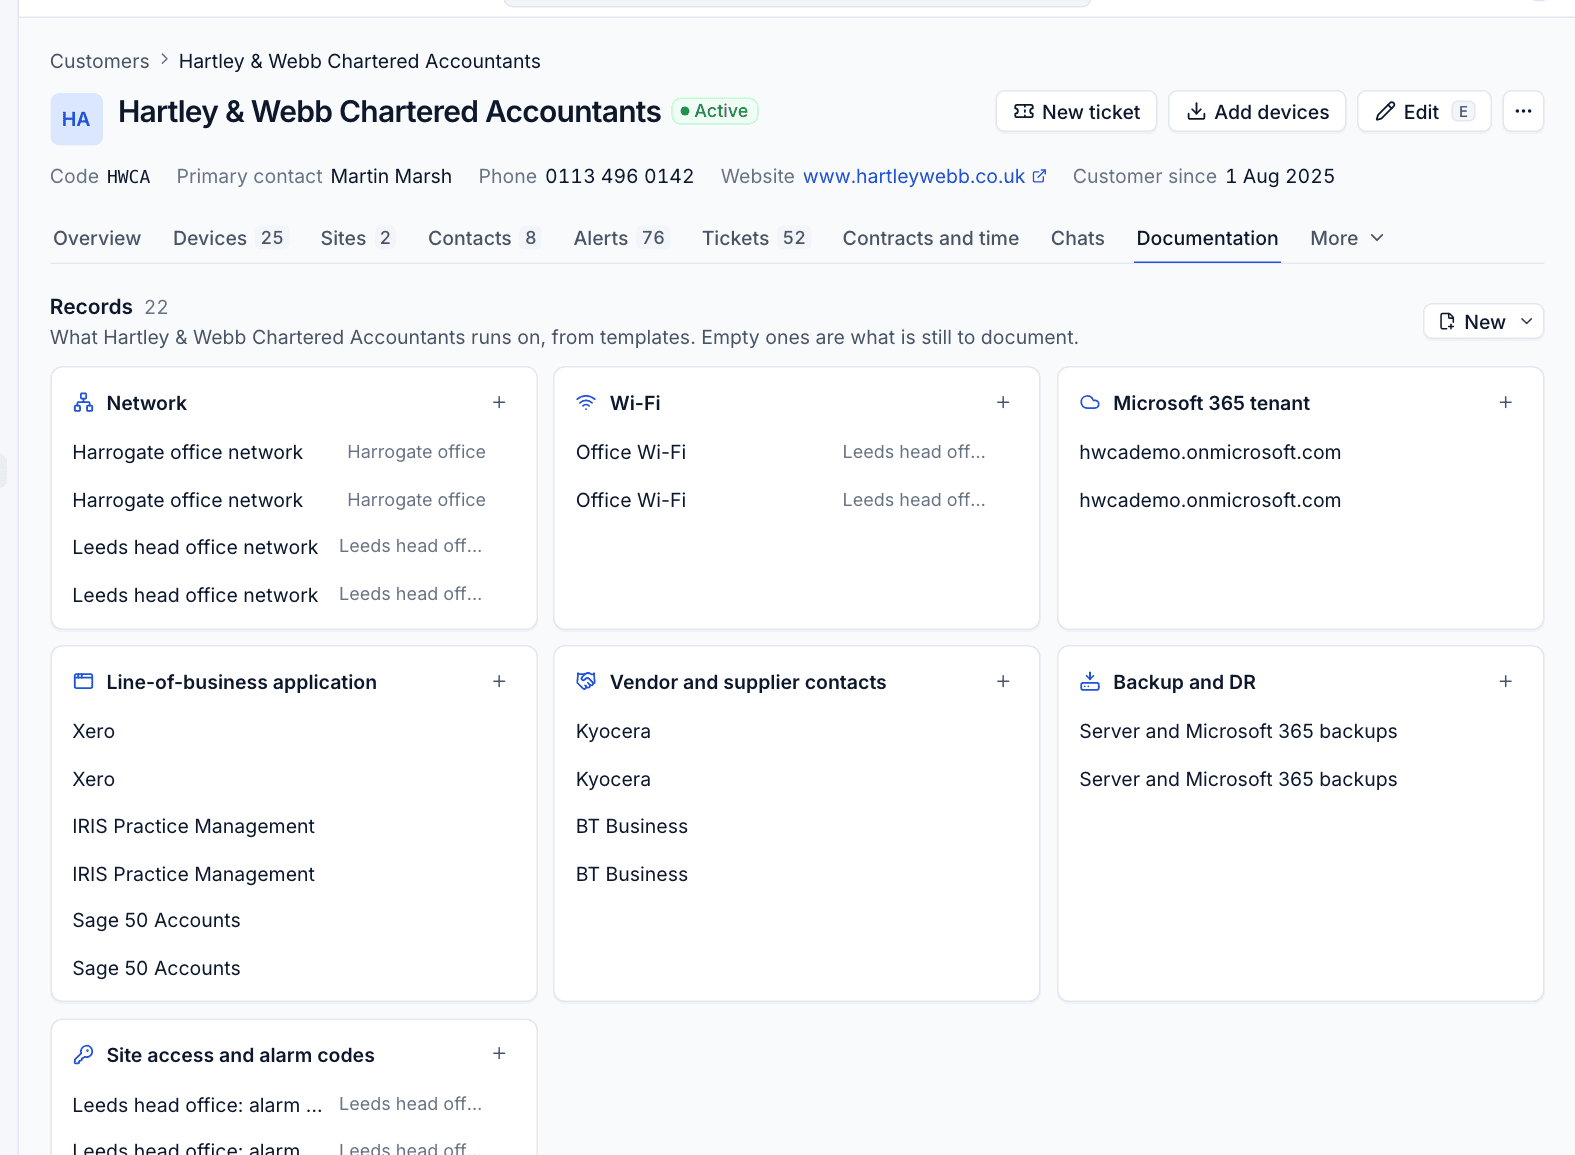
The customer's Overview also shows a short documentation summary.
Adding documentation
The New button on Customer documentation (and on a customer's Documentation tab) offers everything you can add:
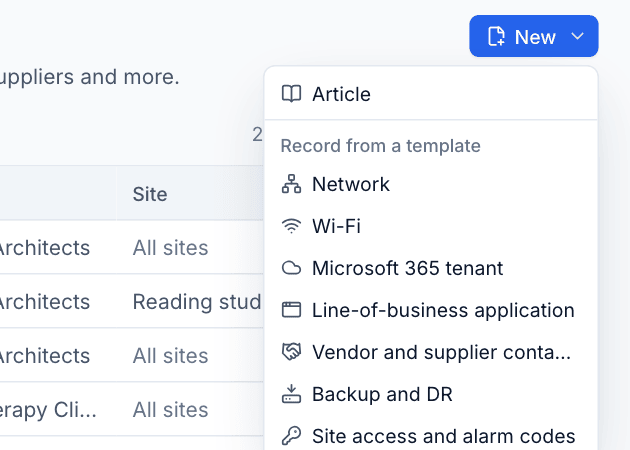
- Article: a customer article. It works like a knowledge base article (see Knowledge base articles), except Where it lives is set to A customer.
- Record from a template: pick the template straight from the menu.
Adding a record
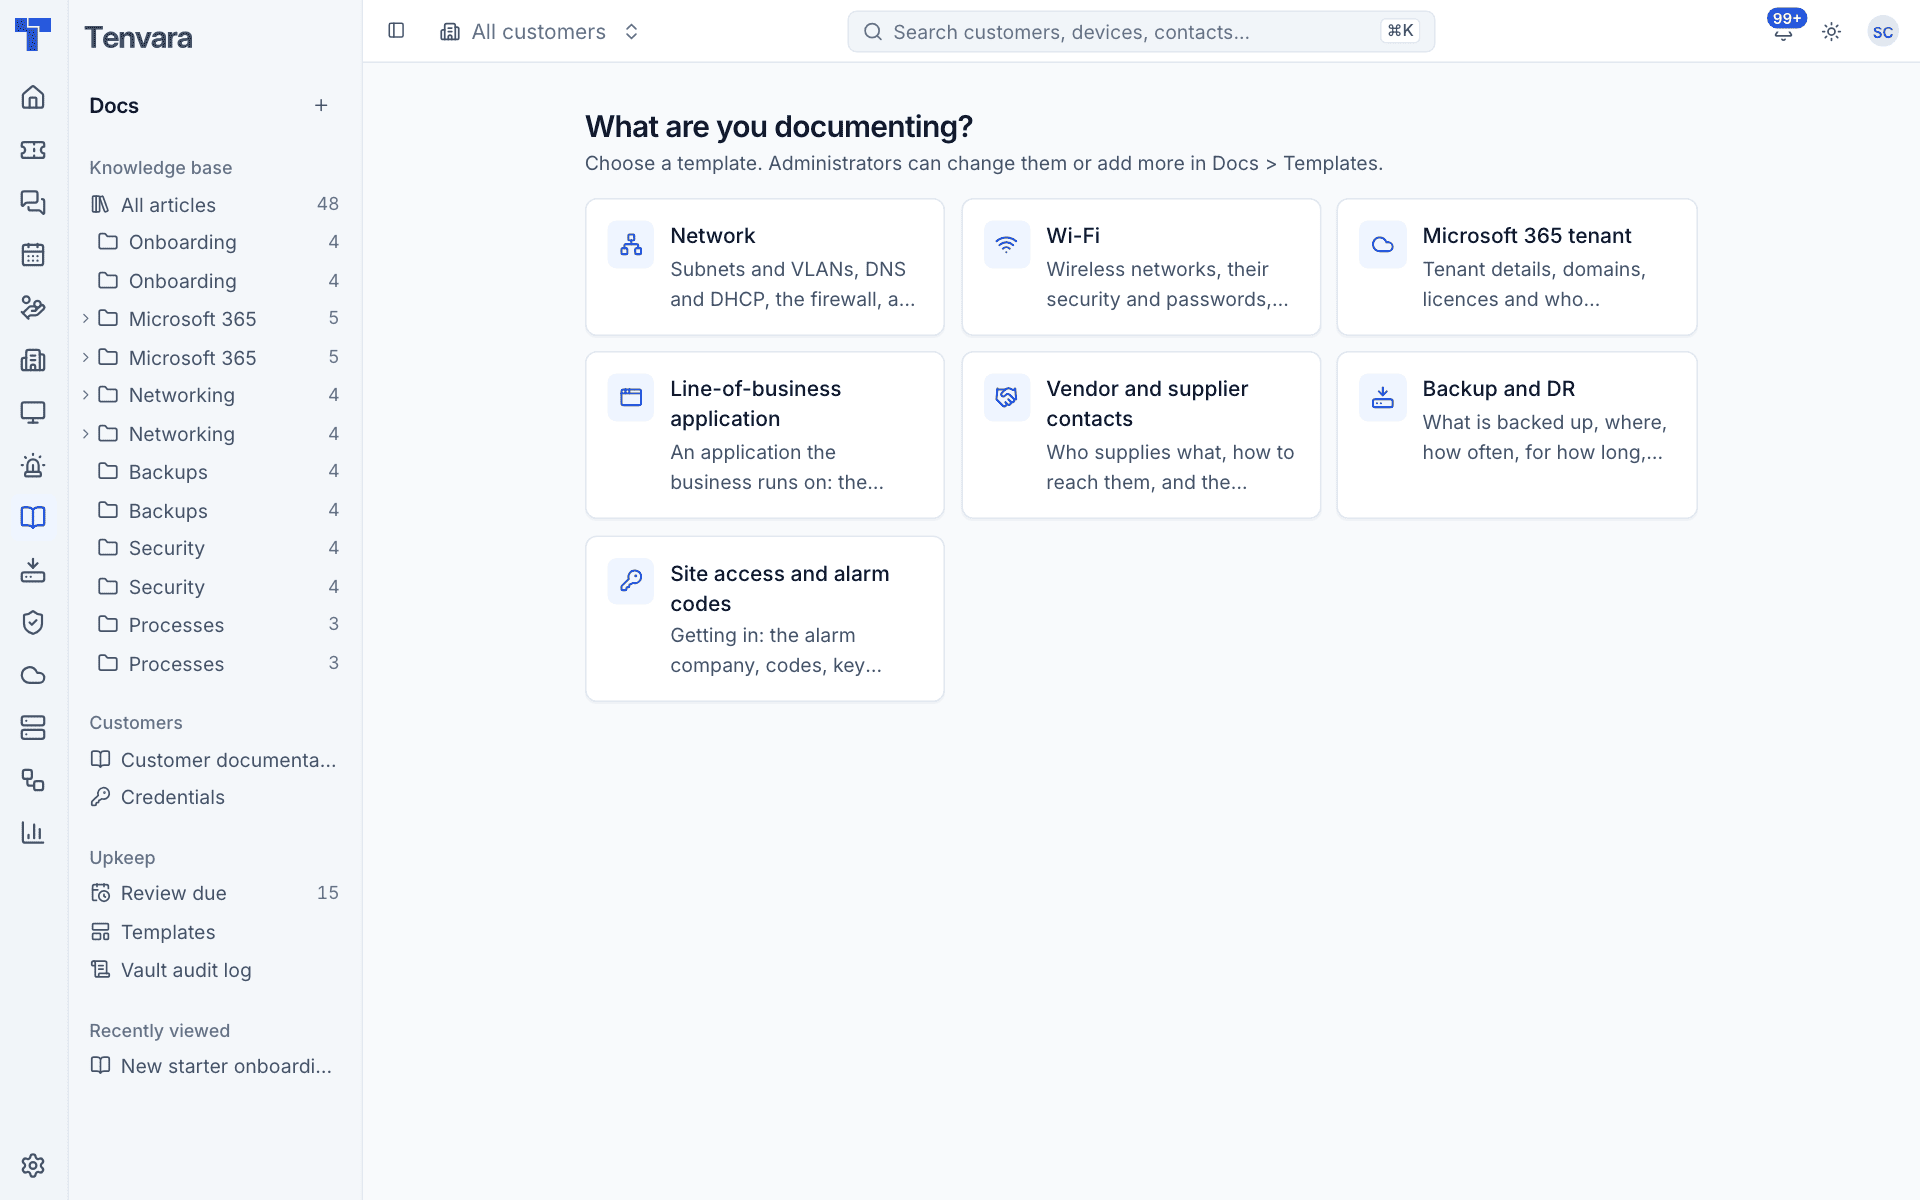
- Choose New, then the kind of record. If you start from Record from a template, Tenvara asks What are you documenting? and shows the templates to choose from.
- Choose the Customer first: links and secrets belong to the customer, so the rest of the form follows from it.
- Choose the Site if the record covers one site. Leave it empty when it covers every site.
- Fill in the fields. Long templates are split into headed sections. Fields marked as required must be filled in.
- Press Save record, or Cmd+S.
Values are checked against the template when you save: an IP address or range field only accepts an address or a CIDR range, a Web address only a URL, and so on.
Field types you will meet
| Type | How it behaves |
|---|---|
| Text, Long text | One line, or formatted text with the same editor as articles |
| Number, Date, Choice, Tick box | As you would expect. A choice offers a fixed list |
| Web address, Email, Phone | Shown as links you can click, email or call |
| IP address or range | An address such as 10.0.0.1 or a range such as 10.0.0.0/24 |
| Secret | Stored in the vault, never in the record. Shows as dots until revealed, and every reveal is logged |
| Link | Points at a credential, device, contact or site of the same customer |
| Table of rows | Rows of columns, for example one row per VLAN or per Wi-Fi network |
Reading a record
Open a record to see its values grouped by section. Tables of rows show as tables, web addresses and phone numbers as links, and link fields as links to what they point at.
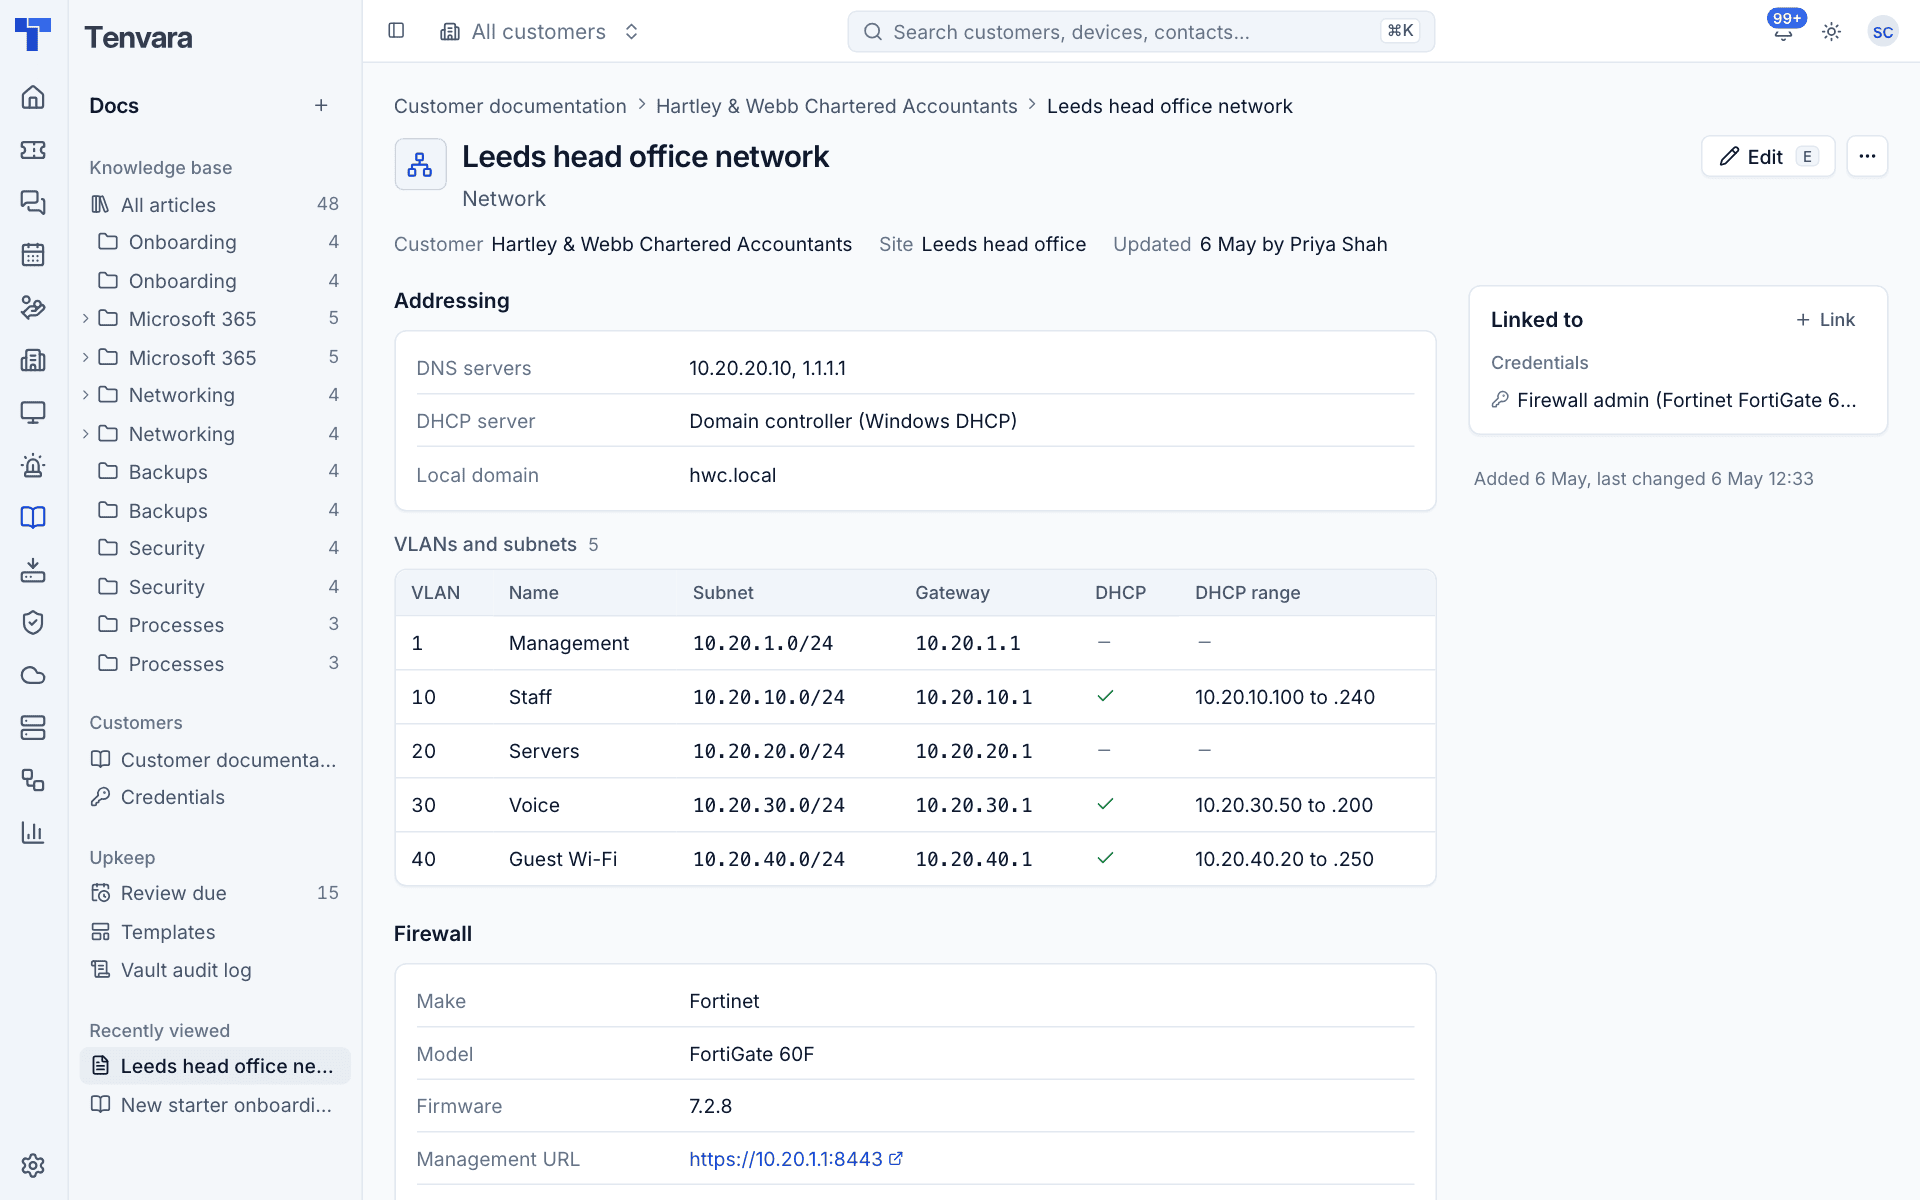
The Linked to panel shows everything the record links to. Press Link to add a link by hand. Press Edit (or E) to change the record.
How link fields work
A Link field creates a real link, so it shows up on both sides:
- A record that links to a credential appears on the credential under Used by.
- A record that links to a device appears on the device page.
If the thing a link field points at is deleted, the field is emptied the next time the record is saved.
Note: People without the credentials permission do not see credential links, in link fields or anywhere else. If they edit and save the record, the links they cannot see are kept.
Documentation on devices, sites and contacts
Device, site and contact pages have a Documentation section. It lists the articles, records and credentials linked to them, with credentials shown inline so a technician working on the device has the login in front of them.
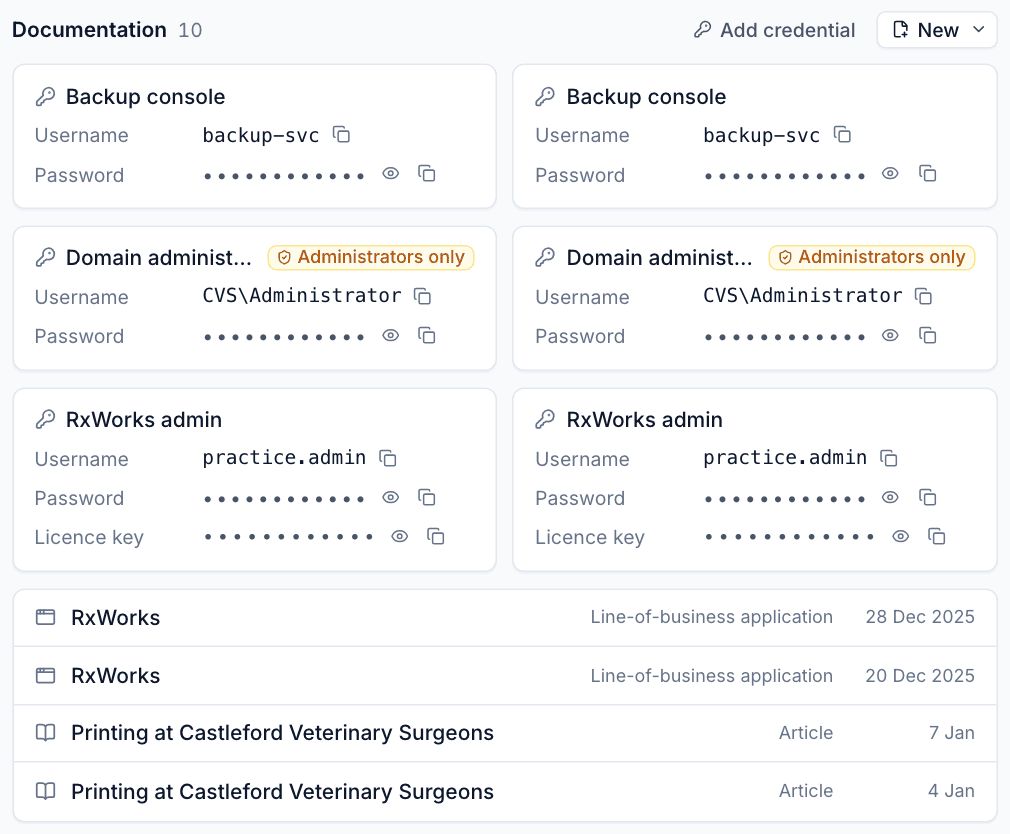
From there you can:
- Reveal or copy a username, password or licence key with the buttons beside it (each reveal and copy is logged).
- Press Add credential to add one already linked to this device.
- Press New to add an article or a record.
These pages only ever list documentation of their own customer.
When a device moves to another customer
If a device is moved to a different customer, its links from the old customer's articles, records and credentials are removed, and record link fields that pointed at it are emptied. Each change is noted on that item's timeline, so nothing about the old customer follows the device.
Was this page helpful?
Thanks for the feedback.