DNS management
Edit your customers' DNS zones from Tenvara at eight DNS providers you connect with your own accounts, or keep zones in Tenvara, with templates, zone file import and export, and undo for every change.
Changing a customer's DNS usually means finding their DNS host's login, then hoping nobody makes a typo. Tenvara lets you edit zones in one place, with every record checked before it is saved, ready-made templates for common jobs such as Microsoft 365, and a history of every change that you can undo record by record.
Zones live in two places:
- At a DNS provider you connect with your own account: Cloudflare, GoDaddy, Namecheap, Amazon Route 53, Azure DNS, DigitalOcean, Gandi or OVHcloud. Changes are written to the provider straight away.
- Kept in Tenvara, for customers whose DNS host has no API. You edit the zone here and export a standard zone file to load at the host.
Connecting a DNS provider
DNS providers are supported integrations you connect with your own account and API credentials. Nothing is read or changed at a provider until you connect it.
- Go to Settings > Domains and DNS > DNS providers (or DNS providers on the DNS zones page).
- Click Connect a provider and choose the provider.
- Say who the account belongs to: you, or one customer. A customer's credentials are kept in that customer's vault, so they are audited and exported with the rest of their documentation.
- Enter the credentials the provider needs:
| Provider | What you need |
|---|---|
| Cloudflare | An API token with DNS edit rights. |
| GoDaddy | An API key and secret. |
| Namecheap | The API user, API key and your server's address allowed in Namecheap. |
| Amazon Route 53 | An access key and secret. |
| Azure DNS | A tenant, an app registration's id and secret, and the subscription. |
| DigitalOcean | An API token. |
| Gandi | A personal access token. |
| OVHcloud | An application key and secret, a consumer key and the endpoint. |
- Save. The credentials are tested before they are saved.
Each connected account shows who it belongs to, what it gives (zones, registrations or both) and how many zones it holds. Tenvara refreshes each account's list of zones every day. Accounts at registrars also report expiry and auto-renew to Domain and SSL monitoring.
The zone list
Go to Domains > DNS zones. Each zone shows its customer, where it lives and how many records it has. Filter by Customer or Where.
To add a zone, click New zone, enter the Zone name and choose the customer and where it lives: one of your connected accounts, or kept in Tenvara. A domain's page also offers Add a zone when it has none.
Editing a zone
Click a zone to open it.
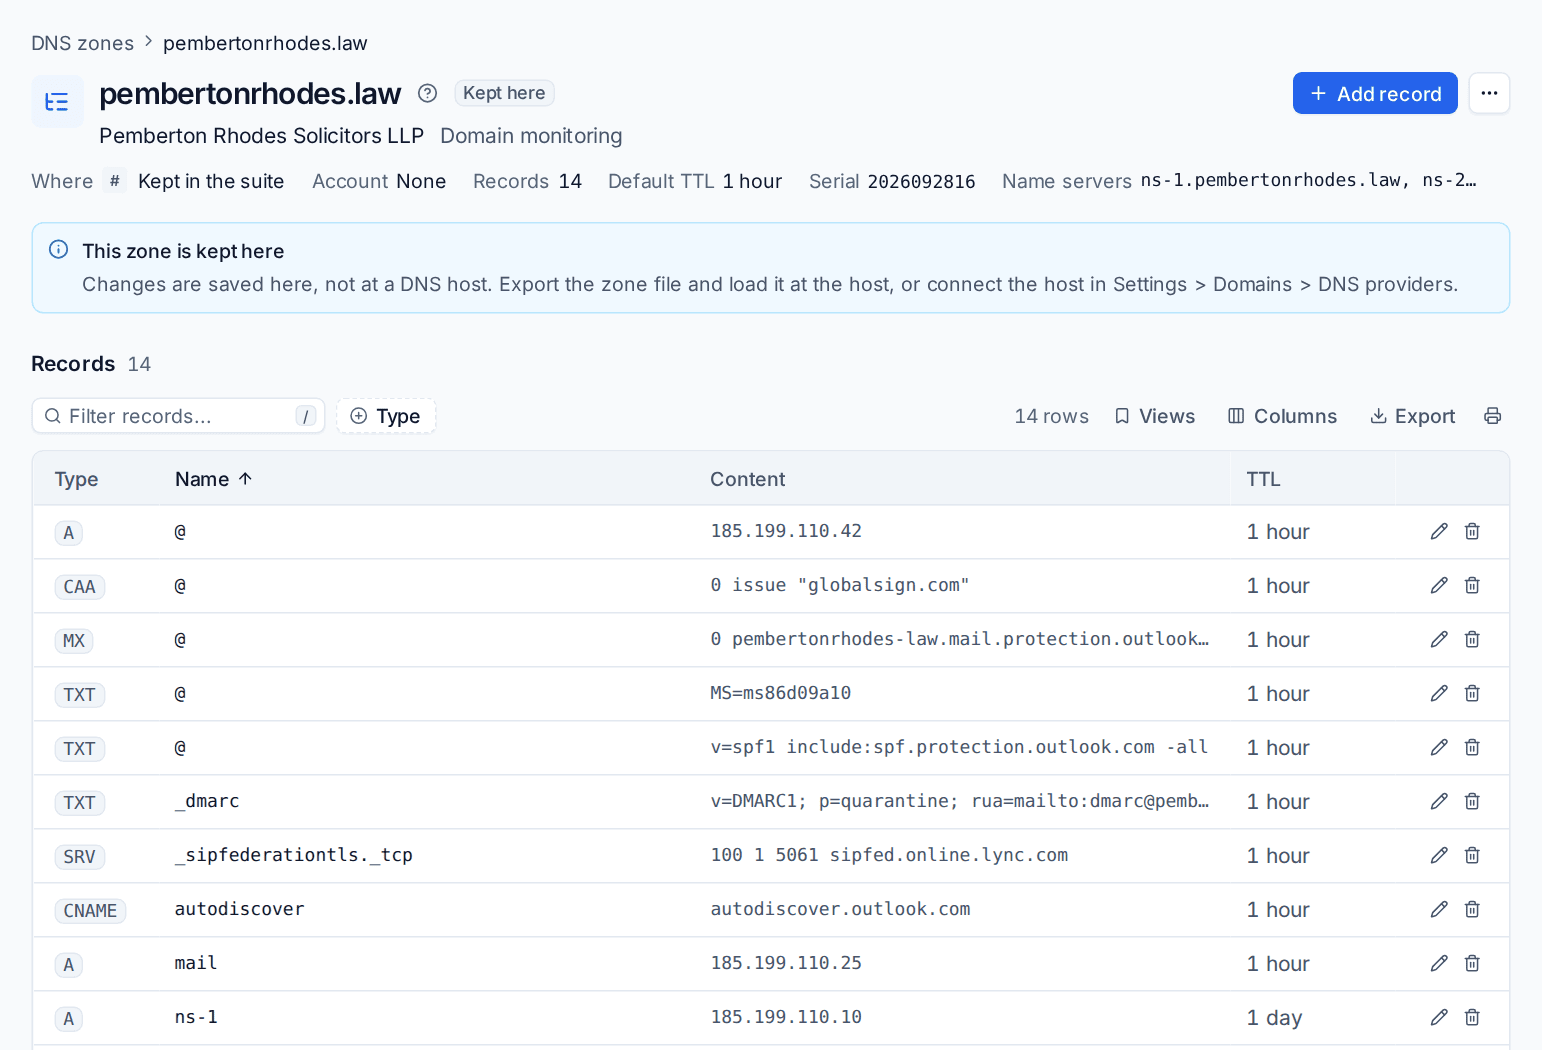
The header shows where the zone lives, the account, the number of records, the default TTL, the serial and the name servers. Below is every record with its type, name, content and TTL.
- Click Add record, or the pencil on a record to change it.
- Choose the type (A, AAAA, CNAME, MX, TXT, SRV, CAA and the rest), the name, the content and the TTL.
- Save. The record is checked first: names must be inside the zone, content must suit its type, a CNAME must stand alone at its name, MX and SRV records need priorities, CAA tags must be valid, and the TTL must be at least the provider's minimum.
The change is written to the provider (or saved in Tenvara for a kept zone) and recorded.
Note: A zone kept in Tenvara is not live until you load it at the DNS host. Choose Export the zone file from the ... menu and load the file there, or connect the host so changes go straight to it. The serial goes up with every change.
Changes and undo
Changes under the records lists every change made from Tenvara, newest first: added, changed or deleted, the record before and after, who made it and when, and whether it came from an import or a template.
Click Undo to put a record back as it was. If the record has been changed at the provider since, Tenvara refuses and shows what it is now, so you never overwrite someone else's change by accident.
Templates
A template is a set of records applied to a zone in one go. Go to Domains > Record templates.
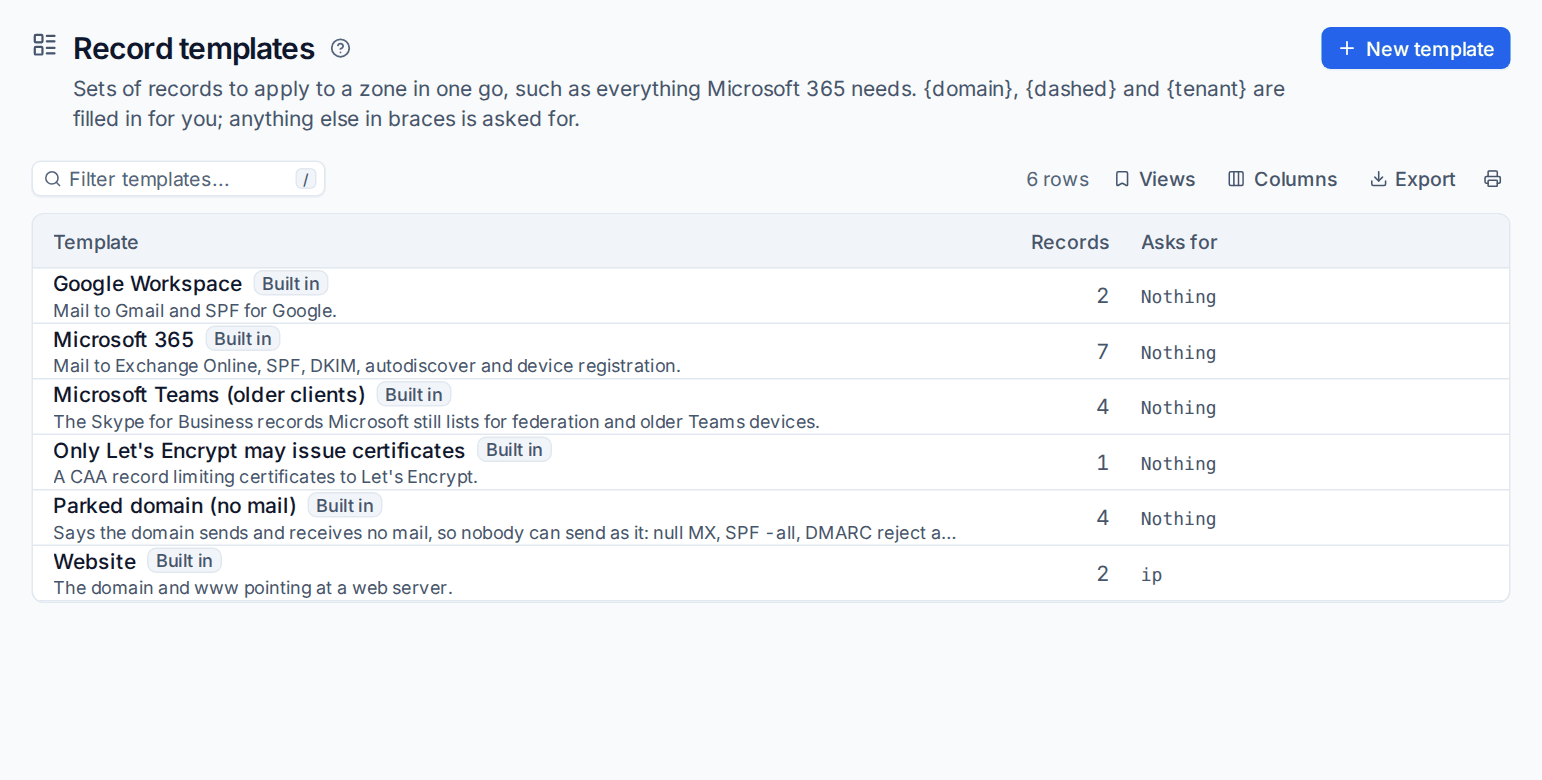
Built in are Google Workspace, Microsoft 365 (mail to Exchange Online, SPF, DKIM, autodiscover and device registration), Microsoft Teams (older clients), Only Let's Encrypt may issue certificates, Parked domain (no mail) and Website. Change them, reset them, or click New template to add your own.
In templates, {domain}, {dashed} (the domain with dashes, as Microsoft 365 uses) and {tenant} are filled in for you; anything else in braces is asked for when you apply it, such as the web server's address.
To apply one:
- Open the zone and choose Apply a template from the ... menu.
- Pick the template and fill in anything it asks for.
- Tenvara shows the plan: records to add, to change, to remove and already there.
- Apply. The whole set is recorded as one batch, and each record can be undone on its own.
Importing and exporting zone files
Moving a customer from an old DNS host? Export the zone file there, then choose Import a zone file from the zone's ... menu. Tenvara reads standard BIND zone files (with $ORIGIN, $TTL, relative names and multi-line records), shows the plan first, and applies it as one batch you can undo.
Export the zone file gives you a standard BIND file of the zone at any time, for a backup or to load at a host.
Related
Was this page helpful?
Thanks for the feedback.