Invoice layouts and trading entities
Choose which parts of an invoice print and how time reads, per customer or per invoice, and invoice as more than one company with its own details, numbering and ledger.
Out of the box, every invoice uses the built-in Standard layout and is sent by your main business. Both can change: layouts decide what an invoice shows, and trading entities decide which of your companies sends it. An install that changes neither sees nothing new.
Invoice layouts
Settings > Invoice layouts lists your layouts, what each does with time, which parts it hides and how many customers use it. The PDF, the copy in the customer portal and the one attached to the email all follow the layout.
Make a layout
- Press New layout and give it a Name, for example "Summary by ticket".
- Under Parts, in the order they print, move parts up or down with the arrows. From and to, Dates and reference, Lines, Totals and Tax notes always print (they are the invoice itself, or the law). How to pay, Invoice notes and Footer can be switched off.
- Under Time, choose the Time lines: a line per time entry (as billed), a line per ticket, a line per work type, or one line for all the time.
- Choose Hours as decimals (1.50 hours) or a clock (1:30), and whether each time line shows the date, the technician and the work type.
- Choose whether to print the tax summary, the service period and the reference.
- Turn on The default layout if customers without one of their own should get it.
- Save the layout.
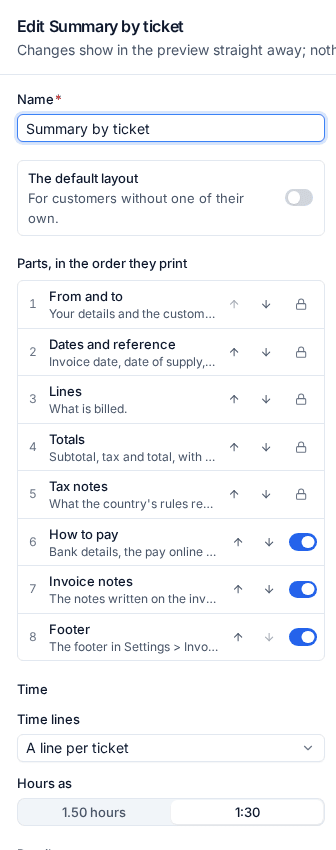
The editor previews your latest invoice with time on it as you change things, and nothing changes on real invoices until you save. Grouping only changes how time prints: every time entry is still billed once, on its own line, underneath.
Which layout an invoice uses
- The invoice's own, chosen on a draft's Printing card.
- Otherwise the customer's, chosen on their Contracts and time tab under Invoicing.
- Otherwise the layout marked as the default.
- Otherwise the built-in Standard layout.
Deleting a layout puts its customers and invoices back on the default.
Trading entities
If you invoice as more than one company (a second limited company, a trading name, or a business in another country), add each as a trading entity. Your main business keeps its details in Settings > Billing > Invoices.
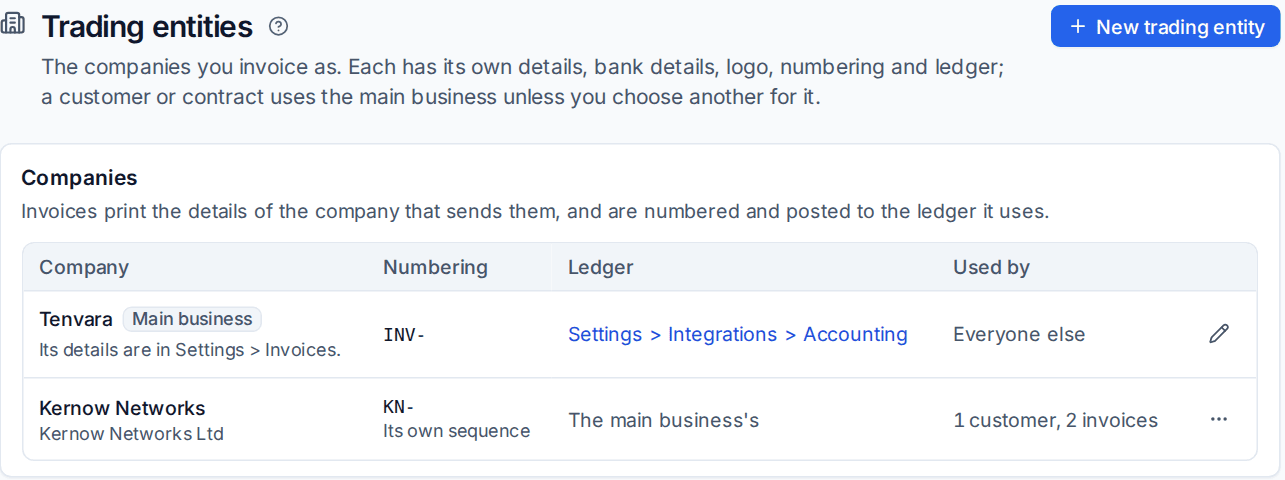
Add a trading entity
- Go to Settings > Trading entities and press New trading entity.
- Enter the Name your staff see, then what prints on its invoices: Company name, address, Email, Phone, Website, Company number and Country.
- Leave Uses the main business's tax registration on, or turn it off to print a tax number of its own, or none.
- Under How to pay it, enter its bank details.
- Upload a logo (PNG, JPEG, GIF or WebP). Without one, the heading prints the company's name, never your main logo.
- Add a footer, and choose its numbering: a prefix of its own (for example
KN-) starts its own sequence, or it shares the main business's. - Save.
Who it invoices
- A contract's own entity, set on the contract page's Invoicing card;
- else the customer's, set on their Contracts and time tab under Invoicing (Invoiced by);
- else the main business.

An invoice run splits each customer's work by entity, so one customer can get an invoice from each of your companies in the same month. A credit note always comes from its invoice's company and sequence. An entity that has sent invoices can be archived but not deleted.
Its own ledger
Each entity posts to the main business's Xero or QuickBooks Online, or connects a ledger of its own. In Settings > Integrations > Accounting, switch between the ledgers to connect and map each one. Posting, voids and payments then use the invoice's own ledger. See Xero and QuickBooks.
Note: If you white-label, a customer's brand profile also applies to the portal, emails and PDFs they see. See Brand profiles.
Related
Was this page helpful?
Thanks for the feedback.