Scanning
Let the office printers scan to email through a computer at the site, with scans to a person's own address delivered to them and shared addresses handled by scan profiles.
Most office printers can scan to email, but setting up a mail server on every printer, with passwords that expire and certificates that change, is a constant source of tickets. With Tenvara, the printers send their scans to a computer at the same site, and Tenvara delivers them. The printer needs no mailbox, no sign-in and no internet access of its own.
How it works
- You choose a scan agent for the site: a Windows computer there with the Tenvara agent, usually a server that is always on.
- The agent listens for scans on port 2525 and only accepts them from the site's printers. It adds a Windows firewall rule that lets only those printers in.
- The printers are set to scan to email with that computer as their mail server.
- When someone scans to an address, the agent passes the scan to Tenvara, which checks it arrived whole and delivers it:
- to a person's own email address: to that person;
- to a scan profile's address, such as a shared accounts address: to the addresses the profile says;
- anything else is refused and recorded.
Setting up scanning at a site
Choose the scan agent
- Go to Devices > Printers > Sites and open the site.
- Under Scan agent, turn scanning on and choose the computer that takes scans.
The Sites list shows each site's scan agent in the Scanning column.
Point the printers at it
On each printer's own web page or panel, set scan to email to use:
- Mail (SMTP) server: the scan agent's IP address or name
- Port: 2525
- Sign-in: none
- Encryption (TLS): off
The scan never leaves the site's network until the agent passes it to Tenvara.
Note: Because the printer's address is how the agent knows a scan is genuine, give the printers fixed IP addresses (or DHCP reservations) before you set this up.
Scan profiles
People's own addresses work without any setup: a scan sent to a contact's email address goes to that person. For shared addresses, such as "scans-ap@" for accounts payable or a post room address, add a scan profile.
- Go to Devices > Printers > Scanning and press Add profile.
- Choose the customer and give the profile a Name, for example "Accounts".
- Enter the Address the printer sends to, and add it to the printer's address book.
- Under Email to, add the addresses that should receive the scans.
- Press Save profile.
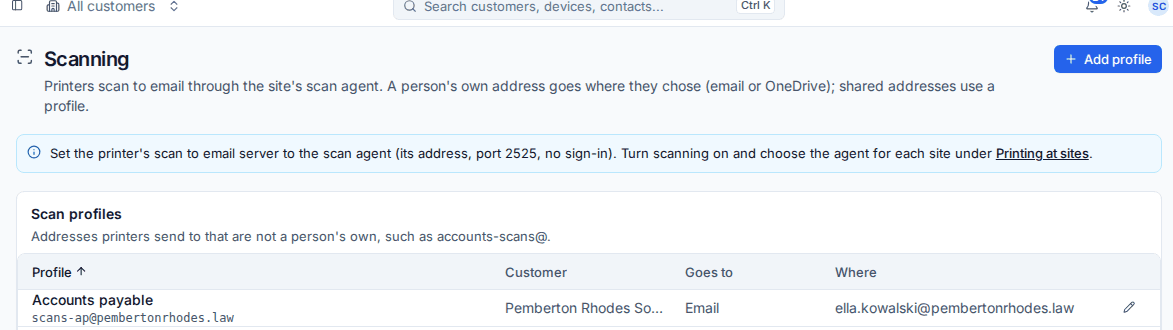
To stop a shared address, delete its profile. Scans sent to it are refused afterwards.
Following scans
Recent scans on Devices > Printers > Scanning lists each scan with who it was Sent to, its Status (for example Delivered), where it was Delivered to, the printer it came From and When. A refused scan says why, which is usually an address that is neither a person's own nor a profile.
People can choose where their own scans go under Scans on the portal's Printing page, including Nowhere to refuse them.
Settings
Settings > Device management > Secure print, under Scanning:
| Setting | What it does |
|---|---|
| Port the agent takes scans on | 2525 by default. Change it only if something else on the scan agent uses that port |
| Largest scan | Bigger scans are refused by the agent |
| Scan file name | The name scans are saved and sent with, for example Scan {date} {time}. You can also use the printer's name and the person's name |
Related: Adding printers and finding them on a network, Secure print release.
Was this page helpful?
Thanks for the feedback.