Network discovery and topology
Make an agent at each site the network probe, scan its subnets, identify every device found, adopt or ignore them, get alerts for new ones and read the site's topology map.
Network discovery finds everything on a customer's network, not just the machines with the agent. One agent at each site acts as the probe: it scans the site's subnets on a schedule and reports what answers. Tenvara works out what each device is, matches it to the devices it already knows, and draws a map of how they connect.
Setting up a probe
Each site has one probe: an always-on device at the site with the agent, such as a server.
- Go to Devices > Network and click Set up a probe, then choose the site. You can also start from the site's page.
- Choose the device that will scan. The list shows the site's devices with an agent and whether they are online.
- Set the Subnets to scan, for example
10.20.1.0/24. Leave them empty to scan the probe's own network. Up to 16 subnets, each between /20 and /30. - Optionally add addresses under Never scan, give the probe its own Scan every, and choose whether it listens for traps.
- Save, then click Scan now for a first look.
Add the site's SNMP credentials on the same page so the probe can read switches, firewalls and printers. See SNMP monitoring and traps.
Note: A site without an always-on device that has the agent cannot have a probe. Install the agent on a server or a desktop that stays on, and use that.
How a scan works
The probe tries every address in its subnets and builds up a picture of each device from several sources, each of which can be switched on or off under Settings > Network:
| Method | What it finds |
|---|---|
| Ping | Devices that answer ping. |
| Read the probe's ARP table | Devices that do not answer ping but have talked to the probe, with their MAC address. |
| Service ports to try | Open TCP ports (printers on 9100, phones on 5060, cameras on 554 and so on), which help tell what a device is. |
| Ask over SNMP | Name, maker, model, serial, interfaces and neighbours, using the site's SNMP credentials. |
| Listen for mDNS (Bonjour) | Names and services announced by printers, TVs, phones and Macs. |
| Ask for NetBIOS names | Windows names and workgroups. |
| Look names up in DNS | Each address's reverse DNS name. |
From all of that, Tenvara identifies the kind of device (switch, router, firewall, access point, printer, UPS, NAS, phone, camera, server, desktop and more), its maker from its MAC address and SNMP details, its model and its operating system. A device is tracked by its MAC address, so it is still recognised when DHCP moves it.
Scan every under Settings > Network sets how often probes scan (each probe can have its own schedule). Lower Addresses at a time on slow links.
What the probe found
Open a site from Devices > Network to see its network page, with the tabs Devices, Map, Scans, Traps and Probe and credentials.
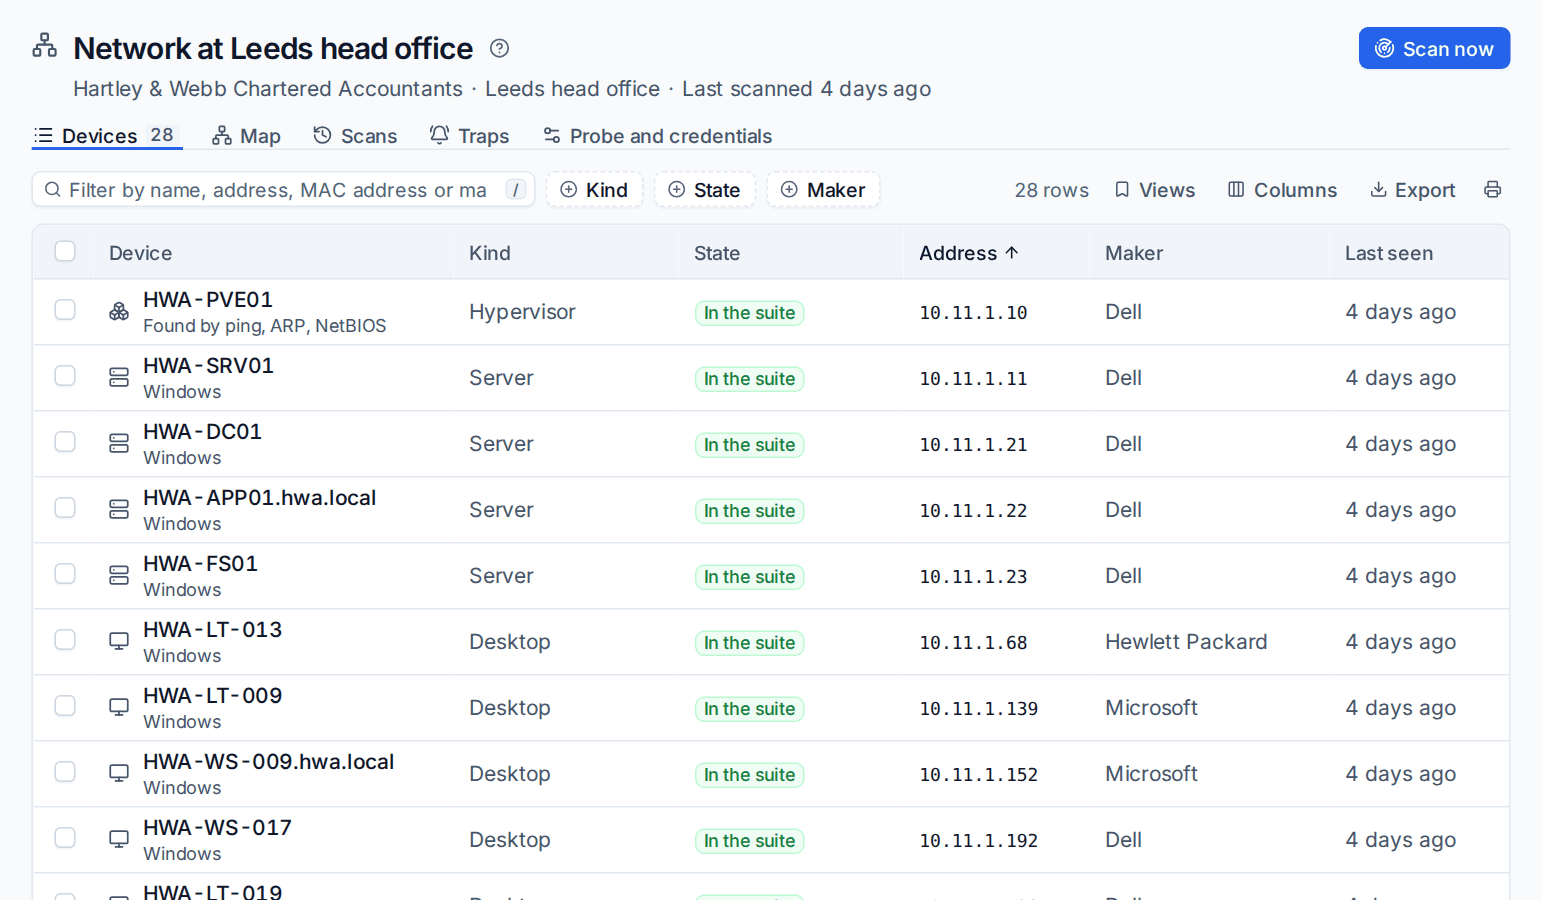
Each device has a state:
| State | Meaning |
|---|---|
| New | Not in Tenvara yet. |
| In the suite | Matched to a device Tenvara already has, by MAC address, serial number or name. |
| Added from the scan | Adopted from a scan. |
| Ignored | You have said you do not need it. |
Use the saved views to see what is new on the network, just the network kit, or what could not be identified. Click a device for its details: what it is, its names, how it was found, its open ports, SNMP facts, interfaces and neighbours.
- Add as asset creates a device for it at the customer and site, with its kind, maker, model, serial and addresses. If it answered SNMP, Tenvara starts polling it. Its warranty and lifecycle can then be tracked like any other device (see Asset lifecycle and warranty).
- Ignore hides it from the new list. Select several rows to ignore them together.
- What it is lets you correct the kind when the scan got it wrong. Later scans keep your choice.
New device alerts
After a site's first scan, any device a scan finds for the first time raises an alert, so you hear about the unknown laptop or the camera someone plugged in. When a scan finds more new devices than the number you set under One alert for many, you get one alert listing them. Adding or ignoring the device clears the alert. Turn the alerts on or off, and set their severity, under Settings > Network > New devices; customers can have their own setting.
Devices that were never adopted and have not been seen for a while drop off the list after the number of days in Forget devices not seen for.
The topology map
The Map tab draws the site from what the switches report: their neighbours (LLDP and CDP) and the addresses each port has learnt.
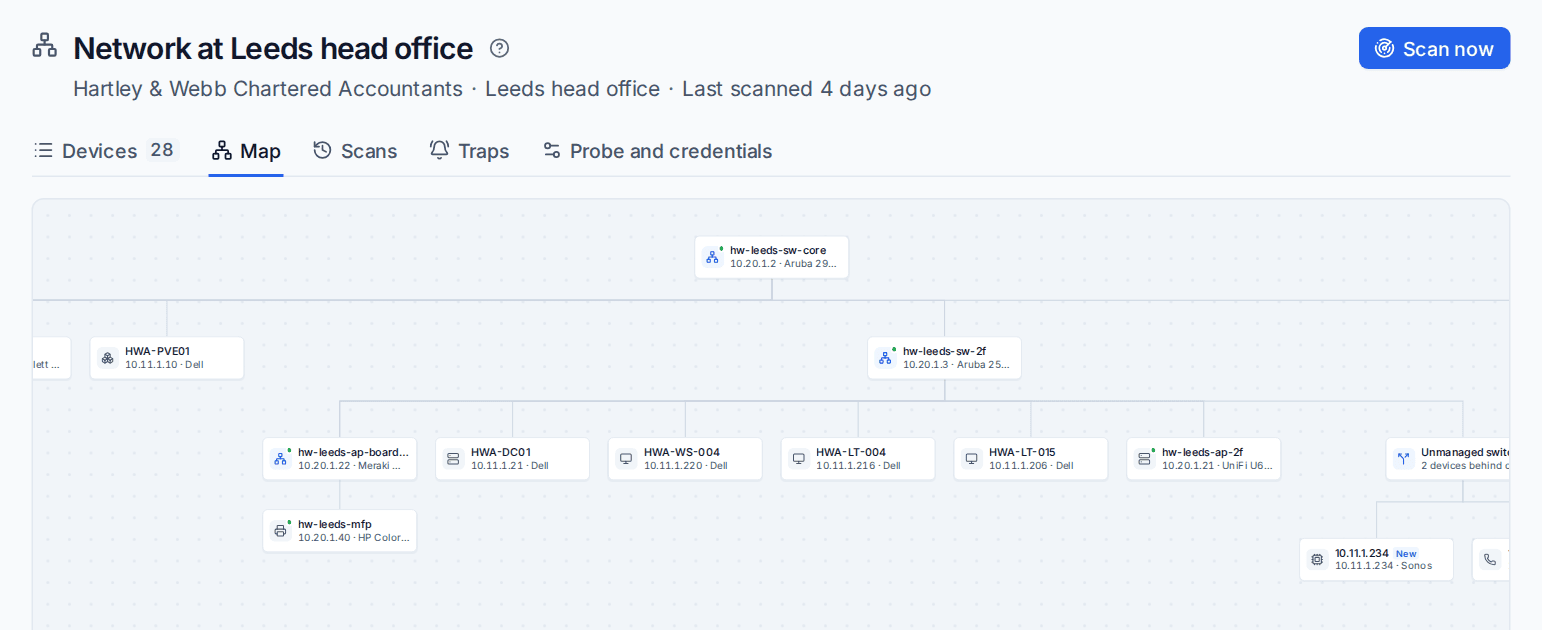
- The map starts at the gateway (the firewall, router or busiest switch) and lays out each switch with the devices plugged into it.
- Several devices behind one port with nothing to report are drawn behind an Unmanaged switch.
- New devices are marked New, and kit polled over SNMP shows whether it is answering.
- Zoom with the mouse wheel, the buttons or the + and - keys, drag or use the arrow keys to move, and press 0 to fit the whole site. Click any device to open it.
A large site opens readable on its gateway rather than shrunk to fit; press 0 to see all of it.
A device's own page also shows the switch port it is plugged into, once a switch has reported it.
Related
Was this page helpful?
Thanks for the feedback.