Importing from CSV
Bring customers, sites, contacts, devices, assets and credentials across from spreadsheets, matching columns to fields and checking every row with a dry run.
If your data is in spreadsheets, or your old tool can export to CSV, you can bring it into Tenvara one file at a time. Each file holds one kind of record. You tell Tenvara which column is which, run a dry run that checks every row, and import when it is right.
What a file can hold
| Kind | Fields you can fill |
|---|---|
| Customers | Name (required), external reference, status (active, onboarding or inactive), website, phone, email, email domains, country (two letter code), time zone, notes |
| Sites | Customer (required), name (required), address lines, town or city, county, state or region, postal code, country, phone, time zone, main site (yes or no), notes |
| Contacts | Customer (required), first name, last name or full name, email, phone, mobile, job title, site, primary contact (yes or no), active (yes or no), notes |
| Devices | Customer (required), host name (required), serial number, type, operating system and version, manufacturer, model, IP address, MAC address, site, notes |
| Assets | Customer (required), the device details above plus asset type, asset tag, purchase date, warranty end date, supplier, cost and currency |
| Credentials | Customer (required), name (required), username, password, address (URL), two-factor secret (TOTP), tags, site, notes |
Every kind can also have an ID in the old system column. A contact needs at least a name or an email address. The Customer column can hold the customer's name, code or reference.
Tip: Import customers first, then sites, then everything else. A row whose customer does not exist yet is an error that says "Import the customers first, or fix the name".
Adding the file
- Go to Settings > Migration and press Add source.
- Under Spreadsheets, choose CSV file.
- Give it a Name you will recognise, for example "Contacts from the old spreadsheet".
- Under What the file holds, choose the kind of record.
- Choose the file, or upload it later from the source page.
- Press Add source.
Matching the columns
Open the source. Under Columns, Tenvara shows each Field, the Column in the file it comes from, and the First rows from that column so you can see you have the right one. It guesses the columns from the headings to start with.
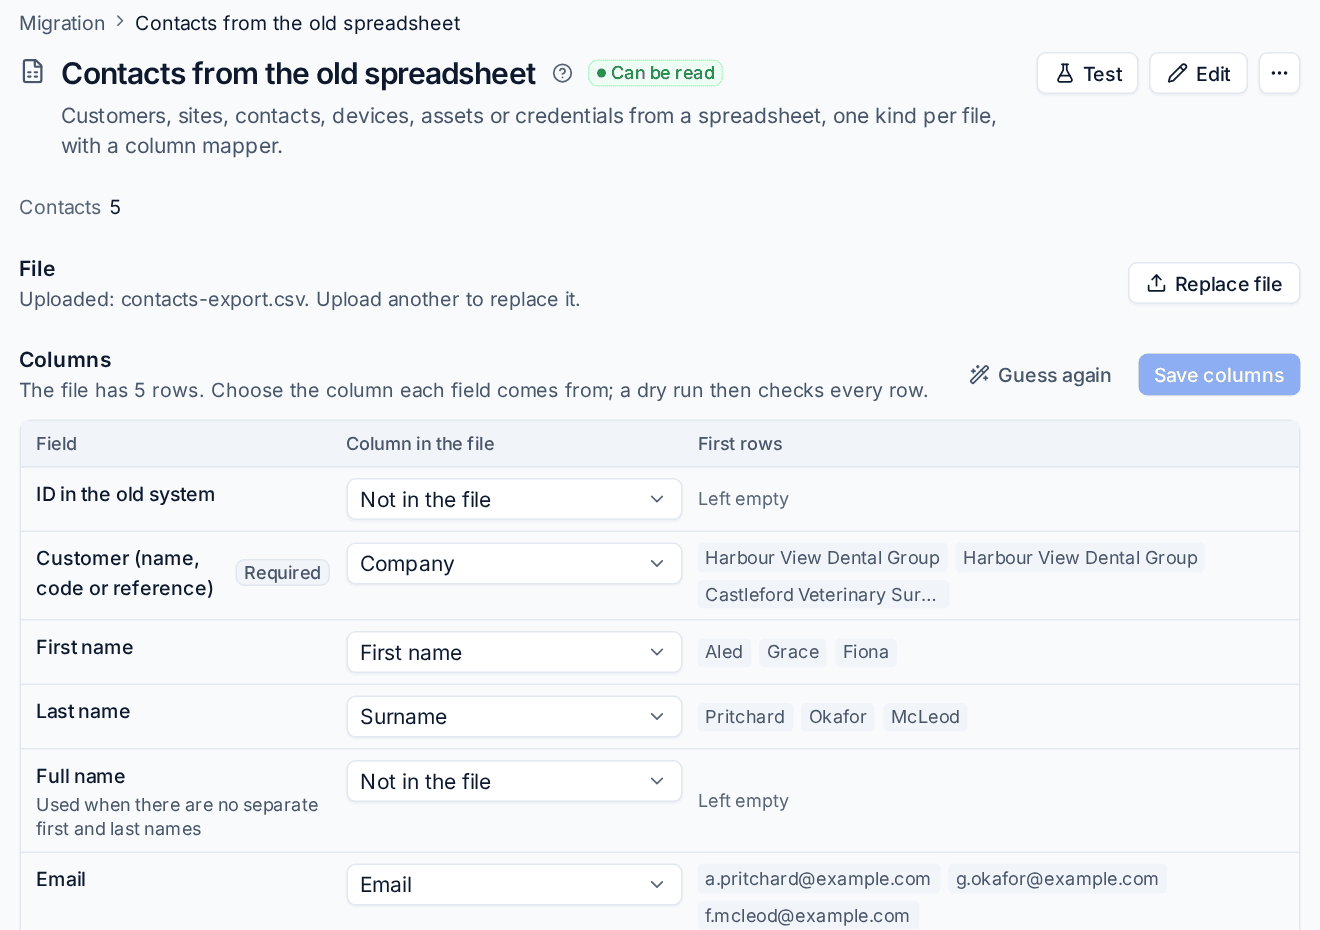
- Check each field and change the column where the guess is wrong. Choose Not in the file for fields you do not have.
- Press Guess again to start over from the headings.
- Press Save columns.
Fields marked Required must have a column. To import a newer copy of the file later, press Replace file.
Checking and importing
- Press Test. Tenvara reads the file and counts the rows.
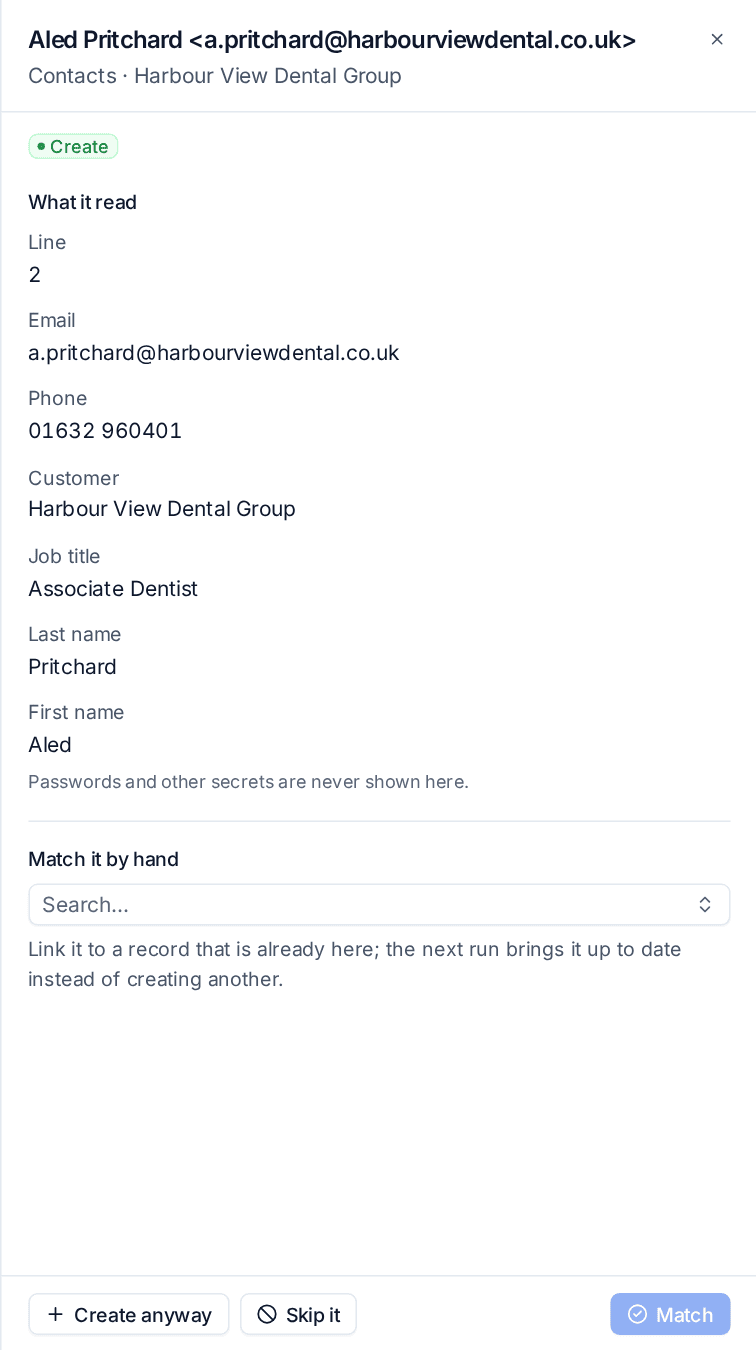
- Press Dry run. Nothing is written. Every row is checked on its own and gets a decision: Create, Match, Update, Skip or Error.
- Open the run. Click a count at the top to see only those rows. Each row shows the old record, the decision, the record In the suite it matched, and Why.
- Fix any errors in your spreadsheet, press Replace file on the source and run it again.
- When it looks right, press Import on the dry run.
Common errors are an email address that is not valid, a country that is not a two letter code (GB, IE, US), a time zone Tenvara does not recognise (use names such as Europe/London), a date or amount it cannot read, or a customer that does not exist.
You can also press Import now on the source to import without a dry run. Everything it creates can still be undone.
Importing the same file again
A row's identity is its ID in the old system column when you map one, otherwise its natural key (for example a contact's email within the customer). So importing the same file again, or a newer export of it, matches what the last import made: unchanged rows are left alone, changed rows fill in empty fields, and new rows are created.
Note: Credentials go straight into the encrypted vault exactly as they are in the file, and are never shown in a run. Delete the CSV file from wherever you exported it once the import is done.
Related: Moving to Tenvara overview, Running side by side and switching.
Was this page helpful?
Thanks for the feedback.