Diagrams, IP addresses and racks
Draw network and floor plan diagrams linked to real devices, keep each customer's subnets and who has which address, lay out racks, and keep photos of the comms cupboard with the customer's documentation.
Some documentation is easier to draw or photograph than to write. Tenvara keeps diagrams, IP address management, rack layouts and site photos with the customer's other documentation, linked to the real devices, sites and records, so they stay in step with what Tenvara already knows.
Diagrams
A diagram belongs to a customer (and optionally one site): a network, a rack, a floor plan. It is drawn in diagrams.net, which Tenvara serves itself, so nothing is sent to diagrams.net or anywhere else.
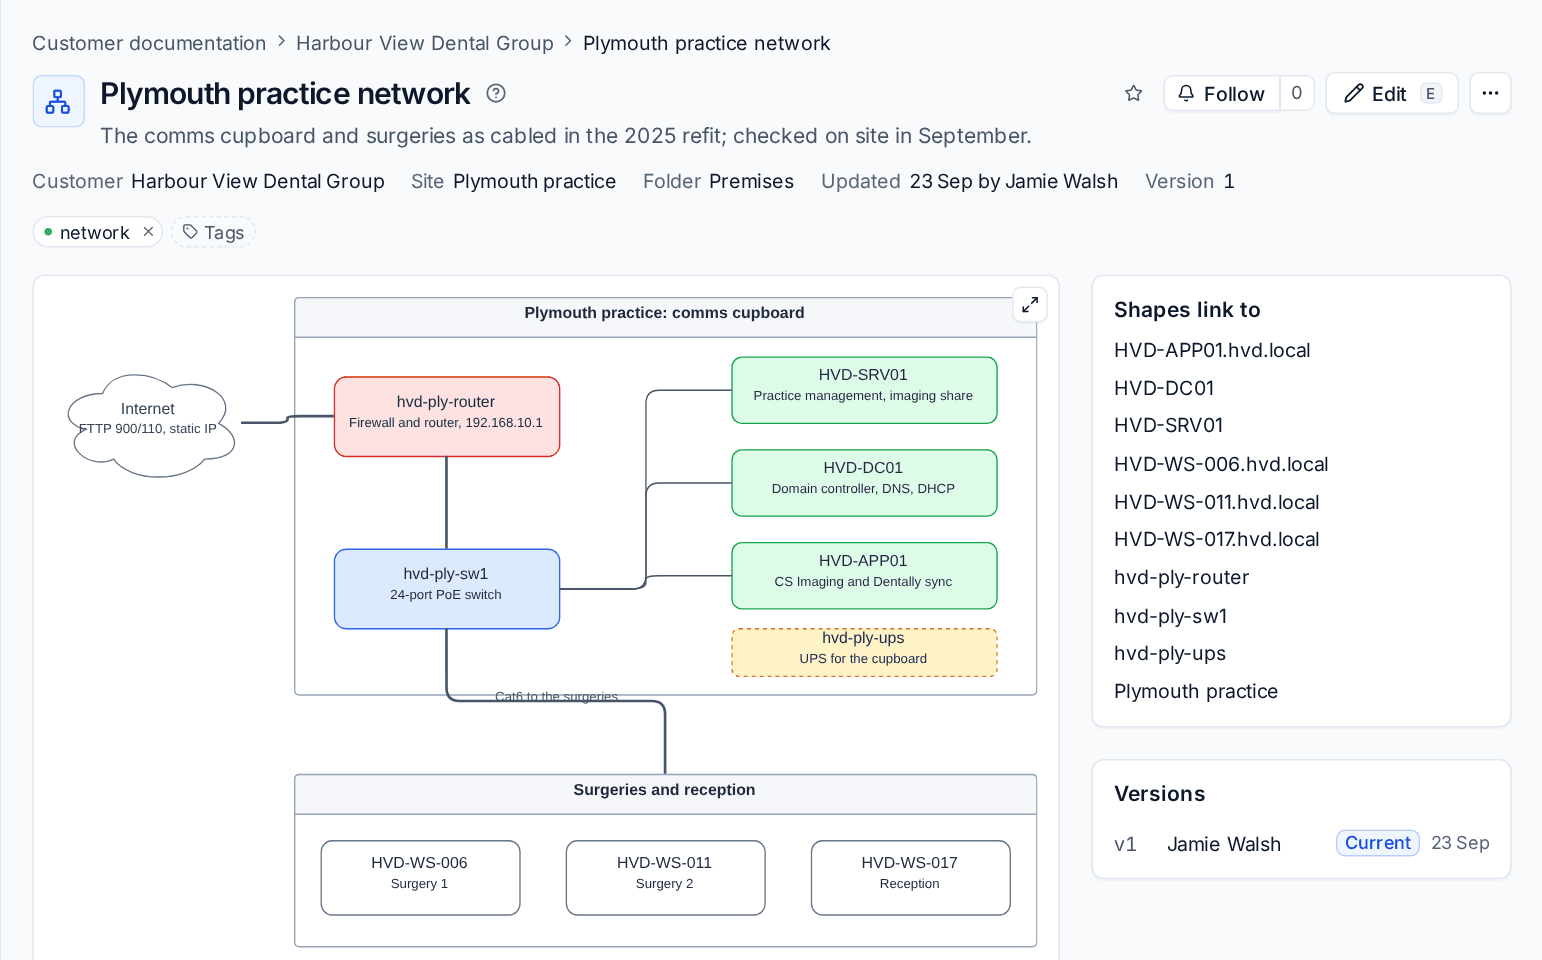
Drawing one
- On the customer's Documentation tab, under Diagrams, press New diagram (or use New > Diagram on the customer or site).
- Give it a title, and choose the site and folder if it belongs to one.
- Press Edit to open the editor full width, and draw.
- To link a shape to something real, select it and press Link, then choose one of the customer's devices, sites, contacts or records, or an article.
- Press Save (or Ctrl+S in the editor).
Every save that changes the drawing or the title is a new version. If someone else saved first, nothing is lost: you choose to keep yours or open theirs.
Reading one
The diagram's page shows the picture. Click a linked shape to open what it links to; Shapes link to lists them all, and the devices and sites show the diagram in their own Documentation section. Versions lets you open any earlier picture and Restore it. The ... menu downloads the drawing (.drawio), the picture (.svg), or the Visio file it came from.
Search and Cmd+K find diagrams by title, description and the words on their shapes. Folders and folder access apply as they do to articles.
From Visio
Choose New diagram > A Visio file and pick a .vsdx file. The editor converts it, and saving makes it a drawing you can edit. The original stays downloadable.
Note: Drawing can be switched off in Settings > Documentation > Diagrams (Draw diagrams). The diagrams already drawn stay readable.
IP addresses
Docs > IP addresses keeps each customer's subnets, who has which address in them, how full each is and what clashes. It covers IPv4.
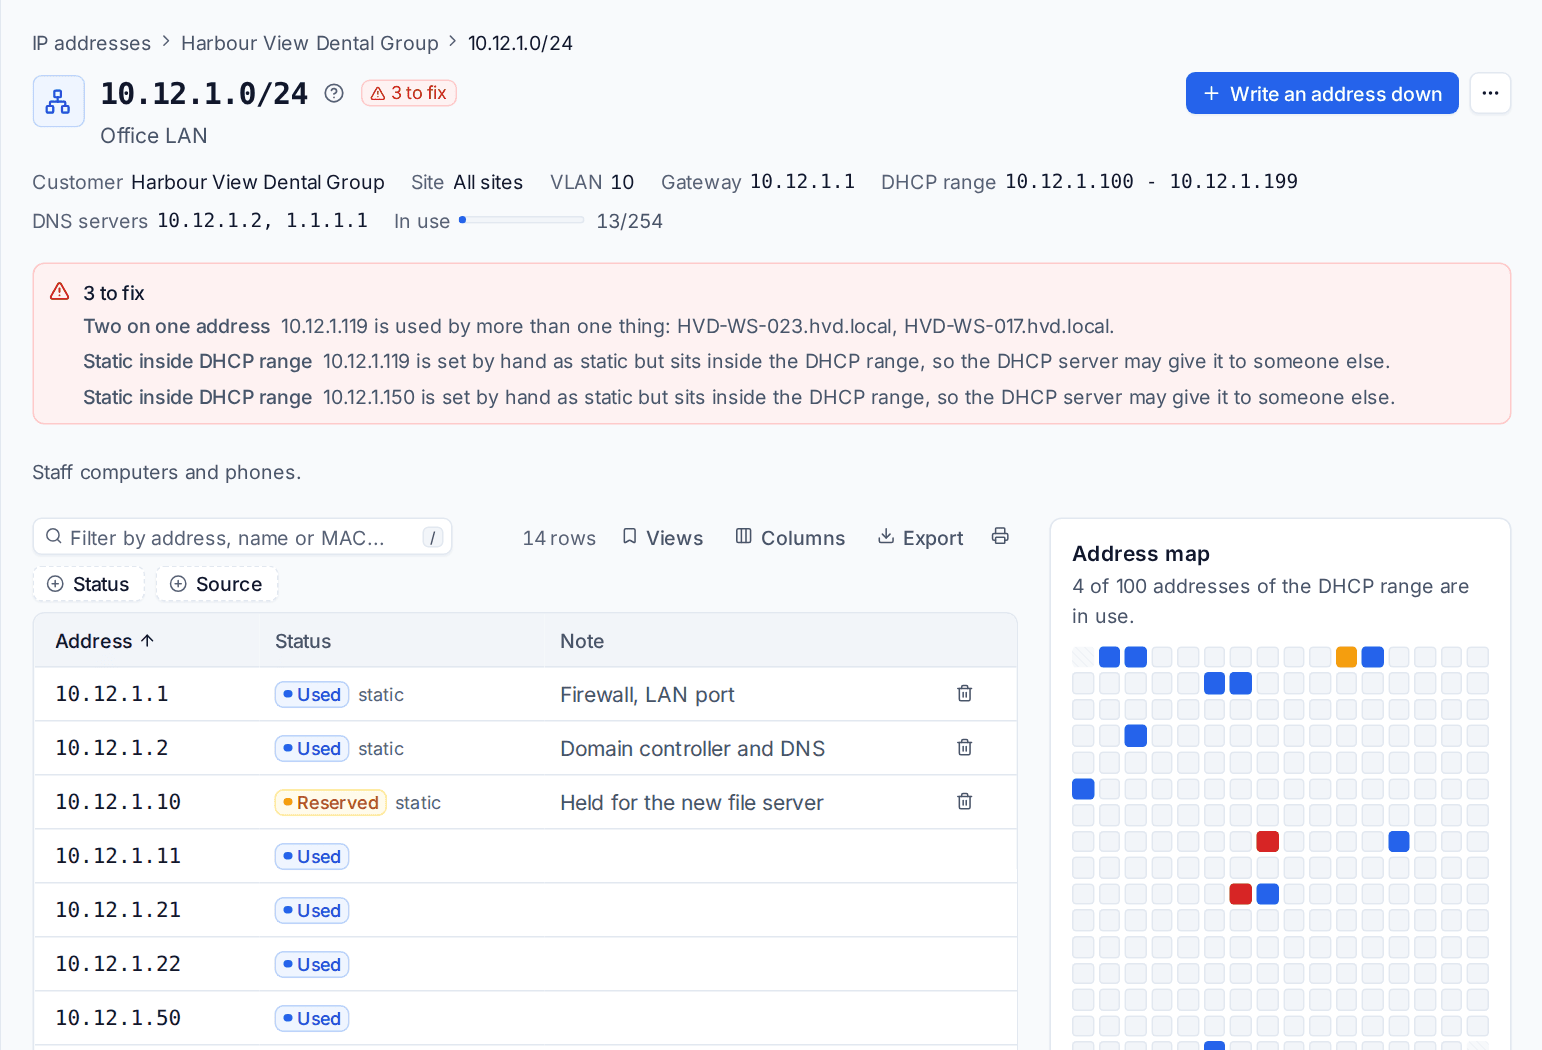
Adding a subnet
- Press Add subnet.
- Choose the customer, and enter a name and the network, for example
192.168.10.0/24. - Optionally add the VLAN, site, gateway, DHCP range and DNS servers. Tenvara checks they fit the network.
- Save.
Add from Network records brings in the subnets already written in a customer's Network records (name, VLAN, network, gateway and DHCP range). Rows it cannot read are reported rather than guessed at.
Where the addresses come from
Nothing is copied, so an address moves when its device does:
- Devices whose agent reports an address in the subnet.
- Printers, those added in Printing and those found by discovery that nobody has added yet.
- What you wrote down: press Write an address down for a static address or a reservation, with the host name, MAC, the device it is for and a note.
Free addresses are the gaps, shown as free ranges and as empty cells in the Address map of a /24 or smaller.
Clashes and how full
The top of a subnet lists what needs fixing: two on one address, a static inside the DHCP range, a MAC that differs from the device's, something on the network or broadcast address, and a subnet that overlaps another of the customer's at the same site. The list's With clashes and Nearly full views find them across customers. A subnet turns amber at 85% used (a setting) and red when full.
Who has this address?
Type an address, the start of one (192.168.1.), a MAC or a host name into Who has this address? above the list, or into Cmd+K ("who has 192.168.1.20 at Acme?"). It searches every customer you can see.
Racks
A site's page has a Racks section with a front view of each rack.
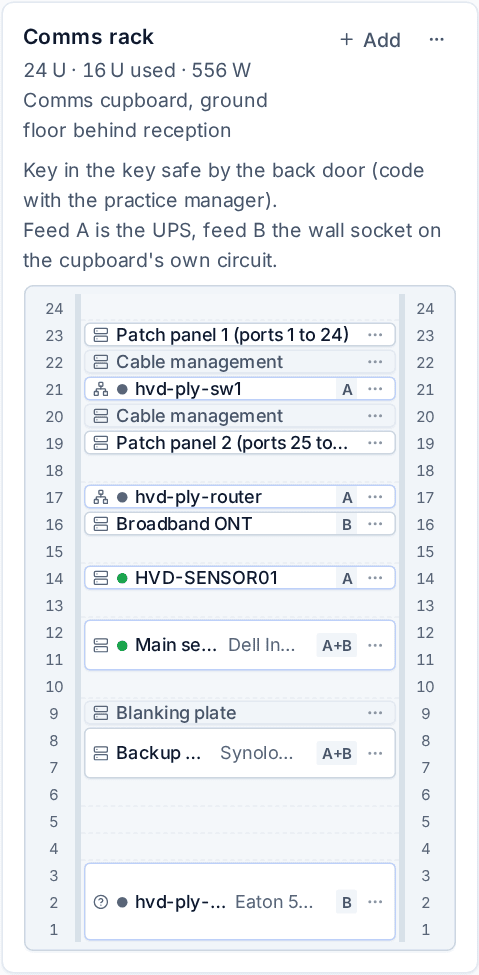
- Press New rack, and give it a name, a height in U (42 to start with), where it is and any notes.
- Click an empty U, or press Add, to place something: one of the customer's devices, or something else (a patch panel, switch, server, UPS, PDU, shelf, cable management, blanking plate and so on) with its make and model.
- Set its height in U, its power feed (A, B, both or none), the PDU ports it uses, its watts if known, and notes.
U1 is the bottom, and an item of several U is placed by its lowest U. Drag an item to move it (where it would land shows in blue, a place that is taken in red), or focus it and press Alt+Up or Alt+Down. The rack's header shows its height, the U used and the watts of what is in it. A device that is later deleted keeps its place under its name, because the box is still in the rack until someone takes it out.
Files and photos
The customer's Documentation tab and each site page have Files and photos: the comms cupboard, the patch panel, floor plans, handover documents.
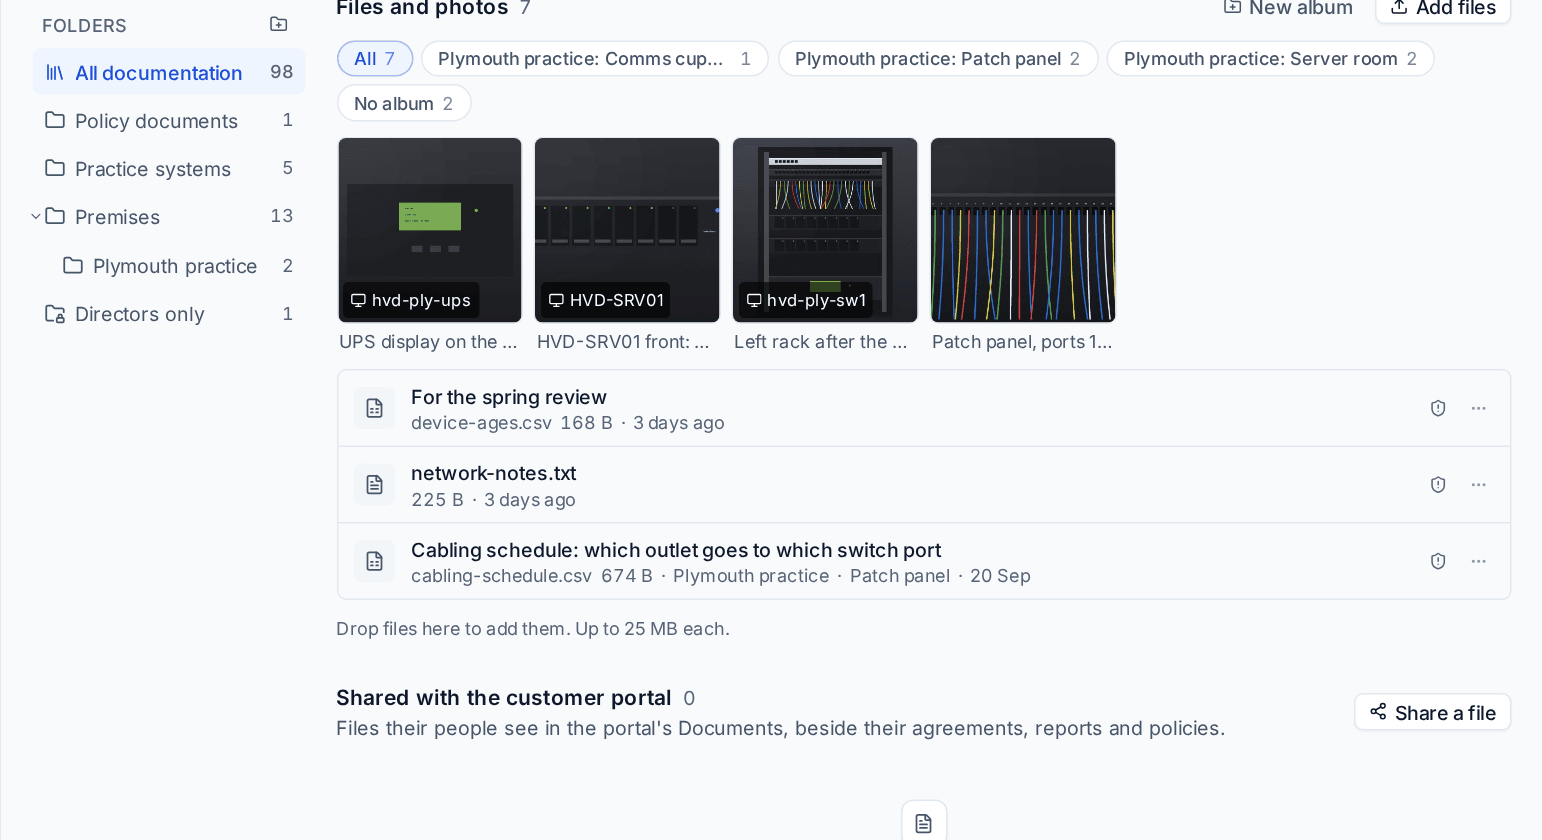
- Press Add files (or drop files on the area). On a phone, Take a photo opens the camera.
- New album makes an album for a site, such as Comms cupboard or Server room. Choosing an album shows its photos, and files added while it is chosen go into it.
- Edit details sets a caption, the album, and a device: the photo then shows on that device too.
Photos open in the file viewer with zoom and next and previous. Phone cameras save where a photo was taken; Tenvara takes that out when the photo is added, unless Keep where photos were taken is on in Settings > Documentation > Files and photos.
Related: Customer documentation and records, Records kept up to date and Active Directory snapshots.
Was this page helpful?
Thanks for the feedback.