Departments
Give each customer's departments a cost centre, a manager and a place in the structure, put contacts and devices in them, and use them for approvals and SLA policies.
A department is a team that people and devices belong to: Finance, Clinical, the branches. In Tenvara a department is a record of its own, with an optional cost centre code, a manager and the department it sits under. Once contacts and devices are in departments you can filter and report by them, send approval requests to the department's manager, and give a department its own SLA policy.
Where departments live
- Customers > Departments lists every department of every customer, with the customer, what it is part of, its cost centre, its manager and how many contacts and devices it has.
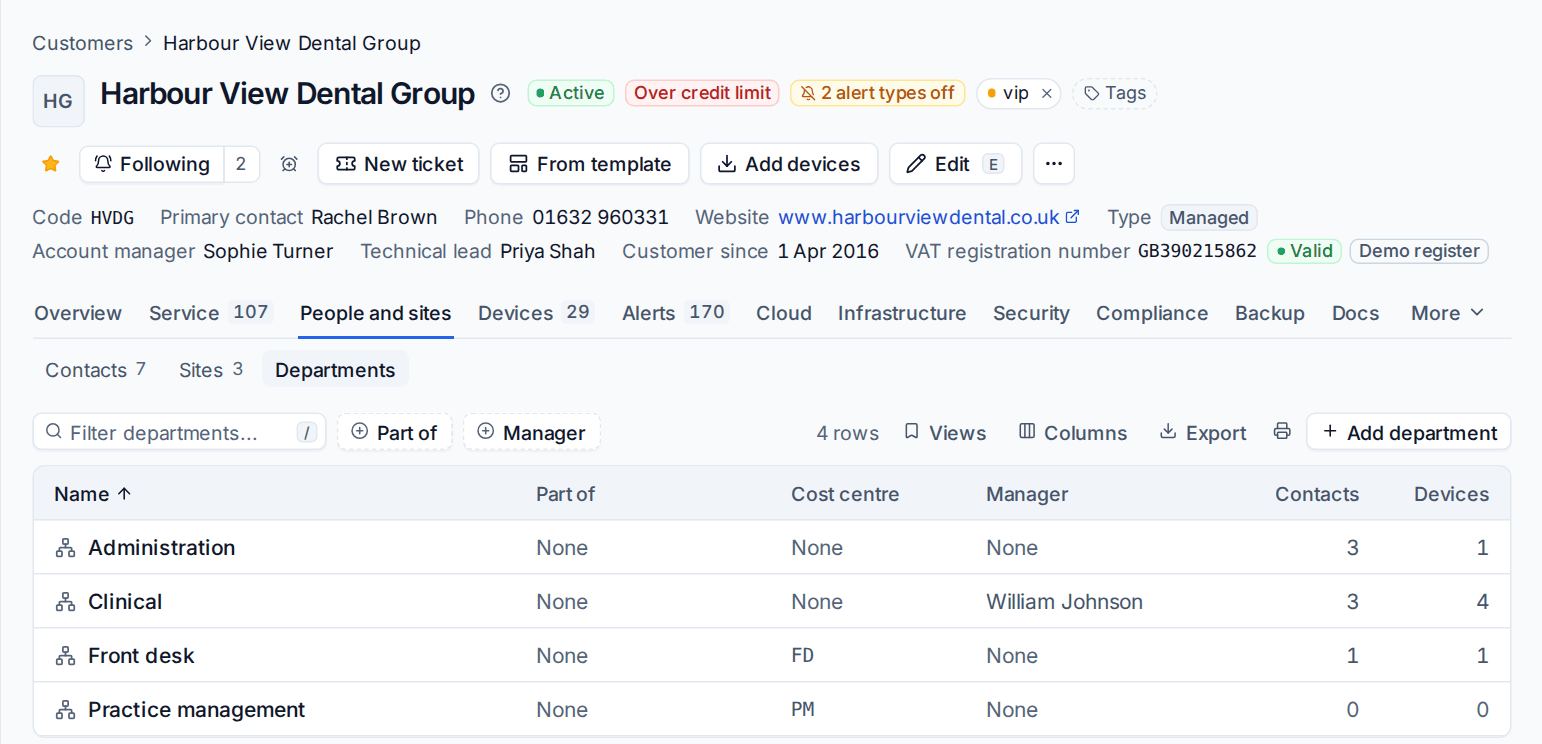
- On a customer's page, People and sites then Departments lists that customer's own.
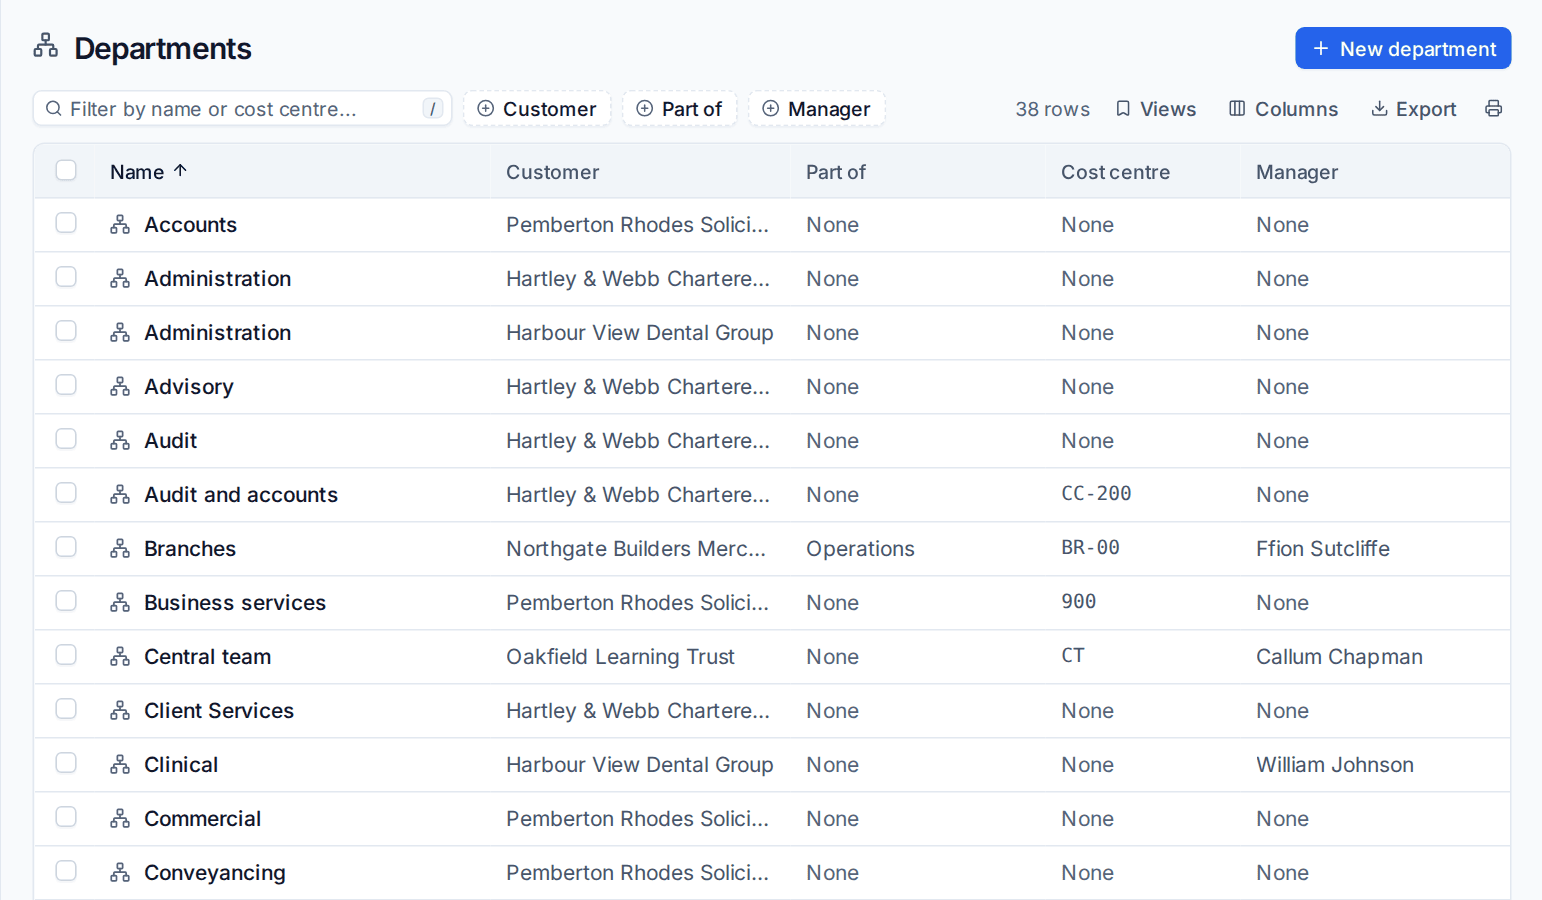
Filter either list by Part of or Manager (and by Customer on the full list), or type a name or cost centre in the filter box. Click a department to see its contacts and its devices.
Add a department
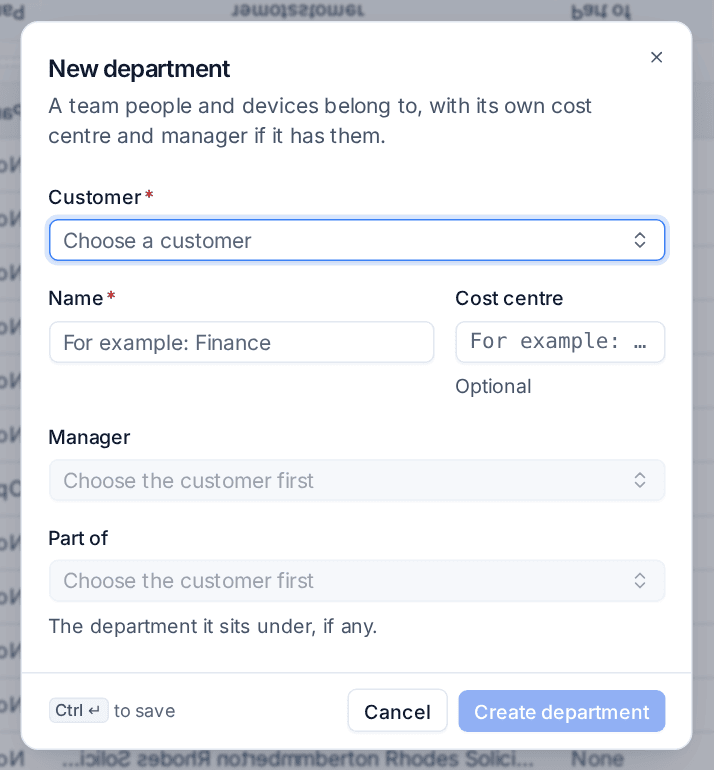
- Go to Customers > Departments and press New department. On a customer's own Departments tab the button is Add department, and the customer is already chosen.
- Choose the Customer.
- Enter the Name.
- Optionally enter a Cost centre code.
- Optionally choose the Manager, one of the customer's contacts.
- Optionally choose Part of: the department it sits under, such as Branches under Operations.
- Press Create department.
Put contacts and devices in a department
Contacts. Choose the Department on the contact's form. The picker lists the customer's departments, and you can add a new one as you type. The department shows on the contact's page beside their site.
Devices. A device is in its user's department unless it has its own. To give it its own, edit the device and choose a Department. Left empty, the field says which department it takes from the person who uses it. A shared device with no user, such as a meeting room PC or a server, needs its own.
The Customers > Contacts list and the device list both have a Department column and filter, so "every laptop in Finance" or "everyone in Clinical" is one filter away.
Tip: For customers whose Microsoft 365 tenant is connected, contacts kept in step with Microsoft 365 take their department from there, so the structure follows the customer's own directory.
Approvals by department
Departments shape who is asked to approve a request. Three things use them:
- The approval matrix. On the customer's Service > Approvals page, a matrix line can cover a department: choose the department under Whose requests and who it is Approved by. A line for a department also covers the departments under it.
- The department's manager. When a department has a manager, that manager is asked for requests from its people, after any line for the person, their site or their department, and before the line for everyone. If the department has no manager, the manager of the department above it is asked, nearest first.
- Chains. In a chain, a step can be asked of Their department's manager (Settings > Approvals, the Chains and thresholds tab, or a customer's own chains). The same choice is offered as an approval step on service catalogue items.
A manager is never asked about their own request: the department above decides. And a request never gets stuck: with no manager anywhere up the line, the step goes to its fallback approver.
See Approval rules, delegation and out of office.
SLAs by department and for VIPs
An SLA policy can belong to departments, and one policy can be the policy for VIPs.
- Go to Settings > Ticket setup and open the SLAs tab.
- Open a policy, or press Add policy.
- Under Departments, choose the departments it covers. It applies to their people, and to the departments under them that have no policy of their own.
- Turn on VIPs to make it the policy for people with the VIP contact role. Only one policy is for VIPs: choosing it here takes it from the policy that had it.
- Save.
A ticket then follows, in this order: the policy chosen on the ticket; else the first policy whose conditions it matches; else its requester's department's policy; else the VIPs' policy when the requester is a VIP; else its contract's; else its customer's; else the default. The ticket's details panel says which one it is following and why, for example the department's policy or the VIPs' policy.
See SLA policies and escalations and Contact roles, merging and duplicates for the VIP role.
Changing a department
Click a department in either list and use the pencil (Edit department) to change its name, cost centre, manager or the department it is part of.
Related: Customers, sites and contacts, Approvals.
Was this page helpful?
Thanks for the feedback.