Teams, invitations and handover
Group staff into teams with leads and queues, invite new people by email, hand over a leaver's work in one go, give a customer's own IT team co-managed access, and see the app as someone else with View as.
Roles say what someone may do; teams say who they work with. This guide covers staff teams, inviting new people, handing over a leaver's work, co-managed IT and View as. For roles themselves, see Roles and permissions.
Teams
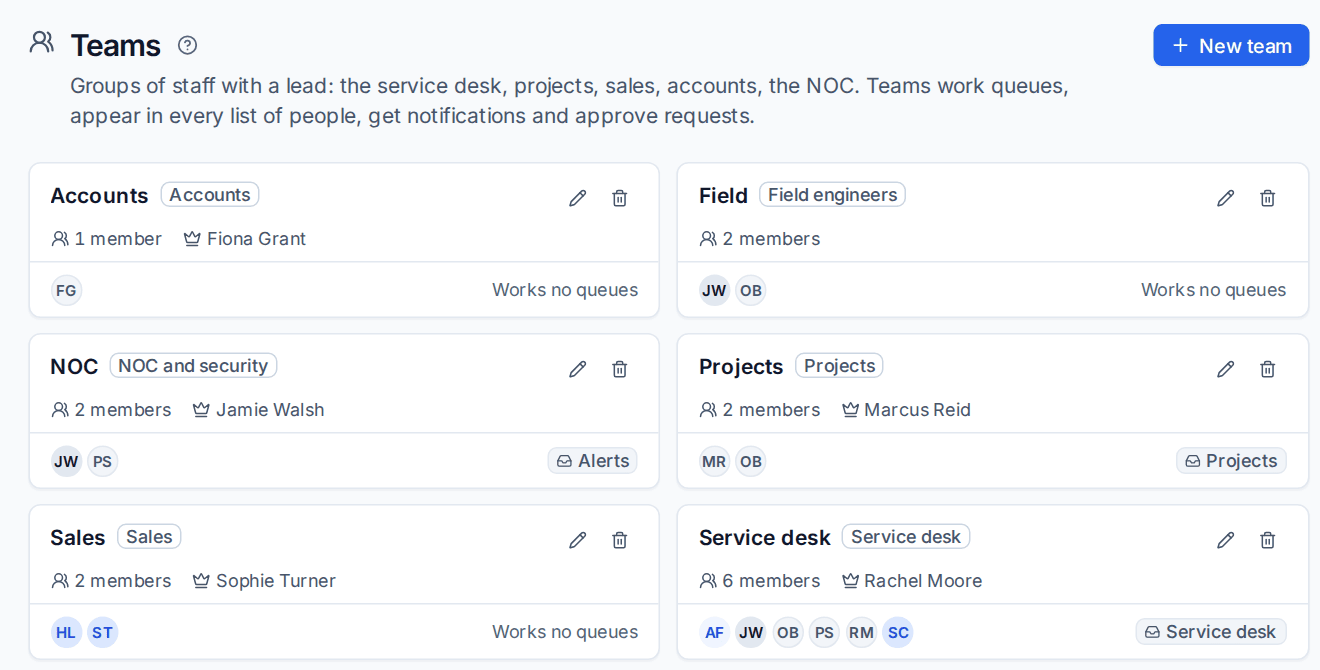
Settings > Teams holds your staff teams: the service desk, projects, sales, accounts, the NOC, field engineers or whatever groups you have. Teams work queues, appear in every list of people, get notifications and approve requests.
Make a team
- Go to Settings > Teams and press New team.
- Enter a Name, for example "Service desk", and an optional Description.
- Choose its Kind. Service desk teams are offered for support tickets, sales teams for leads and quotes, and so on.
- Optionally add an Email address: team notifications go there as well as to its members.
- Choose the Members and the Leads. Leads approve for the team, are told first when something needs a person, and take a leaver's work handed to the team.
- Press Create team.
A person can be in several teams. Each card shows the team's members, its lead and the queues it works, or Works no queues. Deleting a team keeps its people's accounts and roles; queues it worked lose it as a member.
Teams and queues
Give each queue its people in Settings > Ticket setup > Queues: open the queue and choose People and Teams under its members. Everyone in a chosen team works the queue, including people who join later. Assignment, round-robin and least-busy assignment offer the queue's members first. A queue with nobody yet can go to anyone whose role works tickets. See Ticket setup and SLAs.
Home team
Someone in several teams has one home team: the one they are shown and grouped under on the calendar, the dispatch board, workload, the resource plan, utilisation and leaderboards. Set it in Settings > Scheduling > Skills and people; choosing a home team adds them to it. Filtering by a team always means all its members, whatever their home team.
Where teams are used
- Lists of people: the assignee picker, mentions, chat operators, on-call and the dispatch board show the people whose role and team fit the work, with Show everyone for the rest.
- Mentions: type
@and a team's name in a note or comment to tell every member who can see the record. - Approvals: a chain step can ask a team or its lead. See Approval rules, delegation and out of office.
- On-call and automation: escalation policies can page a team, and the automation Notify action can tell a team as well as a role.
Invite new staff
- Go to Settings > Users and press Invite people.
- Paste one or many Email addresses.
- Optionally add a Name.
- Choose their Role, and optionally their Teams and Customers (All customers, Only some customers or Assigned tickets only).
- Press Send invitation.
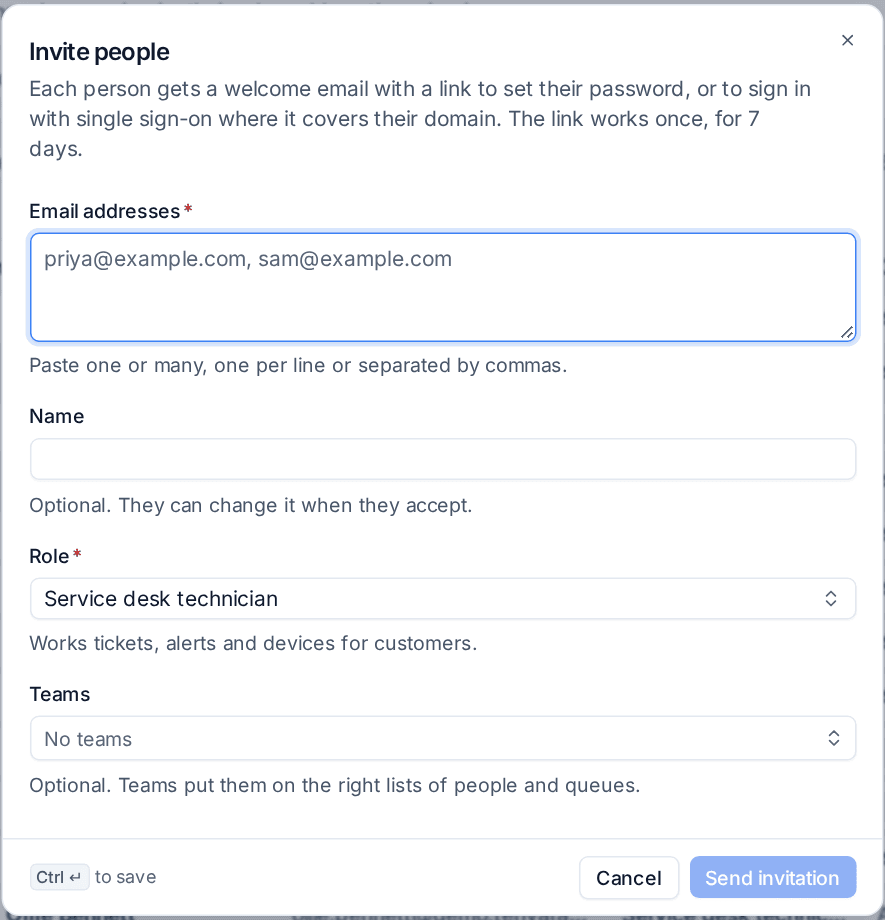
Each person gets a branded welcome email with a link that works once, for 7 days. The link lets them choose a password, or, where single sign-on covers their domain, sign in with your provider, which accepts the invitation. Their seat counts from when they accept. Waiting invitations show in the Users list, where you can resend or cancel them; Tenvara refuses more invitations than your licence could accept.
Hand over a leaver's work
When someone leaves, Turn off and hand over moves everything they own to the right people before their account is turned off.
- Go to Settings > Users, open the person's ... menu and choose Turn off and hand over.
- For each kind of work, choose who takes it: A person, A team (its lead), A queue (for tickets) or Nobody.
- Press Hand over and turn off.
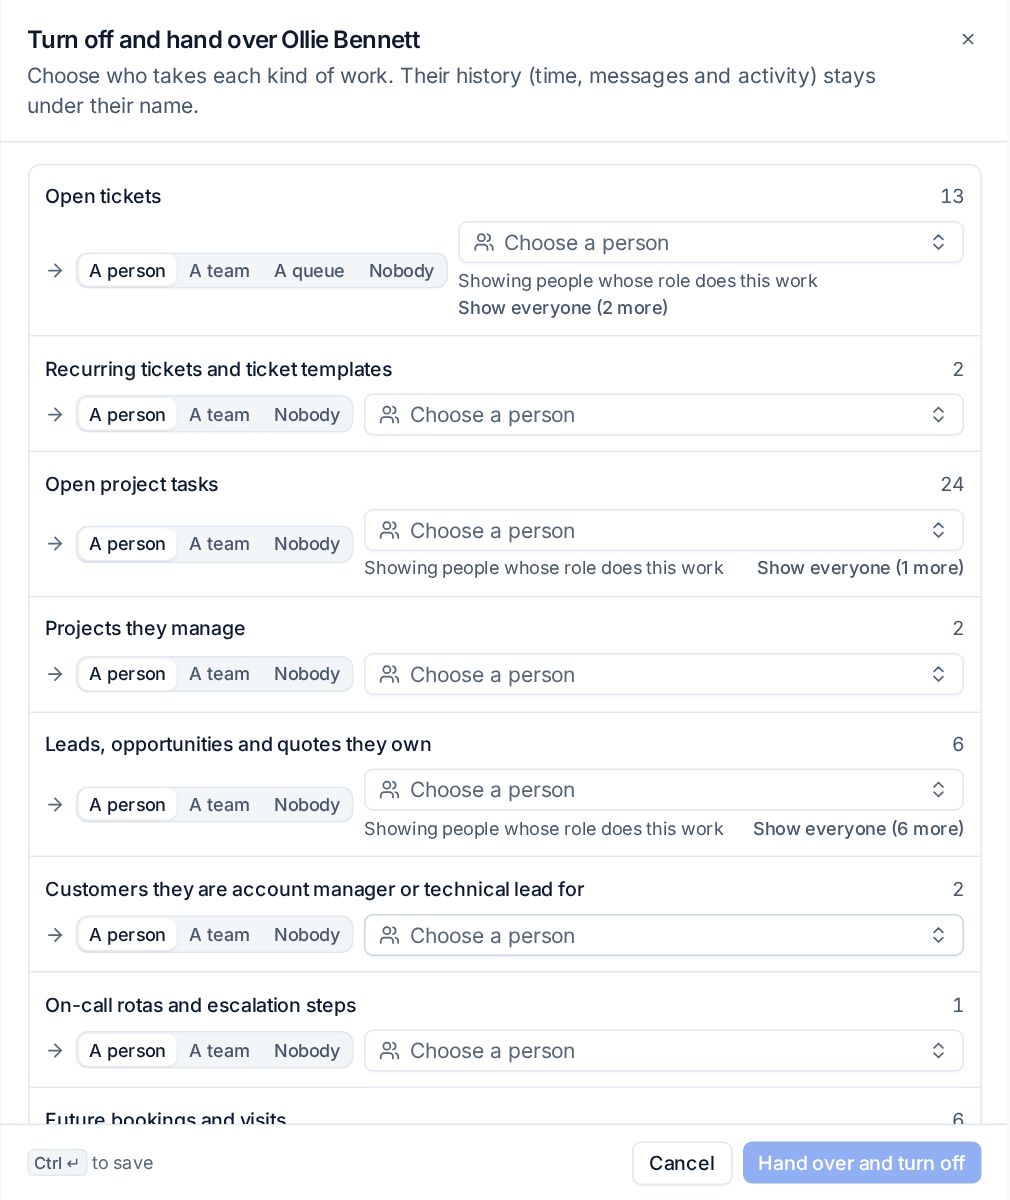
The list covers, with a count of each: open tickets, recurring tickets and ticket templates, open project tasks, projects they manage, leads, opportunities and quotes they own, customers they are account manager or technical lead for, automation rules, saved and scheduled reports and shared views, on-call rotas and escalation steps, future bookings and visits, approvals waiting on them, and open alerts assigned to them. The person picker shows people whose role does that work first, with Show everyone.
They are signed out everywhere and cannot sign in, and their seat is freed. Their history (time, messages and activity) stays under their name. Turning someone off any other way shows the same list as a warning first.
Co-managed IT
Some customers have their own IT person or team who work alongside you. Give them an account with the Co-managed IT role and limit them to their own customer. They then see only that customer's devices, tickets and the scripts you allow, and nothing of any other customer or of billing. Each counts as a full seat. In the Users list their company shows beside their name.
- Invite or add the person with the Co-managed IT role.
- Under Customers, choose their company. A co-managed person can be bound to exactly one customer.
- Adjust the role's Sensitive actions if you want them to run scripts but not write them, for example.
View as
View as shows you Tenvara exactly as one of your team sees it, so you can check a new role or answer "why can't I see this?".
- Go to Settings > Users and open the person's ... menu.
- Choose View as and their name.
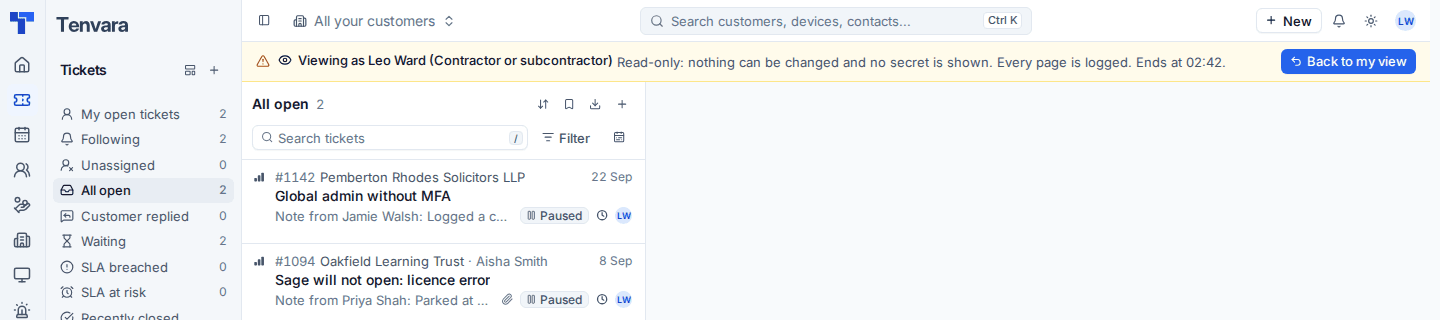
A banner stays at the top the whole time with Back to my view. While viewing:
- nothing can be changed and no secret is shown (credentials, two-factor codes, device secrets, tokens), whatever the person could do;
- every page you open is logged, and the start and end are in the audit log;
- it ends after 30 minutes, on Back to my view or when you reload, and your own session carries on.
Was this page helpful?
Thanks for the feedback.